1. Introduksjon
This manual provides comprehensive instructions for the setup, operation, maintenance, and troubleshooting of your COBY CR-A78 AM/FM Digital Alarm Clock with Time Projector. Please read this manual thoroughly before using the device to ensure proper function and to maximize your user experience. Keep this manual for future reference.
2. Produktet er overview
The COBY CR-A78 is a versatile digital alarm clock featuring an AM/FM radio tuner and a unique time projection function. It is designed to provide reliable timekeeping, alarm functions, and radio entertainment, with the added convenience of projecting the current time onto a wall or ceiling.
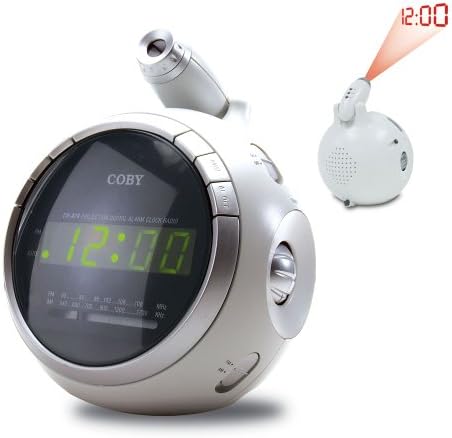
Bilde 2.1: Front view of the COBY CR-A78 digital alarm clock, showing the green LED display and the adjustable time projector. An inset image illustrates the time '12:00' being projected onto a surface.
3. Funksjoner
- AM/FM Digital Tuner: For å lytte til favorittradiostasjonene dine.
- Large Green LED Display: Provides clear visibility of the time.
- Integrated Time Projector: Projects the current time onto a wall or ceiling for easy viewing.
- Dobbel alarmfunksjon: Set two independent alarms for different wake-up times.
- Snooze-funksjon: Allows for a temporary pause of the alarm.
- Sleep Timer: Fall asleep to music with an automatic shut-off feature.
- Reserve batteri: Opprettholder tids- og alarminnstillinger under strømbruddtages (requires 9V battery, not included).
4. Pakkens innhold
- COBY CR-A78 AM/FM Digital Alarm Clock
- Strømadapter
- Brukerhåndbok (dette dokumentet)
5. Oppsett
5.1. Strømtilkobling
- Insert the small end of the AC power adapter into the DC IN jack located on the back of the unit.
- Plug the other end of the AC power adapter into a standard wall outlet (AC 120V, 60Hz).
- The unit will power on, and the display will flash, indicating it is ready for time setting.
5.2. Installasjon av batteribackup
A 9-volt battery (not included) can be installed to provide backup power for the clock and alarm settings during a power interruption.
- Finn batteridekselet på undersiden av enheten.
- Remove the cover by sliding it off.
- Connect a 9-volt battery to the battery connector inside the compartment, observing polarity (+ and -).
- Plasser batteriet i batterirommet og sett dekselet godt på plass.
6. Bruksanvisning
6.1. Stille inn tid
- Trykk og hold inne TIDEN SATT knappen til timesifrene begynner å blinke.
- Trykk på TIME gjentatte ganger for å justere timen. Se på PM-indikatoren for riktig AM/PM-innstilling.
- Trykk på MINUTT knappen gjentatte ganger for å justere minuttene.
- Trykk på TIDEN SATT knappen igjen for å bekrefte og avslutte tidsinnstillingsmodus.
6.2. Stille inn alarmen
The CR-A78 features two independent alarms, Alarm 1 and Alarm 2.
- Trykk og hold inne ALARM 1 SET (eller ALARM 2 SET) button until the alarm hour digits flash.
- Trykk på TIME -knappen for å stille inn ønsket alarmtime.
- Trykk på MINUTT for å stille inn ønsket alarmminutt.
- Trykk på ALARM 1 SET (eller ALARM 2 SET) button again to confirm the alarm time.
- For å aktivere alarmen, skyv ALARM 1 PÅ/AV (eller ALARM 2 PÅ/AV) switch to the 'ON' position. Select 'BUZZER' for a beeping alarm or 'RADIO' to wake to the radio.
6.3. Bruk av snooze-funksjonen
Når alarmen går, trykker du på SLUM button. The alarm will temporarily stop and sound again after approximately 9 minutes. To turn off the alarm completely, press the ALARM PÅ / AV switch to 'OFF'.
6.4. Radiodrift (AM/FM)
- Trykk på RADIO PÅ/AV knappen for å slå på radioen.
- Skyv på AM/FM switch to select the desired band.
- Roter TUNING knappen for å finne ønsket stasjon.
- Juster volumet med VOLUM knott.
- For å slå av radioen, trykk på RADIO PÅ/AV knappen igjen.
6.5. Using the Time Projector
- Locate the projector lens on top of the unit.
- Trykk på PROJEKTOR PÅ/AV button to activate the time projection.
- Rotate the projector lens to adjust the focus of the projected time.
- Adjust the angle of the projector arm to direct the time onto your desired surface (wall or ceiling).
- Trykk på PROJEKTOR PÅ/AV button again to turn off the projection.
7. Vedlikehold
- Rengjøring: Bruk en myk, tørr klut til å rengjøre utsiden av enheten. Ikke bruk slipende rengjøringsmidler eller løsemidler.
- Linsepleie: Gently wipe the projector lens with a soft, lint-free cloth if it becomes dusty.
- Plassering: Plasser enheten på en stabil, flat overflate, unna direkte sollys, varmekilder og overdreven fuktighet.
- Batteribytte: Replace the 9-volt backup battery annually or if the unit experiences frequent power outages to ensure continuous backup functionality.
8. Feilsøking
| Problem | Mulig årsak | Løsning |
|---|---|---|
| Enheten slås ikke på. | Strømadapteren er ikke riktig tilkoblet. | Sørg for at strømadapteren er ordentlig koblet til enheten og en fungerende stikkontakt. |
| Alarmen lyder ikke. | Alarmen er ikke aktivert eller feil innstilt. | Verify the alarm time is set correctly and the ALARM ON/OFF switch is in the 'ON' position (BUZZER or RADIO). |
| Radiomottaket er dårlig. | Antenna not extended or unit too close to interference. | Extend the FM wire antenna fully. For AM, rotate the unit for best reception. Move away from other electronic devices. |
| Projected time is blurry. | Projector focus not adjusted. | Rotate the projector lens to adjust the focus until the time is clear. |
| Tid/innstillinger tapt etter strømbruddtage. | Backupbatteriet er dødt eller ikke installert. | Install a fresh 9-volt battery or replace the existing one. |
9. Spesifikasjoner
| Trekk | Spesifikasjon |
|---|---|
| Merke | Coby |
| Modell | CR-A78 |
| Visningstype | Digital LED (grønn) |
| Radiotuner | AM/FM Analog |
| Strømkilde | AC 120V, 60Hz |
| Batterisikkerhetskopiering | 1 x 9V batteri (ikke inkludert) |
| Produktdimensjoner (L x B x H) | 12.7 x 10.16 x 15.24 cm (5 x XUMX x 4 inches) |
| Produktvekt | 567 g (1.25 lbs) |
| Farge | Sølv |
10. Garanti og støtte
For warranty information or technical support, please refer to the documentation provided at the time of purchase or contact Coby customer service. Keep your purchase receipt as proof of purchase for any warranty claims.