1. Introduksjon
This manual provides comprehensive instructions for the safe and efficient operation, maintenance, and troubleshooting of your Malongo EXP 240 Espresso Pod Machine. Please read this manual thoroughly before first use and retain it for future reference.

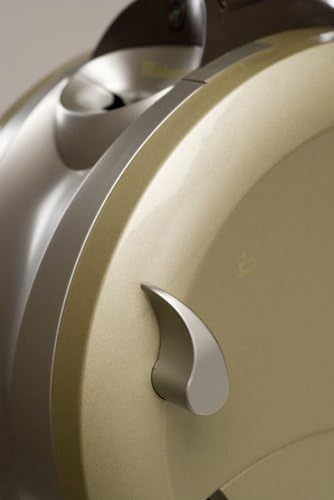
Figure 1: Malongo EXP 240 Espresso Pod Machine. This image shows the machine's overall design, including the water tank, pod insertion area, and espresso spout.
2. Viktige sikkerhetsinstruksjoner
Følg alltid grunnleggende sikkerhetsregler når du bruker elektriske apparater for å redusere risikoen for brann, elektrisk støt og personskade.
- Les alle instruksjonene før du bruker apparatet.
- Ikke berør varme overflater. Bruk håndtak eller knotter.
- For å beskytte mot brann, elektrisk støt og personskade, må du ikke senke ledningen, støpsler eller apparatet ned i vann eller annen væske.
- Nøye tilsyn er nødvendig når et apparat brukes av eller i nærheten av barn.
- Koble fra stikkontakten når den ikke er i bruk og før rengjøring. La det avkjøles før du setter på eller tar av deler, og før du rengjør apparatet.
- Ikke bruk noe apparat med en skadet ledning eller støpsel eller etter at apparatet ikke fungerer, eller har blitt skadet på noen måte.
- Bruk av tilbehør som ikke er anbefalt av produsenten av apparatet, kan føre til brann, elektrisk støt eller personskade.
- Ikke bruk utendørs.
- Ikke la ledningen henge over kanten av bordet eller benken, eller berør varme overflater.
- Ikke plasser på eller i nærheten av en varm gass- eller elektrisk brenner, eller i en oppvarmet ovn.
- Koble alltid støpselet til apparatet først, og deretter ledningen til stikkontakten. For å koble fra, slå av en hvilken som helst kontroll og ta deretter støpselet ut av stikkontakten.
- Ikke bruk apparatet til annet enn tiltenkt bruk.
3. Produktet er overview
Familiarize yourself with the components of your Malongo EXP 240 machine before operation.
3.1. Hovedkomponenter
- Vanntank (avtakbar)
- Pod Insertion Slot
- Brewing Handle/Lever
- Espresso Spout (adjustable)
- Drip Tray and Used Pod Container
- On/Off Switch with Indicator Light
- Control Selector (for coffee volume)
- Temperaturindikatorlys
Figur 2: Side view of the machine, showing the brewing handle. This handle is used to open and close the pod insertion mechanism.
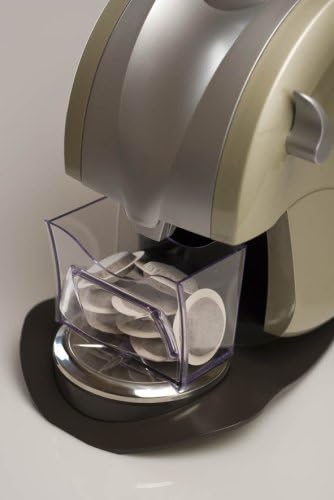
Figure 3: The removable container for used coffee pods, located beneath the brewing area. This container collects pods after brewing.
4. Oppsett
4.1. Pakker ut
Carefully remove the machine from its packaging. Ensure all components are present and undamaged. Retain packaging for future transport or service.
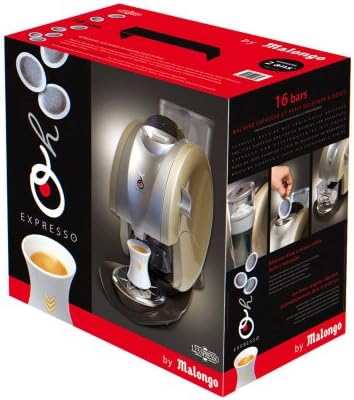
Figure 4: The product packaging. Ensure all items shown on the box are included.
4.2. Innledende rengjøring
Before first use, wash the water tank, drip tray, and used pod container with warm, soapy water. Rinse thoroughly and dry. Wipe the exterior of the machine with a damp klut.
4.3. Fylle vanntanken
Remove the water tank from the back of the machine. Fill it with fresh, cold drinking water up to the MAX line. Replace the water tank securely.
4.4. First Use / Priming the Pump
- Koble maskinen til en jordet stikkontakt.
- Trykk på av/på-bryteren. Indikatorlampen vil lyse.
- Place a large cup under the espresso spout.
- Without inserting a coffee pod, press the brew button or activate the control selector to dispense water. Allow water to flow until the tank is nearly empty. This primes the pump and flushes the system.
- Repeat if necessary until water flows smoothly.
5. Bruksanvisning
5.1. Lage espresso
- Sørg for at vanntanken er fylt med ferskvann.
- Turn on the machine using the On/Off switch. Wait for the temperature indicator light to signal that the machine is ready (usually when it stops blinking or turns solid).
- Lift the brewing handle to open the pod insertion slot.
- Insert one Malongo espresso pod into the slot, ensuring it is correctly seated.
- Lower the brewing handle firmly until it clicks into place.
- Place your espresso cup under the spout. The spout is adjustable to accommodate different cup sizes.
- Use the control selector to choose your desired coffee volume (e.g., short espresso, long espresso). Press the corresponding button or activate the selector.
- The machine will begin brewing. Once the desired volume is reached, the brewing will stop automatically.
- Lift the brewing handle to eject the used pod into the internal container.

Figure 5: Correct insertion of a coffee pod into the machine. Ensure the pod is flat and centered.
5.2. Adjusting Spout Height
The espresso spout can be adjusted vertically to fit various cup sizes. Gently push or pull the spout to the desired height.
6. Vedlikehold og rengjøring
Regelmessig rengjøring sikrer optimal ytelse og levetid for maskinen din.
6.1. Daglig rengjøring
- Drip Tray and Used Pod Container: Empty and rinse daily. Wash with warm, soapy water and dry thoroughly.
- Vanntank: Rinse daily and refill with fresh water. Clean with warm, soapy water weekly.
- Espresso Spout: Tørk med annonseamp cloth after each use to prevent coffee residue buildup.
- Ytre: Tørk av maskinens utside med en myk klutamp klut. Ikke bruk skurende rengjøringsmidler eller løsemidler.
6.2. Avkalking
Descaling is essential to remove mineral deposits that can affect machine performance and coffee taste. The frequency depends on water hardness and usage, but generally every 2-3 months.
- Empty the water tank and fill it with a descaling solution mixed according to the manufacturer's instructions (or a solution of white vinegar and water, 1:1 ratio).
- Place a large container under the espresso spout.
- Turn on the machine. Without a coffee pod, run several brewing cycles until the water tank is empty.
- Skyll vanntanken grundig og fyll den med friskt vann.
- Kjør flere sykluser med friskt vann for å skylle ut eventuell gjenværende avkalkingsløsning.
Forsiktighet: Always follow the instructions on your descaling product. Do not use descaling solutions not intended for coffee machines.
7. Feilsøking
Se tabellen nedenfor for vanlige problemer og løsningene på dem.
| Problem | Mulig årsak | Løsning |
|---|---|---|
| Maskinen slås ikke på. | Not plugged in; power outlet fault; On/Off switch not pressed. | Check power cord connection; test outlet with another appliance; press On/Off switch firmly. |
| Ingen kaffe kommer ut, eller strømmen er veldig treg. | Water tank empty; machine not primed; clogged spout; machine needs descaling. | Fill water tank; prime the pump (Section 4.4); clean spout; descale the machine (Section 6.2). |
| Coffee tastes burnt or plastic-like. | Initial use residue; machine needs cleaning; poor water quality. | Run several plain water cycles; perform thorough cleaning and descaling; use filtered water. |
| Det lekker vann fra maskinen. | Water tank not seated correctly; drip tray overflowing; internal seal issue. | Ensure water tank is firmly in place; empty drip tray; if problem persists, contact customer support. |
| Used pods not ejecting properly. | Pod container full; pod jammed. | Empty used pod container; gently remove any jammed pods. |
If the problem persists after attempting these solutions, please contact Malongo customer support.
8. Spesifikasjoner
- Modell: Malongo EXP 240
- Makt: 1050 watt
- Trykk: 16 Barer
- Vanntankvolum: 1.3 liter
- Dimensjoner (L x B x H): 23.5 x 40.4 x 39.4 cm
- Vekt: 3 kilo
- Farge: Gull
- Funksjoner: On/Off switch with indicator, Control selector, Luminous temperature indicator, Adjustable spout.
9. Garanti og kundestøtte
Your Malongo EXP 240 machine comes with a 2 års garanti. Malongo offers a revolutionary 48-hour home exchange service under specific conditions:
- Within 3 months of purchase: Exchange with a new machine.
- Innen 2 år etter kjøp: Exchange with a reconditioned (refurbished) machine.
- After 2 years of purchase: Exchange with a reconditioned machine for a fee of 39€ TTC.
To initiate a warranty claim or for any support inquiries, please contact Malongo customer service at: 0 825 826 187 (0.15 €TTC/min).
Viktig: Please retain your purchase invoice or sales receipt as it is essential for warranty claims. This offer is valid only in France for machines purchased from November 19, 2007, onwards.