Technics SL-PD807
Technics SL-PD807 MASH 5 Disc CD Player User Manual
Model: SL-PD807
Introduksjon
Takk for kjøpetasing the Technics SL-PD807 MASH 5 Disc CD Player. This manual provides detailed instructions for the proper setup, operation, and maintenance of your new audio component. Please read this manual thoroughly before using the unit to ensure optimal performance and longevity.
The SL-PD807 features a 5-disc carousel changer, allowing for extended playback without interruption, and incorporates MASH (Multi-stage Noise Shaping) D/A conversion for high-quality audio reproduction.
Viktig sikkerhetsinformasjon
- Strømkilde: Ensure the unit is connected to an AC 120V, 60Hz power supply.
- Ventilasjon: Ikke blokker ventilasjonsåpningene. Sørg for tilstrekkelig plass rundt enheten for riktig luftstrøm for å forhindre overoppheting.
- Fuktighet: Ikke utsett enheten for regn eller fuktighet. Ikke plasser gjenstander fylt med væske, som for eksempel vaser, oppå enheten.
- Rengjøring: Trekk støpselet til enheten ut av stikkontakten før rengjøring. Bruk en tørr klut til rengjøring.
- Service: Ikke forsøk å utføre service på denne enheten selv. Overlat all service til kvalifisert servicepersonell.
Pakkeinnhold
Vennligst sjekk at alle varene er til stede i pakken:
- Technics SL-PD807 MASH 5 Disc CD Player
- Strømledning
- RCA lydkabler
Note: A remote control is not included with this unit.
Oppsett
1. Pakker ut
Carefully remove the CD player and all accessories from the packaging. Retain the packaging materials for future transport or storage.
2. Plassering
Place the CD player on a stable, level surface away from direct sunlight, heat sources, and excessive dust or vibrations. Ensure there is sufficient space around the unit for proper ventilation.

Figur 1: Front view of the Technics SL-PD807 CD Player with included RCA cables.
3. Tilkoblinger
Connect the CD player to your amplifier or receiver using the supplied RCA audio cables.
- Connect one end of the RCA audio cables (red and white plugs) to the 'LINE OUT' jacks on the rear of the SL-PD807.
- Connect the other end of the RCA audio cables to an available 'CD IN' or 'AUX IN' input on your amplifier/receiver. Match the red plug to the 'R' (right) input and the white plug to the 'L' (left) input.
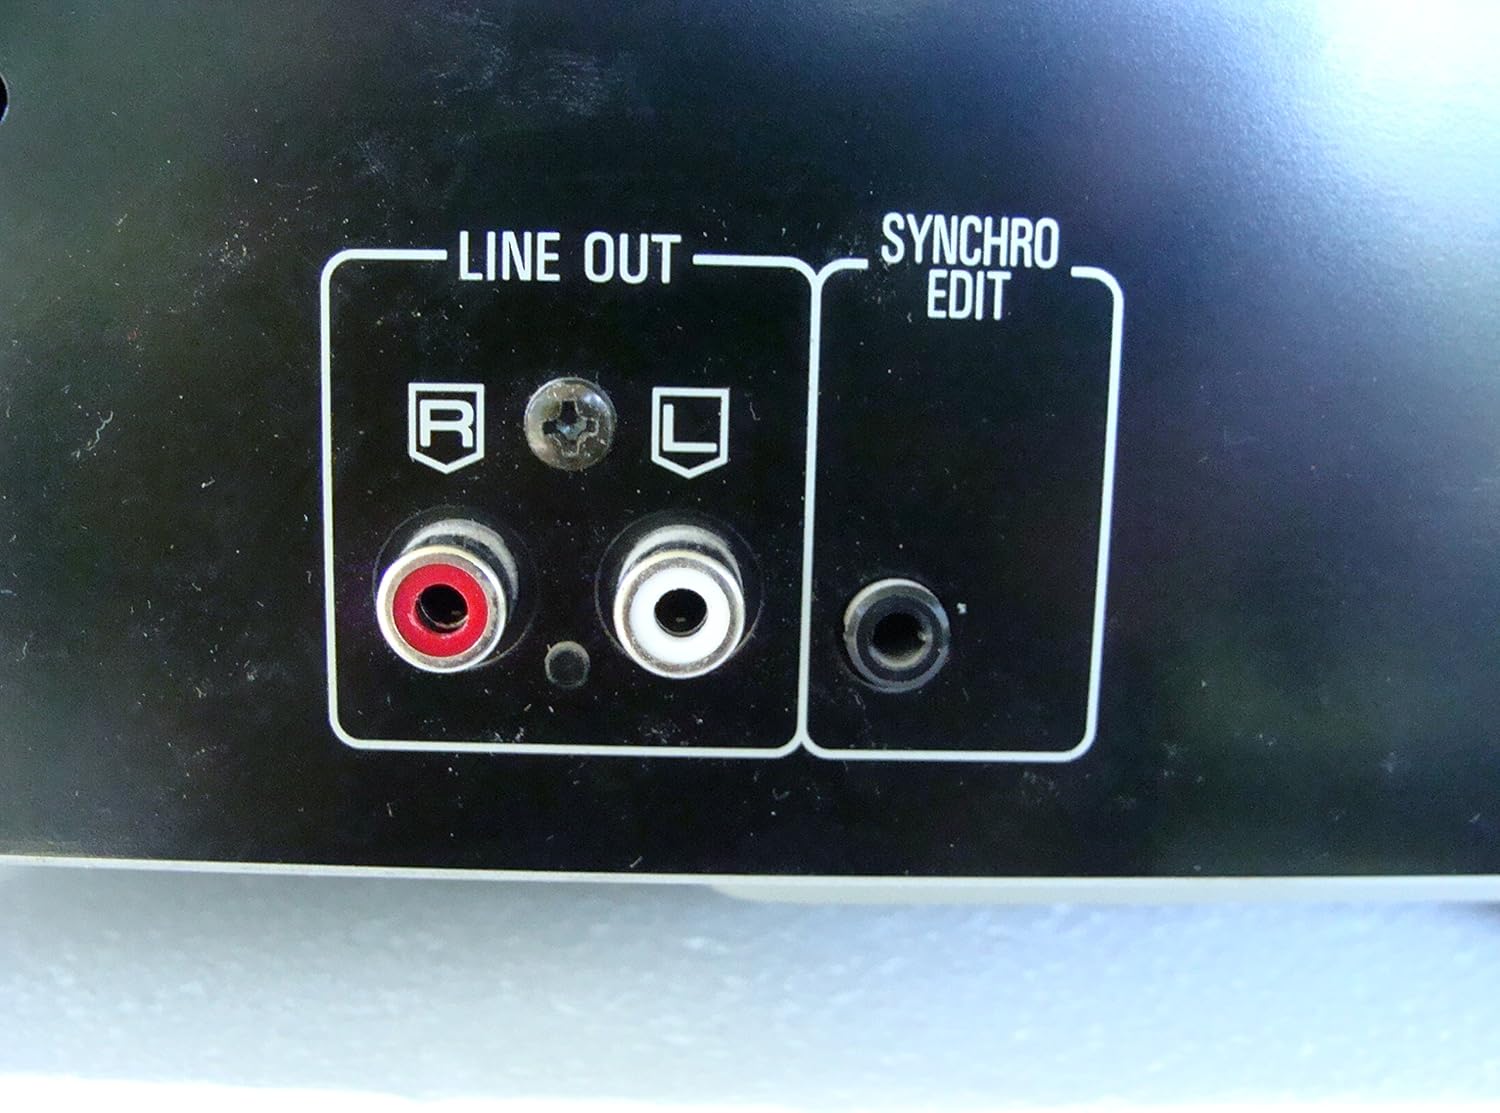
Figur 2: Rear panel connections, highlighting the 'LINE OUT' (RCA) and 'SYNCHRO EDIT' ports.
- Plug the power cord into the AC inlet on the rear of the CD player, then plug the other end into a standard AC wall outlet.
Bruksanvisning
1. Slå på/av
Trykk på MAKT button located on the front left of the unit to turn the CD player on or off.
2. Loading Discs
The SL-PD807 features a 5-disc carousel. Press the ÅPNE/LUKK button to open the disc tray. Place up to five CDs onto the numbered disc slots with the label side facing up. Press ÅPNE/LUKK igjen for å lukke skuffen.

Figur 3: Front panel controls including disc tray, display, and playback buttons.
3. Grunnleggende avspilling
- Spille: Trykk på SPILLE -knappen (►) for å starte avspillingen.
- Pause: Trykk på PAUSE button (⏸) to temporarily stop playback. Press again to resume.
- Stopp: Trykk på STOPPE knappen (■) for å stoppe avspillingen.
- Hopp over spor: Trykk på HOPPE OVER buttons (⏭︎ / ⏮︎) to skip to the next or previous track.
- Søk: Hold nede SØK buttons (⏪︎ / ⏩︎) to fast forward or rewind within a track.
4. Disc Exchange
You can exchange discs while another disc is playing. Press the DISK SKIP button to rotate the carousel to an empty slot or a disc you wish to remove/replace. The currently playing disc will continue to play until you select a new disc to play.
5. Avspillingsmoduser
- Tilfeldig spill: Trykk på TILFELDIG button to play tracks on the current disc or all loaded discs in a random order.
- Programavspilling: Bruk PROGRAM button to create a custom playback sequence of tracks from the loaded discs. Refer to the on-screen display for programming steps.
- Gjenta avspilling: Trykk på GJENTA button to repeat the current track, current disc, or all discs.
Vedlikehold
1. Rengjøring av enheten
Wipe the exterior of the unit with a soft, dry cloth. For stubborn stains, slightly dampen the cloth with water and a mild detergent, then wipe dry. Do not use abrasive cleaners, benzene, thinner, or alcohol, as these can damage the finish.

Figur 4: Top surface of the unit, illustrating areas that may require cleaning or show wear.
2. Skivepleie
- Håndter platene i kantene for å unngå fingeravtrykk på spilleflaten.
- Keep discs clean. Wipe from the center outwards with a soft, lint-free cloth if necessary.
- Store discs in their cases to protect them from dust and scratches.
Feilsøking
If you experience problems with your CD player, please consult the following table before seeking service.
| Problem | Mulig årsak | Løsning |
|---|---|---|
| Ingen strøm | Strømledningen er ikke ordentlig tilkoblet. | Sjekk strømledningens tilkobling til enheten og stikkontakten. |
| Ingen lyd | RCA audio cables not connected correctly. Amplifier/receiver input not selected. | Ensure RCA cables are securely connected to both the CD player and amplifier. Select the correct input on your ampløfter/mottaker. |
| Disc does not play / Skipping | Disc is dirty or scratched. Disc is inserted incorrectly. | Clean the disc with a soft, lint-free cloth. Ensure the disc is placed label-side up in the tray. Try another disc. |
| Carousel does not rotate | Obstruction in the disc tray. | Ensure no foreign objects are obstructing the carousel mechanism. |
Spesifikasjoner
The following are the technical specifications for the Technics SL-PD807 MASH 5 Disc CD Player:
| Trekk | Spesifikasjon |
|---|---|
| Modellnavn | SL-PD807 |
| Produsent | Teknikk |
| Platekapasitet | 5 plater |
| Strømkrav | AC 120V, 60Hz, 13W |
| Pakkedimensjoner | 17 x 17 x 5 tommer |
| Varevekt | 15.02 pund |
| Tilkoblingsteknologi | Auxiliary, Infrared |
| Spesialfunksjon | Anti-hoppbeskyttelse |

Figur 5: Product label displaying model number and power specifications.
Garanti og støtte
For information regarding warranty coverage and customer support for your Technics SL-PD807 CD Player, please refer to the warranty card included with your purchase or visit the official Technics website. If you require further assistance, please contact Technics customer service.
Ask a question about this manual
Ask about setup, troubleshooting, compatibility, parts, safety, or missing instructions. Manuals+ will review the question and use this page’s manual context to help answer it.