Introduksjon
This manual provides detailed instructions for the safe and efficient operation, maintenance, and troubleshooting of your Mr. Coffee TF6 5-Cup Switch Coffeemaker. Designed for convenience, this coffeemaker is ideal for small households or office use, featuring a compact design and a "Pause 'n Serve" function.
Nøkkelfunksjoner
- On/Off Indicator Light: Clearly shows when the coffeemaker is operating.
- Avtakbar filterkurv: Lifts out for easy filling with ground coffee and simple cleaning.
- Brewing Pause 'n Serve: Allows you to pour a cup of coffee before the brewing cycle is complete.
- Dual Water Window: Gir en klar view of the water level in the reservoir for accurate filling.
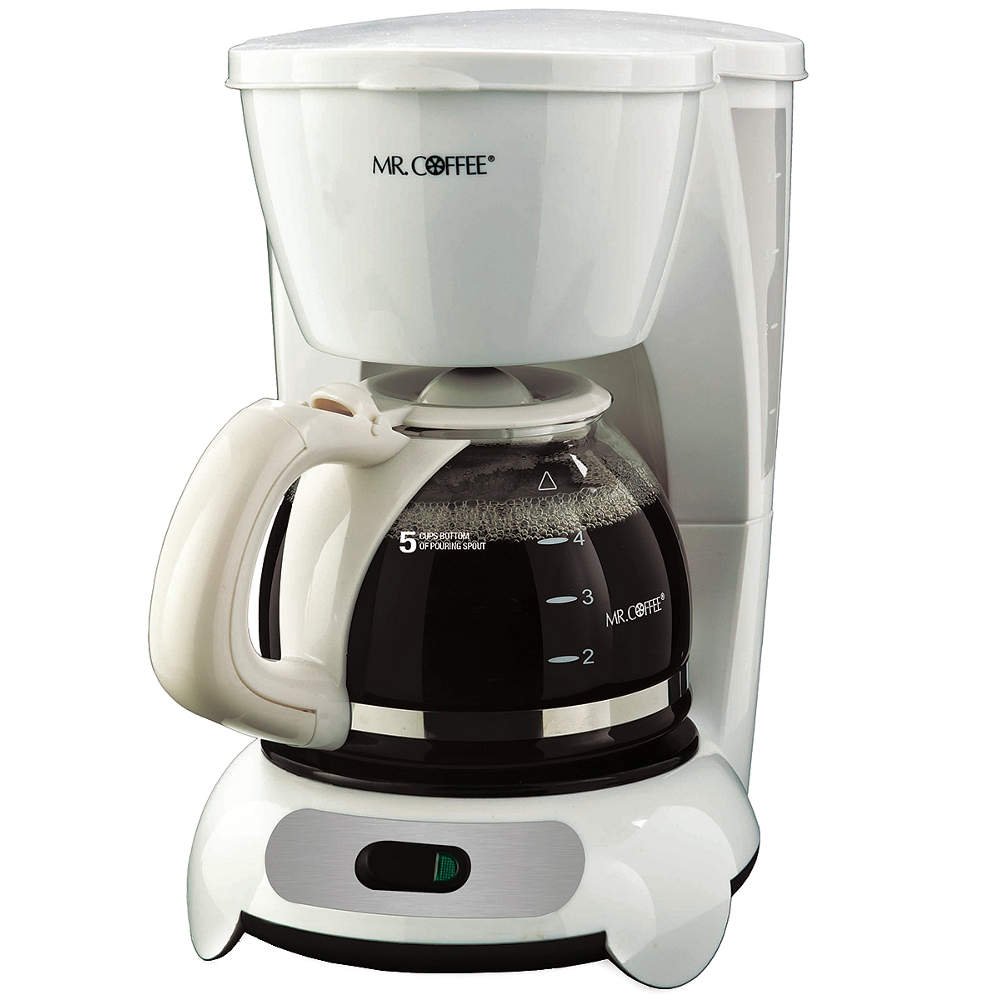
Image: Mr. Coffee TF6 5-Cup Switch Coffeemaker in white, showcasing its compact design and glass carafe.
Viktig sikkerhetsinformasjon
Please read all instructions carefully before using this appliance. Basic safety precautions should always be followed to reduce the risk of fire, electric shock, and/or injury to persons.
- Ikke berør varme overflater. Bruk håndtak eller knotter.
- To protect against electric shock, do not immerse cord, plugs, or coffeemaker in water or other liquid.
- Nøye tilsyn er nødvendig når et apparat brukes av eller i nærheten av barn.
- Koble fra stikkontakten når den ikke er i bruk og før rengjøring. La det avkjøles før du setter på eller tar av deler, og før du rengjør apparatet.
- Ikke bruk noe apparat med en skadet ledning eller støpsel eller etter at apparatet ikke fungerer, eller har blitt skadet på noen måte.
- Bruk av tilbehør som ikke er anbefalt av produsenten av apparatet kan føre til brann, elektrisk støt eller personskade.
- Ikke bruk utendørs.
- Ikke la ledningen henge over kanten av bordet eller benken, eller berør varme overflater.
- Ikke plasser på eller i nærheten av en varm gass- eller elektrisk brenner, eller i en oppvarmet ovn.
- For å koble fra, slå av en hvilken som helst kontroll og trekk deretter støpselet ut av stikkontakten.
- Ikke bruk apparatet til annet enn tiltenkt bruk.
- Det kan oppstå skålding hvis lokket fjernes under bryggesyklusen.
Identifikasjon av deler
Familiarize yourself with the components of your coffeemaker before first use.
- Lokk: Dekker vannbeholderen og filterkurvområdet.
- Vannreservoar: Holds the water for brewing. Features a dual water window.
- Filterkurv: Removable basket that holds the coffee filter and ground coffee.
- Sprayhode: Fordeler varmt vann jevnt over kaffegrut.
- Glasskaraffel: Collects the brewed coffee. Features a handle and pouring spout.
- Varmeplate: Holder den bryggede kaffen varm.
- På / av bryter: Illuminates when the coffeemaker is on.
- Strømledning: Connects the coffeemaker to an electrical outlet.
Oppsett og første gangs bruk
Before brewing your first pot of coffee, it is important to clean the coffeemaker.
- Pakke ut: Remove all packing materials and any labels from your coffeemaker.
- Clean Carafe and Filter Basket: Wash the glass carafe and removable filter basket in warm, soapy water. Rinse thoroughly and place them back into the coffeemaker.
- Første rengjøringssyklus: Fill the water reservoir with cold water up to the 5-cup mark. Do not add coffee. Place the empty filter basket into its position. Close the lid.
- Brew Water: Place the empty carafe on the warming plate. Plug the power cord into an electrical outlet. Press the ON/OFF switch to the ON position. Allow the coffeemaker to complete a full brewing cycle.
- Kast vann: Once the cycle is complete, turn the coffeemaker OFF and discard the water from the carafe. Let the unit cool for 5 minutes.
- Gjenta: Repeat steps 3-5 once more to ensure the coffeemaker is thoroughly cleaned. Your coffeemaker is now ready for use.
Bruksanvisning
Follow these steps to brew a fresh pot of coffee.
- Fyll vannreservoar: Open the coffeemaker lid. Fill the glass carafe with the desired amount of cold, fresh water (up to 5 cups). Pour the water into the water reservoir. The dual water window will help you measure accurately.
- Sett inn filter: Place a standard basket-style paper filter (or a reusable gold-tone filter, if preferred) into the removable filter basket.
- Tilsett kaffegrut: Tilsett ønsket mengde malt kaffe i filteret. En generell veiledning er én spiseskje malt kaffe per kopp, men juster mengden etter din smak.
- Posisjonsfilterkurv: Slide the filter basket firmly into its position. Close the coffeemaker lid securely.
- Stedskaraffelen: Ensure the empty glass carafe is properly seated on the warming plate.
- Start bryggingen: Plug the power cord into an electrical outlet. Press the ON/OFF switch to the ON position. The indicator light will illuminate, and brewing will begin.
- Pause 'n Serve (Optional): If you wish to pour a cup before brewing is complete, carefully remove the carafe. The flow of coffee will temporarily stop. Return the carafe to the warming plate within 20 seconds to prevent overflow.
- Nyte: Once brewing is complete, the coffeemaker will keep the coffee warm on the warming plate. For optimal flavor, serve coffee immediately after brewing.
Vedlikehold og rengjøring
Regelmessig rengjøring sikrer optimal ytelse og forlenger levetiden til kaffetrakteren.
Daglig rengjøring
- Koble fra og kjøl ned: Trekk alltid ut støpselet til kaffetrakteren og la den avkjøles helt før rengjøring.
- Kast grus og filtrer: Remove and discard the used coffee grounds and paper filter (or empty and rinse reusable filter).
- Vask avtakbare deler: Wash the glass carafe and filter basket in warm, soapy water. Rinse thoroughly. These parts are not dishwasher safe.
- Tørk utvendig: Tørk av utsiden av kaffetrakteren med en myk klutamp klut. Ikke bruk skuremidler eller skuresvamp.
- Tørke: Sørg for at alle deler er helt tørre før de monteres igjen eller oppbevares.
Decalcifying (Monthly or as needed)
Mineral deposits (calcium) can build up in your coffeemaker, affecting its performance. Decalcify regularly.
- Forbered løsning: Hell 4 kopper ufortynnet hvit husholdningseddik i vannbeholderen.
- Brew Half: Place an empty paper filter in the filter basket and close the lid. Place the empty carafe on the warming plate. Turn the coffeemaker ON and allow half of the vinegar solution to brew through.
- Bløtlegg: Turn the coffeemaker OFF and let it soak for at least 30 minutes.
- Complete Brew: Turn the coffeemaker ON again and allow the remaining vinegar solution to brew through.
- Skyllesykluser: Discard the vinegar solution. Fill the water reservoir with fresh, cold water and brew through a full cycle. Repeat this rinsing cycle two more times with fresh water to remove any residual vinegar taste.
Feilsøking
Se denne delen for vanlige problemer og løsninger på disse.
| Problem | Mulig årsak | Løsning |
|---|---|---|
| Coffeemaker does not brew. | Not plugged in; ON/OFF switch not activated; power outage. | Ensure unit is plugged in and switch is ON. Check household circuit breaker. |
| Kaffen renner over fra filterkurven. | Too much coffee grounds; filter basket not seated correctly; carafe not on warming plate; clogged spray head. | Use less coffee. Ensure filter basket and carafe are correctly positioned. Clean spray head. |
| Kaffen smaker svakt eller for sterkt. | Incorrect coffee-to-water ratio; old coffee grounds. | Adjust coffee amount to taste. Use fresh coffee grounds. |
| Bryggingen går tregt. | Mineraloppbygging (forkalkning). | Decalcify the coffeemaker as per the maintenance instructions. |
Spesifikasjoner
| Spesifikasjon | Detalj |
|---|---|
| Merke | Mr. Kaffe |
| Modellnummer | TF6 |
| Farge | Hvit |
| Kapasitet | 5 kopper |
| Type kaffetrakter | Drypp kaffemaskin |
| Spesialfunksjon | Manual, Permanent Filter (optional) |
| Anbefalt bruk | Home Use, Office Use |
| Driftsmodus | Helautomatisk |
| Voltage | 110 volt |
| Strømkilde | AC-adapter |
| Kaffeinngangstype | Malt kaffe |
| Produktdimensjoner | 9 x 7.2 x 11.1 tommer |
| Varevekt | 3 pund |
| Tåler oppvaskmaskin | No (for removable parts) |
Garanti og støtte
For warranty information and customer support, please refer to the warranty card included with your product or visit the official Mr. Coffee webnettstedet. Ta vare på kjøpskvitteringen som kjøpsbevis for eventuelle garantikrav.


