Introduksjon
Welcome to the Greenlee DM-810A True RMS Digital Multimeter user manual. This document provides essential information for the safe and effective operation, maintenance, and troubleshooting of your device. The DM-810A is designed for accurate measurement of AC/DC voltage, AC/DC current, resistance, capacitance, frequency, and continuity, making it a versatile tool for electrical professionals.
Sikkerhetsinformasjon
Følg disse instruksjonene for å sikre sikker drift og service av måleren. Unnlatelse av å følge disse advarslene kan føre til alvorlig personskade eller død.
- Always read and understand the entire instruction manual before using the meter.
- Ikke overskrid de maksimale inngangsgrensene for noen funksjon.
- Vær forsiktig når du arbeider med voltagover 30 V AC RMS, 42 V peak eller 60 V DC. Disse volumenetagdet utgjør en sjokkfare.
- Always use the proper terminals, function, and range for your measurements. The DM-810A features a Beep-Jack audible and visible warning to guard against improper A and mA terminal plug-in.
- Inspect test leads for damaged insulation or exposed metal before each use. Replace if damaged.
- Ikke bruk måleren hvis den ser skadet ut, eller hvis dekselet er åpent.
- Sørg for at batteridekselet er ordentlig lukket før bruk.
- Adhere to local and national safety codes. Use personal protective equipment (PPE) such as approved safety glasses and electrically insulated gloves when necessary.
Produkt overview
This section identifies the key parts and controls of your Greenlee DM-810A multimeter.

Figur 1: Front view of the Greenlee DM-810A Digital Multimeter, showing the display, function selector dial, and input jacks.
- Utstilling: Large LCD for clear readings, often with dual display capability.
- Funksjonsvelger: Used to select the desired measurement function (e.g., V~, V-, A~, A-, Ω, CAP, Hz, Continuity).
- Inngangskontakter:
- COM: Felles (negativ) inngang for alle målinger.
- VΩHz: Positiv inngang for volumtage, motstands-, frekvens- og kapasitansmålinger.
- mAμA: Positiv inngang for milliampere og mikroamperestrømmålinger.
- A: Positive input for amperestrømmålinger.
- Knapper:
- VELGE: Toggles between functions on a single dial position (e.g., AC/DC voltage, diode/kontinuitet).
- OMRÅDE: Manually selects measurement range or returns to auto-ranging.
- △: Delta function for relative measurements.
- HOLDE: Fryser gjeldende displayavlesning.
Oppsett
Installasjon av batteri
The Greenlee DM-810A requires batteries for operation. Refer to the back of the meter for the battery compartment. Use a screwdriver to open the compartment, insert the specified batteries (typically AA or 9V, check the compartment label), observing correct polarity, and then securely close the cover.
Koble til testledninger
Always ensure test leads are properly connected before taking measurements.
- Sett den svarte testledningen inn i COM (felles) inngangskontakt.
- Insert the red test lead into the appropriate positive input jack based on the measurement you intend to make:
- For voltage, resistance, capacitance, or frequency, use the VΩHz jack.
- For milliampere eller mikroampere current, use the mAμA jack.
- Til ampere current, use the A jack.
- The meter's Beep-Jack feature will provide an audible and visible alert if the function selector is set to a current measurement (A or mA) but the test lead is incorrectly plugged into a voltage/resistance jack, or vice-versa. This helps prevent damage to the meter and ensures correct setup.
Bruksanvisning
This section details how to perform various measurements with your DM-810A multimeter.
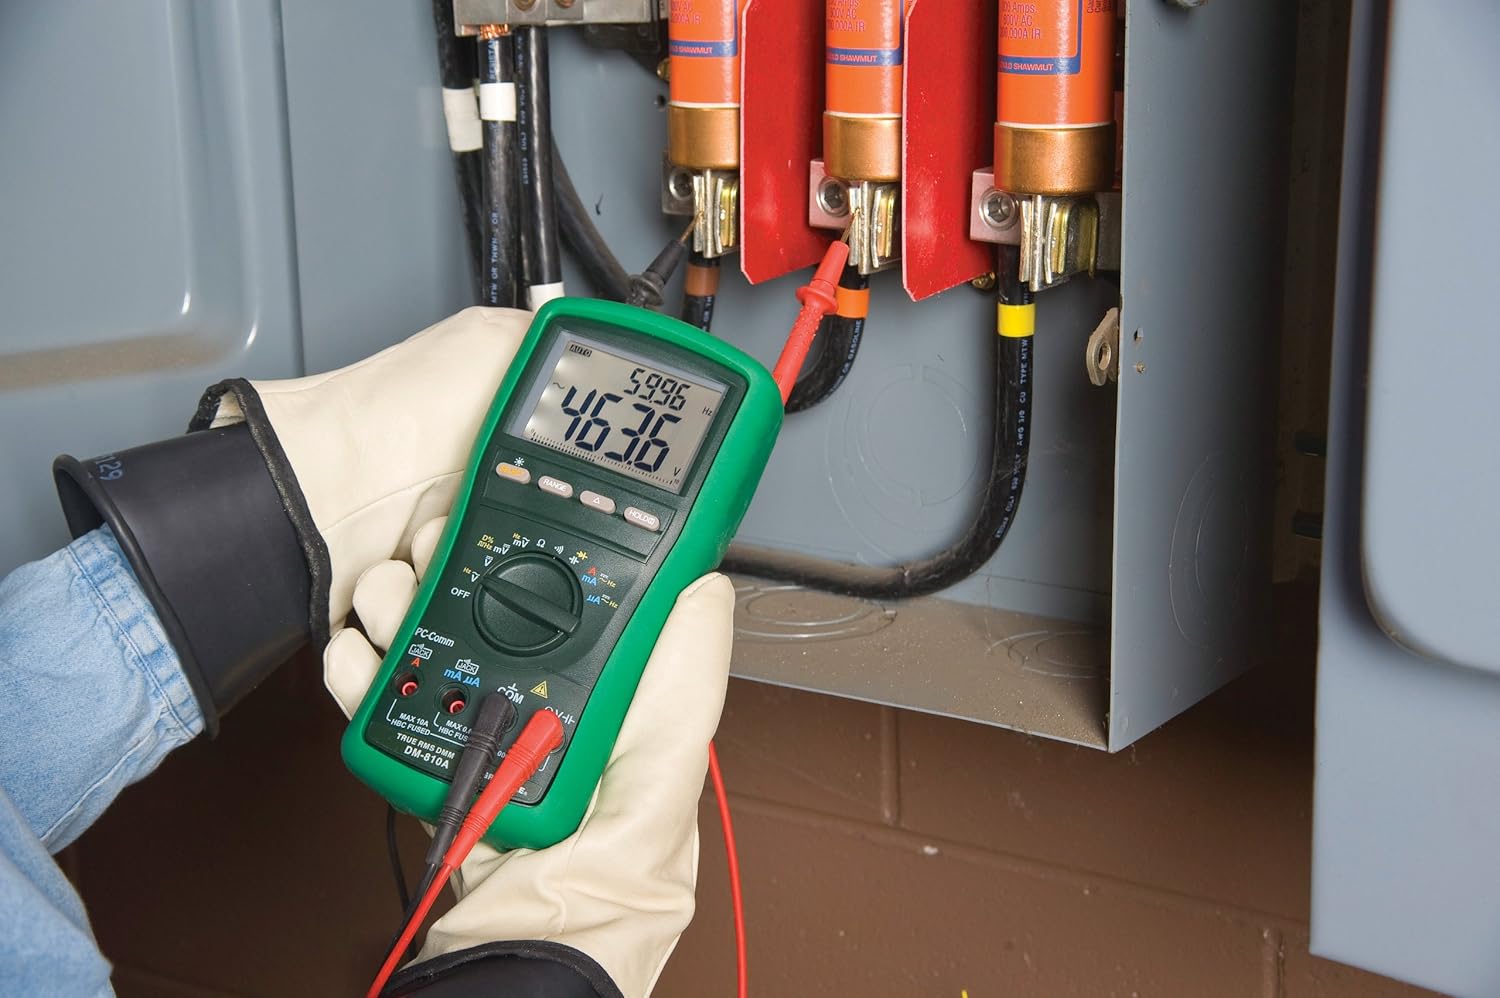
Figur 2: The Greenlee DM-810A Digital Multimeter being used to take measurements within an electrical panel, demonstrating practical application.
Måling AC/DC Voltage
- Set the function selector to V~ (AC Voltage) eller V- (DC Voltage). Use the SELECT button to toggle if both are on one position.
- Koble den svarte testledningen til COM og den røde testledningen til VΩHz.
- Koble testprobene parallelt over kretsen eller komponenten som skal måles.
- Les voltage -verdien på displayet.
Måler AC/DC-strøm
Viktig: Current measurements require the meter to be connected in series with the circuit. Ensure the circuit is de-energized before connecting the meter.
- Koble fra strømkretsen.
- Set the function selector to A~ (AC Current) or A- (DC Current), or mA~ / mA-.
- Koble den svarte testledningen til COM. Connect the red test lead to mAμA for small currents or A for larger currents (up to 10A). The Beep-Jack warning will activate if leads are in the wrong jacks for the selected function.
- Open the circuit where the current is to be measured and connect the meter in series.
- Koble til kretsen igjen og les av strømverdien.
- Slå av strømmen til kretsen før du kobler fra måleren.
Measuring Resistance (Ω)
- De-energize the circuit or component.
- Set the function selector to Ω.
- Koble den svarte testledningen til COM og den røde testledningen til VΩHz.
- Koble testprobene over komponenten.
- Les av motstandsverdien.
Measuring Capacitance (CAP)
- Sørg for at kondensatoren er helt utladet før måling.
- Set the function selector to CAP.
- Koble den svarte testledningen til COM og den røde testledningen til VΩHz.
- Koble testprobene over kondensatorterminalene.
- Les av kapasitansverdien.
Measuring Frequency (Hz)
- Set the function selector to Hz.
- Koble den svarte testledningen til COM og den røde testledningen til VΩHz.
- Koble testprobene over signalkilden.
- Read the frequency value.
Kontinuitetstest
- De-energize the circuit or component.
- Set the function selector to the continuity symbol (often shared with diode test, use SELECT to toggle).
- Koble den svarte testledningen til COM og den røde testledningen til VΩHz.
- Connect the test probes across the circuit path or component.
- An audible beep indicates continuity (low resistance). The display will show the resistance value.
Vedlikehold
Rengjøring
Tørk av måleren med annonseamp klut og mildt vaskemiddel. Ikke bruk slipemidler eller løsemidler. Sørg for at måleren er helt tørr før bruk.
Batteribytte
When the battery indicator appears on the display, replace the batteries immediately to ensure accurate readings. Follow the battery installation steps outlined in the Setup section.
Bytte sikring
If the current measurement functions cease to work, the internal fuses may need replacement. Refer to the meter's internal diagram (usually accessible by opening the battery compartment or back casing) for fuse specifications and replacement instructions. Always replace fuses with those of the specified type and rating to maintain safety and performance.
Feilsøking
This section provides solutions for common issues encountered during the operation of your DM-810A multimeter.
| Problem | Mulig årsak | Løsning |
|---|---|---|
| Ingen skjerm eller svak skjerm | Døde eller lave batterier | Bytt batterier. |
| Feil avlesning | Incorrect function/range selected; Damaged test leads; External interference | Verify function and range; Inspect and replace test leads; Move away from strong electromagnetic fields. |
| Strømmåling fungerer ikke | Blown fuse; Incorrect lead connection | Check and replace fuses; Ensure leads are in the correct A or mA jacks. |
| Beep-Jack warning active | Test leads connected to incorrect input jacks for the selected function | Adjust test lead connections to match the selected function on the dial. |
| Continuity test not beeping | Open circuit; High resistance | Ensure the circuit is closed; Check for breaks in the circuit or component. |
Tekniske spesifikasjoner
The following table outlines the key technical specifications for the Greenlee DM-810A Digital Multimeter.
| Trekk | Verdi |
|---|---|
| Merke | Greenlee |
| Modell | DM-810A |
| Måletype | Ekte RMS digitalt multimeter |
| Strømkilde | Batteridrevet |
| Stil | Digital |
| Varevekt | 16 gram (1 pund) |
| Produktdimensjoner (L x B x H) | 10 x 10 x 12 tommer |
| Sertifiseringer | CE, CSA, UL |
| UPC | 783310087434 |
Garanti og støtte
Garantiinformasjon
The Greenlee DM-810A Digital Multimeter comes with a 1 års produsentgarantiDenne garantien dekker material- og produksjonsfeil ved normal bruk. Vennligst ta vare på kjøpsbeviset for garantikrav.
Kundestøtte
For technical assistance, warranty service, or to inquire about replacement parts, please contact Greenlee customer support. Refer to the official Greenlee webnettstedet eller produktemballasjen for den mest oppdaterte kontaktinformasjonen.