1. Introduksjon
Thank you for choosing the AMS Pendule 211/1 wall clock. This manual provides comprehensive instructions for the safe and efficient setup, operation, and maintenance of your new clock. Please read this manual thoroughly before use and retain it for future reference.
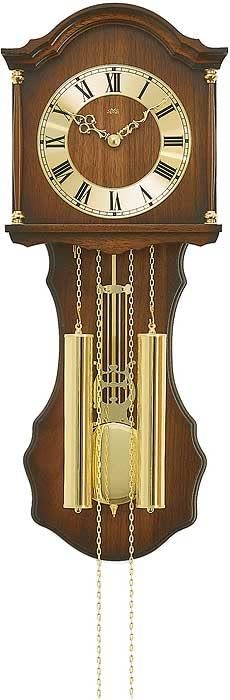
Figure 1: AMS Pendule 211/1 Wall Clock
2. Oppsett
2.1 Utpakking
- Ta klokken forsiktig ut av emballasjen.
- Inspect the clock for any signs of damage. If damaged, do not proceed with setup and contact customer support.
- Remove all protective films or packaging materials from the clock face, hands, and pendulum.
- Ta vare på emballasjen for fremtidig transport eller oppbevaring.
2.2 Installasjon av batteri
The AMS Pendule 211/1 requires batteries (not included) for operation. Please use the specified battery type.
- Finn batteridekselet på baksiden av klokken.
- Remove the cover by sliding or unlatching it.
- Insert the required batteries (e.g., 1x AA or 1x C, refer to the compartment label for exact type) according to the polarity indicators (+ and -).
- Sett batteridekselet godt på plass.
2.3 Montering av klokken
Ensure the clock is mounted securely on a stable wall surface.
- Choose a suitable location on a wall, away from direct sunlight, extreme temperatures, or vibrations.
- Use an appropriate wall anchor and screw for your wall type (e.g., drywall, concrete). The mounting point should be strong enough to support the clock's weight.
- Hang the clock securely using the keyhole slot on the back. Ensure it is level.
2.4 Stille inn tiden
Your AMS Pendule 211/1 clock features an analog display. Some models may include a radio-controlled mechanism for automatic time synchronization.
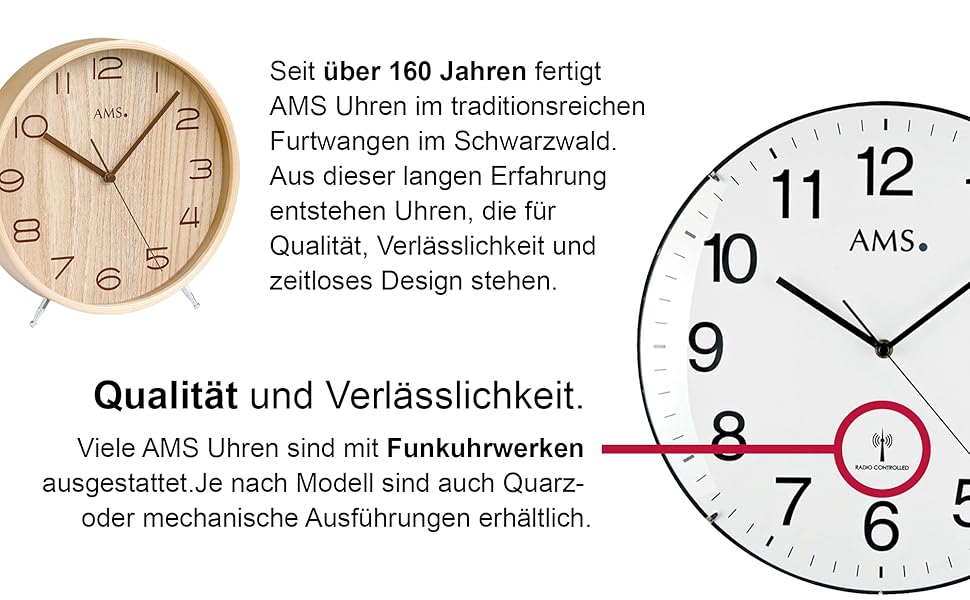
Figur 2: Eksample Clock Face with Radio Controlled Symbol
- Manuell innstilling: Locate the time-setting knob or wheel on the back of the clock. Gently turn this knob to move the minute and hour hands clockwise until the correct time is displayed. Avoid turning the hands counter-clockwise.
- Radio-Controlled (if applicable): If your clock is radio-controlled, it will attempt to synchronize with a time signal after battery installation. Place the clock near a window for better signal reception. This process may take several minutes or hours. Once synchronized, the clock will automatically display the correct time.
2.5 Pendulum Setup
The pendulum is a decorative and functional element of your clock.
- Carefully unpack the pendulum if it was separate from the main clock body.
- Attach the pendulum to its hook or hanging mechanism inside the clock case. Ensure it hangs freely and does not touch the sides of the case.
- Gently push the pendulum to one side to start its swing. It should swing evenly.
3. Bruksanvisning
3.1 Lese tiden
The AMS Pendule 211/1 features a clear analog display with hour, minute, and second hands for precise timekeeping.
- De short hand indicates the hour.
- De long hand indicates the minute.
- De thin sweeping hand indicates the second.
3.2 Alarmfunksjon
Your clock is equipped with an alarm function. Refer to the specific controls on the back or side of your clock for alarm setting.
- Angi alarmtid: Locate the alarm setting knob/dial (often separate from the main time setting). Turn it to set the desired alarm time.
- Aktiver alarm: Find the alarm ON/OFF switch or button. Move it to the "ON" position to activate the alarm.
- Deaktiver alarm: To turn off the alarm sound, move the alarm switch to the "OFF" position.
3.3 Pendulum Operation
Once the pendulum is installed and started, it should swing continuously. If it stops, gently restart it.
- Ensure the clock is level on the wall to allow for an even pendulum swing.
- Avoid obstructing the pendulum's movement.
4. Vedlikehold
4.1 Rengjøring
Regular cleaning will help maintain the appearance of your clock. The frame is made of Acrylonitrile Butadiene Styrene (ABS).
- Wipe the clock's exterior with a soft, dry, lint-free cloth.
- For gjenstridige merker, litt dampSkyll kluten med vann. Unngå å bruke sterke kjemikalier, slipende rengjøringsmidler eller løsemidler, da disse kan skade overflaten.
- Do not spray cleaning solutions directly onto the clock.
- Keep the clock away from excessive dust and moisture.
4.2 Batteribytte
Replace batteries when the clock starts losing time or stops functioning.
- Follow the steps in Section 2.2 "Battery Installation" to replace old batteries with new ones of the correct type.
- Kast brukte batterier på en ansvarlig måte i henhold til lokale forskrifter.
7. Garanti og støtte
For garantiinformasjon eller teknisk støtte, se dokumentasjonen som fulgte med kjøpet, eller kontakt forhandleren. Ta vare på kjøpsbeviset for eventuelle garantikrav.
For further assistance, you may visit the official AMS webnettstedet eller kontakt deres kundeserviceavdeling.