Produkt overview
The Mr. Coffee® Water Filter Replacement Discs are designed for use with Mr. Coffee® Water Filtration Systems. These universal discs are compatible with Mr. Coffee® 8, 10, 12, and 14 cup coffeemaker models.
These filters are made from carbon fiber and are NSF certified. They are designed to remove up to 97% of chlorine from water, which helps to improve the taste of your coffee.

Image: Mr. Coffee Water Filter Replacement Discs (2-pack).
Installasjon og bruk
To install and use the water filtration system in your Mr. Coffee® coffeemaker, follow these steps:
- Remove the gray disk cover: Locate the water filtration system in your coffeemaker. Remove the gray disk cover. Remove your used water filter disk and replace it with a new Mr. Coffee® water filter disk. Reinstall the cover.
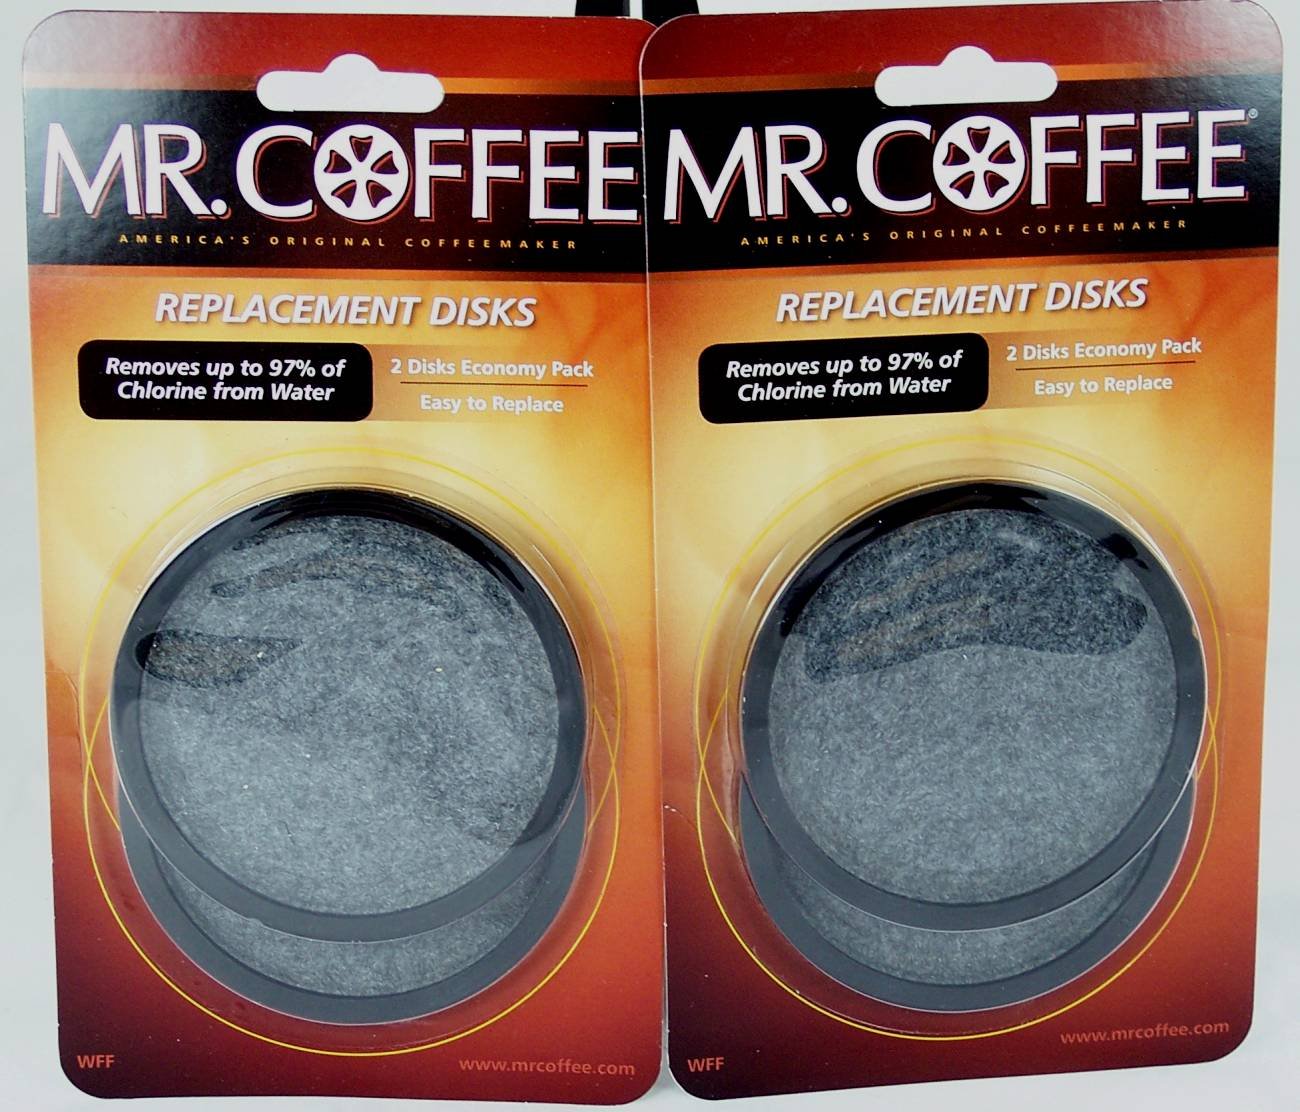
Image: Diagram illustrating the components of the water filter system, including the frame, filter disk, and disk cover, with an arrow indicating removal of the cover (Diagram 1 from original manual).
- Set the replacement reminder: On the water filter, locate the red indicator. Align this indicator to the letter on the frame that corresponds with the month you are installing the replacement disk. This serves as a visual reminder to change the disk monthly.
Image: Diagram illustrating the red indicator on the water filter and its alignment with month letters on the frame (Diagram 2 from original manual).
- Prepare the brew basket: Place a Mr. Coffee® paper or permanent filter into the brew basket. Add your desired amount of coffee grounds into the filter.
Image: Diagram showing coffee grounds being added to a filter within the brew basket (Diagram 3 from original manual).
- Insert the water filter: Place the Mr. Coffee® Water Filter into the brew basket. Ensure the correct side is facing up, as indicated on the water filter itself. Verify that the water filter is level.
Image: Diagram illustrating the placement of the water filter into the brew basket, ensuring the correct orientation (Diagram 4 from original manual).
- Close the brew basket: Close the brew basket or lid of your coffeemaker. If the brew basket or lid does not close properly, re-check steps 4 and 5 to ensure the filter is correctly inserted. Once closed, you are ready to brew coffee.
Image: Diagram showing the brew basket being closed after filter insertion (Diagram 5 from original manual).
- Post-brewing care: After brewing, rinse the water filter with fresh water. Do not wash the water filter in a dishwasher.
Vedlikehold
- Utskiftingsplan: The water filtration disk should be replaced once a month, or approximately every 30 brew cycles, to maintain optimal performance.
- Rengjøring: After each use, rinse the water filter with fresh water. Do not place the water filter in a dishwasher.
Feilsøking
If the brew basket or lid of your coffeemaker does not close properly after inserting the water filter, please:
- Re-check step 4: Ensure the Mr. Coffee® Water Filter is placed correctly in the brew basket with the indicated side facing up and is level.
- Re-check step 5: Verify that the filter is properly seated before attempting to close the brew basket or lid.
Spesifikasjoner
| Trekk | Detalj |
|---|---|
| Merke | Mr. Kaffe |
| Modellnummer | WFF |
| Materiale | Karbonfiber |
| Ekstern testsertifisering | NSF |
| Produktfordeler | Removes up to 97% of chlorine for improved taste |
| Antall enheter | 2 telling |
| UPC | 072179224945 |
Garanti og støtte
Dette produktet kommer med en 1 års begrenset garanti. For full details, please refer to the information provided inside the product packaging.
Til kjøpasing replacement water filtration disks or other Mr. Coffee® accessories, you can contact your local retailer or call:
1-800-MR COFFEE (1-800-672-6333)
Visit the official Mr. Coffee® webnettsted for mer informasjon: www.mrcoffee.com