1. Introduksjon
This user manual provides comprehensive instructions for the Yamaha PSRE443 61-Key Portable Keyboard. It covers essential information for setting up, operating, maintaining, and troubleshooting your instrument. The PSRE443 is designed for musicians of all levels, offering a wide range of voices, accompaniment styles, and interactive learning features.
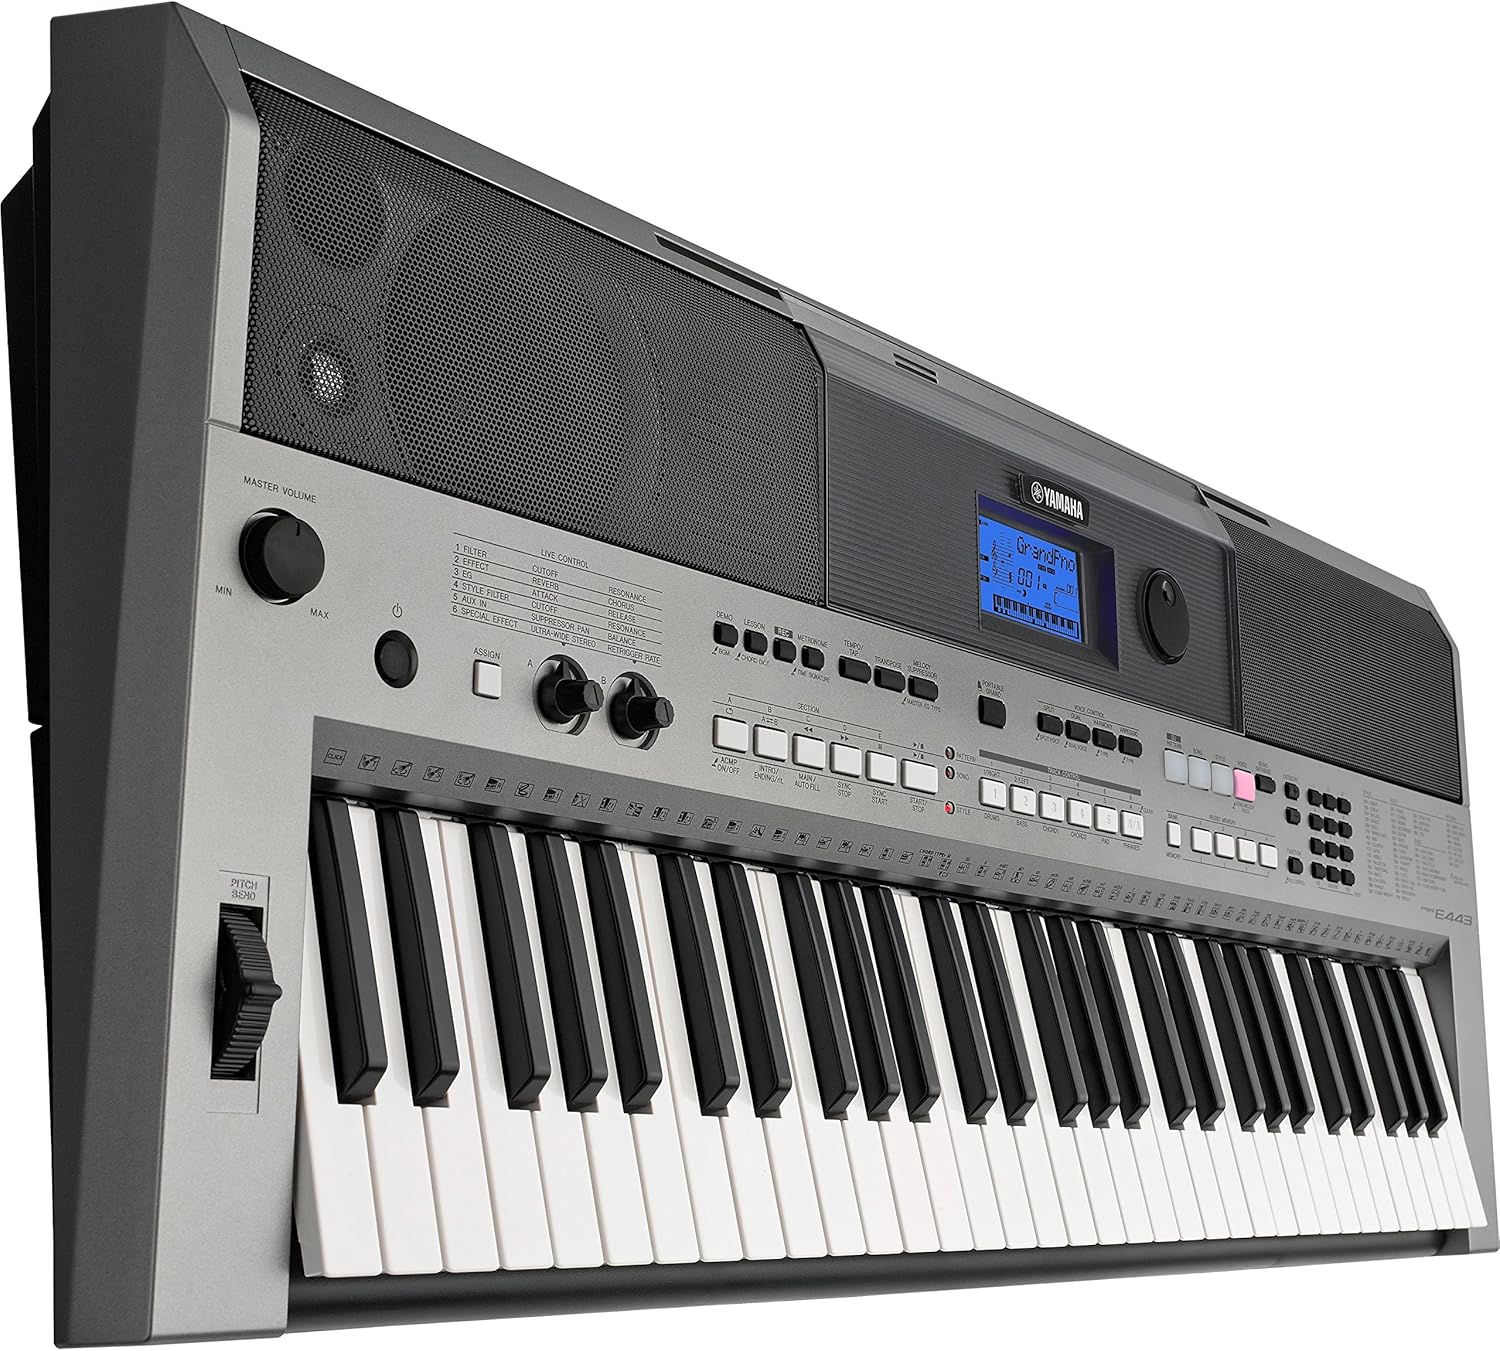
Figur 1.1: Foran view of the Yamaha PSRE443 Portable Keyboard, showcasinde 61 tastene, kontrollpanelet og de integrerte høyttalerne.
2. Sikkerhetsinformasjon
Please read these safety precautions carefully before using your PSRE443 keyboard to ensure safe and optimal performance.
- Strømforsyning: Use only the specified power adapter (not included) or 6 AA batteries. Ensure the voltage samsvarer med instrumentets krav.
- Sted: Avoid placing the instrument in direct sunlight, near heat sources, or in excessively dusty, humid, or vibrating environments.
- Vann og fuktighet: Do not expose the instrument to rain or moisture. Do not place containers with liquids on the instrument.
- Håndtering: Do not apply excessive force to the keys, buttons, or connectors. Avoid dropping the instrument.
- Rengjøring: Clean the instrument with a soft, dry cloth. Do not use paint thinners, solvents, or cleaning fluids.
3. Oppsett
3.1 Utpakking
Carefully remove the keyboard from its packaging. Retain the packaging materials for future transport or storage.
3.2 Strømtilkobling
The PSRE443 can be powered using an AC adapter (sold separately) or batteries.
- Using an AC Adapter: Connect the appropriate Yamaha AC power adapter (e.g., PA-150, sold separately) to the 12V DC IN jack on the rear panel of the keyboard. Plug the adapter into a standard AC outlet.
- Bruk av batterier: Open the battery compartment on the underside of the keyboard. Insert six new "AA" size alkaline (LR6) or rechargeable Ni-MH batteries, ensuring correct polarity.
3.3 Connecting Headphones or External Audio System
To listen privately or connect to an external amplifier/speaker system, use the PHONES/OUTPUT jack.
- Connect stereo headphones to the PHONES/OUTPUT jack. The internal speakers will be muted.
- For eksterne amplification, connect an audio cable from the PHONES/OUTPUT jack to the input of your amplifier eller drevne høyttalere.

Figure 3.1: Rear panel connections, including DC IN, USB TO HOST, USB TO DEVICE, SUSTAIN, AUX IN, and PHONES/OUTPUT jacks.
4. Grunnleggende betjening
4.1 Strøm på/av
Trykk på [MAKT] knappen for å slå på instrumentet. Trykk og hold inne [MAKT] -knappen i noen sekunder for å slå den av.
4.2 Volumkontroll
Juster [MASTER VOLUME] knob to set the overall output level of the instrument.
4.3 Valg av stemmer
The PSRE443 features 755 high-quality voices, including realistic Sweet! and Cool! Voices.
- Trykk på [STEMME] knapp.
- Bruk det numeriske tastaturet eller [KATEGORI] buttons to browse and select a voice. The selected voice name and number will appear on the LCD display.
4.4 Selecting Styles
The keyboard includes 200 diverse accompaniment styles.
- Trykk på [STIL] knapp.
- Bruk det numeriske tastaturet eller [KATEGORI] buttons to select a style.
- Trykk på [ACMP ON/OFF] button to start/stop the accompaniment.
5. Avanserte funksjoner
5.1 Real-time Control Knobs
The two assignable real-time control knobs allow for dynamic manipulation of sound parameters such as filter cutoff, effects, and sound envelope during performance.
- Snu på [ASSIGN] button to select the parameter you wish to control (e.g., Filter, Effect, EQ).
- Roter [CONTROL KNOB A] or [CONTROL KNOB B] to adjust the selected parameter in real-time.

Figure 5.1: Real-time control knobs (A and B) and the ASSIGN button for dynamic sound manipulation.
5.2 Pitch Bend Wheel
Use the pitch bend wheel located on the left side of the keyboard to smoothly raise or lower the pitch of notes while playing.
5.3 PATTERN Function
The PATTERN function allows you to create and play dynamic grooves, similar to a DJ. Press the [DJ PATTERN] button to activate this mode and use the various pads and controls to build your patterns.
5.4 Arpeggio Function
The Arpeggio function automatically generates arpeggiated phrases based on the chords you play. Press the [ARPEGGIO] button to activate and deactivate this feature.
5.5 6-Track Sequencer
Record your performances using the built-in 6-track sequencer. This allows you to layer multiple instrument parts to create complete songs.
- Trykk på [REC] button to enter recording standby mode.
- Pressen [START STOPP] for å starte innspillingen.
- Pressen [START STOPP] igjen for å stoppe opptaket.
5.6 Music Database
The Music Database provides 305 song titles with pre-configured keyboard settings (voice, style, tempo) for quick and easy setup. Press the [MUSIC DATABASE] button and use the numeric keypad to select a song.
5.7 Yamaha Education Suite (Y.E.S.)
Y.E.S. offers a suite of lesson functions to help beginners learn to play. These include listening, timing, and waiting modes to practice songs at your own pace.
6. Tilkobling
6.1 AUX IN Terminal
Connect an external audio player (e.g., smartphone, MP3 player) to the AUX IN terminal using a stereo mini cable. This allows you to play along with your favorite songs through the keyboard's speakers.

Figure 6.1: Connecting an external audio device to the AUX IN terminal.
6.2 USB TO HOST Terminal
Connect the keyboard to a computer (PC or Mac) using a standard USB cable. This enables MIDI communication, allowing you to use the keyboard as a MIDI controller or transfer MIDI data to and from your computer.
6.3 USB TO DEVICE Terminal
Insert a USB flash drive into the USB TO DEVICE terminal to save and load user data, such as recorded songs or registration memories.

Figur 6.2: Nærbilde view of the USB TO HOST and USB TO DEVICE ports for computer and storage connectivity.
6.4 iOS Device Connectivity
The PSRE443 supports connectivity with iOS devices (iPhone/iPod touch/iPad) for use with various Yamaha apps, enhancing your playing, performing, and practicing experience.
7. Vedlikehold
7.1 Rengjøring
Tørk av instrumentet med en myk, tørr klut. For gjenstridig smuss, bruk en lett tørr klut.amp cloth and then wipe dry. Avoid abrasive cleaners or solvents.
7.2 Oppbevaring
When not in use for extended periods, disconnect the AC adapter or remove the batteries. Store the instrument in a cool, dry place away from extreme temperatures and humidity.
8. Feilsøking
| Problem | Mulig årsak | Løsning |
|---|---|---|
| Ingen strøm | AC adapter not connected, batteries depleted/incorrectly inserted | Check AC adapter connection; replace batteries or ensure correct polarity. |
| Ingen lyd | Volume too low, headphones connected, local control off | Increase MASTER VOLUME; disconnect headphones; check Local Control setting (refer to full manual). |
| Tastene svarer ikke | MIDI settings, specific mode activated | Check MIDI settings if connected to computer; ensure not in a mode that disables keyboard input. |
For more detailed troubleshooting, please refer to the complete owner's manual available on the Yamaha webnettstedet.
9. Spesifikasjoner
| Trekk | Beskrivelse |
|---|---|
| Modellnavn | PSRE443 |
| Modellnummer | PSR-E433 |
| Antall nøkler | 61 |
| Stemmer | 755 High Quality Voices (including Sweet! and Cool! Voices) |
| Stiler | 200 Varieties of Styles |
| Sekvenser | 6-spors opptak |
| Kontrollknapper | 2 Real-time Control Knobs |
| Tilkobling | USB TO HOST, USB TO DEVICE, AUX IN (3.5mm Jack), PHONES/OUTPUT (3.5mm Jack), SUSTAIN |
| Strømkilde | AC Adapter (12V, sold separately) or 6 "AA" Batteries |
| Varevekt | 22 pund (ca. 9.98 kg) |
| Varedimensjoner (L x B x H) | 41.34 x 19.69 x 8.54 tommer (ca. 105 x 50 x 21.7 cm) |
10. Offisiell produktvideo
Video 10.1: En overview of the Yamaha PSRE443 61-Key Portable Keyboard, highlighting its versatile features, extensive voice library, and real-time controls.
11. Garanti og støtte
11.1 Garantiinformasjon
The Yamaha PSRE443 Portable Keyboard comes with a limited 1-year warranty covering parts and labor. Please retain your proof of purchase for warranty claims.
11.2 Kundestøtte
For further assistance, technical support, or to download the full owner's manual, please visit the official Yamaha webnettstedet eller kontakt Yamahas kundeservice.