1. Introduksjon
Takk for kjøpetasing the COBY DTV-700 Digital to Analog TV Converter. This device allows you to receive digital broadcast television signals and convert them for display on older analog televisions. It also functions as a multimedia player, supporting various audio, video, and image formats via its USB port, and offers recording capabilities. Please read this manual thoroughly before operating the device to ensure proper use and to maximize your viewopplevelse.
2. Pakkens innhold
Vennligst kryss av i boksen for følgende elementer:
- COBY DTV-700 Digital to Analog TV Converter
- Fjernkontroll
- AC/DC strømadapter
- AV-kabel (RCA)
- Brukerhåndbok (dette dokumentet)
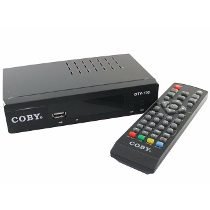
Image 2.1: The COBY DTV-700 Digital to Analog TV Converter. This image shows the compact design of the converter unit, typically black with various ports and indicators.
3. Sikkerhetsinformasjon
For å sikre sikker drift og forhindre skade, må du følge følgende forholdsregler:
- Ikke utsett enheten for regn, fuktighet eller ekstreme temperaturer.
- Ikke åpne c-enasing; overlat all service til kvalifisert personell.
- Sørg for god ventilasjon rundt enheten for å unngå overoppheting.
- Bruk kun den medfølgende strømadapteren.
- Hold enheten unna direkte sollys, varmekilder og sterke magnetfelt.
- Kast batterier og elektronisk avfall på en ansvarlig måte i henhold til lokale forskrifter.
4. Produktet er overview
4.1 Frontpanel
The front panel typically includes:
- Strømindikator: Lyser når enheten er på.
- Kanal opp/ned-knapper: For changing channels.
- Menyknapp: Får tilgang til hovedmenyen.
- USB-port: For connecting USB storage devices for media playback and recording.
4.2 Bakpanel
Bakpanelet har alle nødvendige tilkoblingsporter:
- MAUR I: Connects to your antenna for receiving digital signals.
- HDMI UT: Connects to an HDMI-compatible TV for high-definition output.
- AV OUT (RCA): Connects to older analog TVs using composite video (yellow) and stereo audio (red/white) cables.
- KOAKSIELL UT: Digital audio output (if available).
- DC IN: Connects to the provided AC/DC power adapter.
5. Oppsett
5.1 Connecting the Converter
- Koble til antennen: Connect your digital antenna to the MAUR INN port on the rear of the DTV-700.
- Koble til TV:
- For Analog TVs: Use the supplied AV cable. Connect the yellow plug to the video input of your TV, and the red/white plugs to the corresponding audio inputs. Connect the other end to the AV UT ports on the DTV-700.
- For Digital/HDTVs: Use an HDMI cable (not included). Connect one end to the HDMI UT port on the DTV-700 and the other end to an available HDMI input on your TV.
- Koble til strøm: Plug the AC/DC power adapter into the DC IN port on the DTV-700, then plug the adapter into a wall outlet.
5.2 Førstegangsoppsett og kanalskanning
- Turn on your TV and select the correct input source (e.g., AV1, HDMI1) that corresponds to your connection.
- Power on the DTV-700 using the remote control or the power button on the front panel.
- The first time you power on, an initial setup wizard may appear. Follow the on-screen prompts to select your language and country.
- Initiate an automatic channel scan. This will search for all available digital channels in your area. This process may take several minutes. Do not interrupt the scan.
- Once the scan is complete, the converter will tune to the first available channel.
6. Bruksanvisning
6.1 Fjernkontrollfunksjoner
The remote control provides full functionality for your DTV-700. Ensure two AAA batteries are inserted correctly (batteries not included).
- MAKT: Slår enheten på eller av.
- CH +/-: Endrer kanaler opp eller ned.
- VOL +/-: Justerer volumet.
- MENY: Får tilgang til hovedmenyen.
- EXIT: Går ut av gjeldende meny eller funksjon.
- INFO: Viser gjeldende kanalinformasjon.
- OK / Navigation Buttons: Confirms selections and navigates menus.
- RECs: Starts recording the current program.
- PLAY/PAUSE, STOP, FF, REW: Kontroller for medieavspilling.
- USB: Switches to USB media playback mode.
6.2-kanals navigasjon
Bruk CH +/- buttons on the remote or front panel to browse channels. You can also directly enter a channel number using the numeric keypad on the remote.
6.3 Hovedmeny
Trykk på MENY button to access settings for Program, Picture, Sound, Time, Option, and System. Use the navigation buttons to select options and OK for å bekrefte.
7. Medieavspilling
The DTV-700 supports media playback from a USB storage device (e.g., USB flash drive, external hard drive). Insert your USB device into the USB port on the front panel.
7.1 Støttede formater
- Musikk: MP3, WMA
- Foto: JPG-er, BMP-er, PNG-er
- Video: MKV, AVI, DIVX, XVID, MOV, VOB, FLV, DAT, MPEG, MP4, TS
7.2 Spille av media
- Sett inn en USB-lagringsenhet i USB-porten.
- Trykk på USB button on the remote control or navigate to the 'Multimedia' section in the main menu.
- Select the desired media type (Music, Photo, Video) and browse your files.
- Bruk navigasjonsknappene til å velge en file og trykk OK å spille.
8. Recording Features
The DTV-700 allows you to record live TV programs to a connected USB storage device.
8.1 Øyeblikkelig opptak
Mens du ser på et program, trykker du på REC -knappen på fjernkontrollen for å starte opptaket. Trykk STOPPE for å avslutte opptaket.
8.2 Scheduled Recording (PVR)
Access the PVR (Personal Video Recorder) or Schedule menu via the main menu to set up timed recordings. You will need to specify the channel, start time, end time, and date for the recording.
9. Feilsøking
| Problem | Mulig årsak/løsning |
|---|---|
| Ingen bilde eller lyd |
|
| Poor picture quality / No channels |
|
| Fjernkontrollen virker ikke |
|
| USB-medier spiller ikke av |
|
10. Spesifikasjoner
- Modell: DTV-700
- Merke: Coby
- Inndata: Digital TV Antenna (ATSC/DVB-T/T2 compatible, depending on region)
- Produksjon: HDMI, AV (RCA Composite Video/Audio)
- USB-port: Yes (for media playback and PVR)
- Støttede medieformater:
- Music: MP3, WMA
- Foto: JPG, BMP, PNG
- Video: MKV, AVI, DIVX, XVID, MOV, VOB, FLV, DAT, MPEG, MP4, TS
- Makt: AC/DC Adapter (Input: 100-240V ~ 50/60Hz, Output: typically 5V-12V DC)
- Dimensjoner: Approximately 20 x 15.6 x 6.2 cm (Package dimensions)
- Vekt: Approximately 490 g (Package weight)
- Fjernkontroll batterier: 2 x AAA (ikke inkludert)
11. Vedlikehold
To ensure the longevity and optimal performance of your DTV-700 converter:
- Rengjøring: Bruk en myk, tørr klut til å rengjøre utsiden av enheten. Ikke bruk flytende rengjøringsmidler eller slipende kjemikalier.
- Ventilasjon: Pass på at ventilasjonsåpningene ikke er blokkert for å forhindre overoppheting.
- Lagring: Hvis enheten skal oppbevares over lengre tid, må den kobles fra strømmen og oppbevares på et kjølig og tørt sted.
12. Garanti og støtte
For warranty information and technical support, please refer to the warranty card included with your product or visit the official Coby webnettstedet. Ta vare på kjøpskvitteringen som kjøpsbevis for eventuelle garantikrav.
Coby is committed to providing quality products and customer satisfaction. If you encounter any issues not covered in this manual, please contact Coby customer service for assistance.