1. Introduksjon
Thank you for choosing the Oasser Dash Cam U1. This manual provides detailed instructions for the proper installation, operation, and maintenance of your dash camera. Please read this manual thoroughly before using the device to ensure optimal performance and longevity. The Oasser Dash Cam U1 is designed to record your driving journey in Full HD 1080p, offering features like a wide viewing angle, G-Sensor for emergency recording, loop recording, and smart parking monitoring.
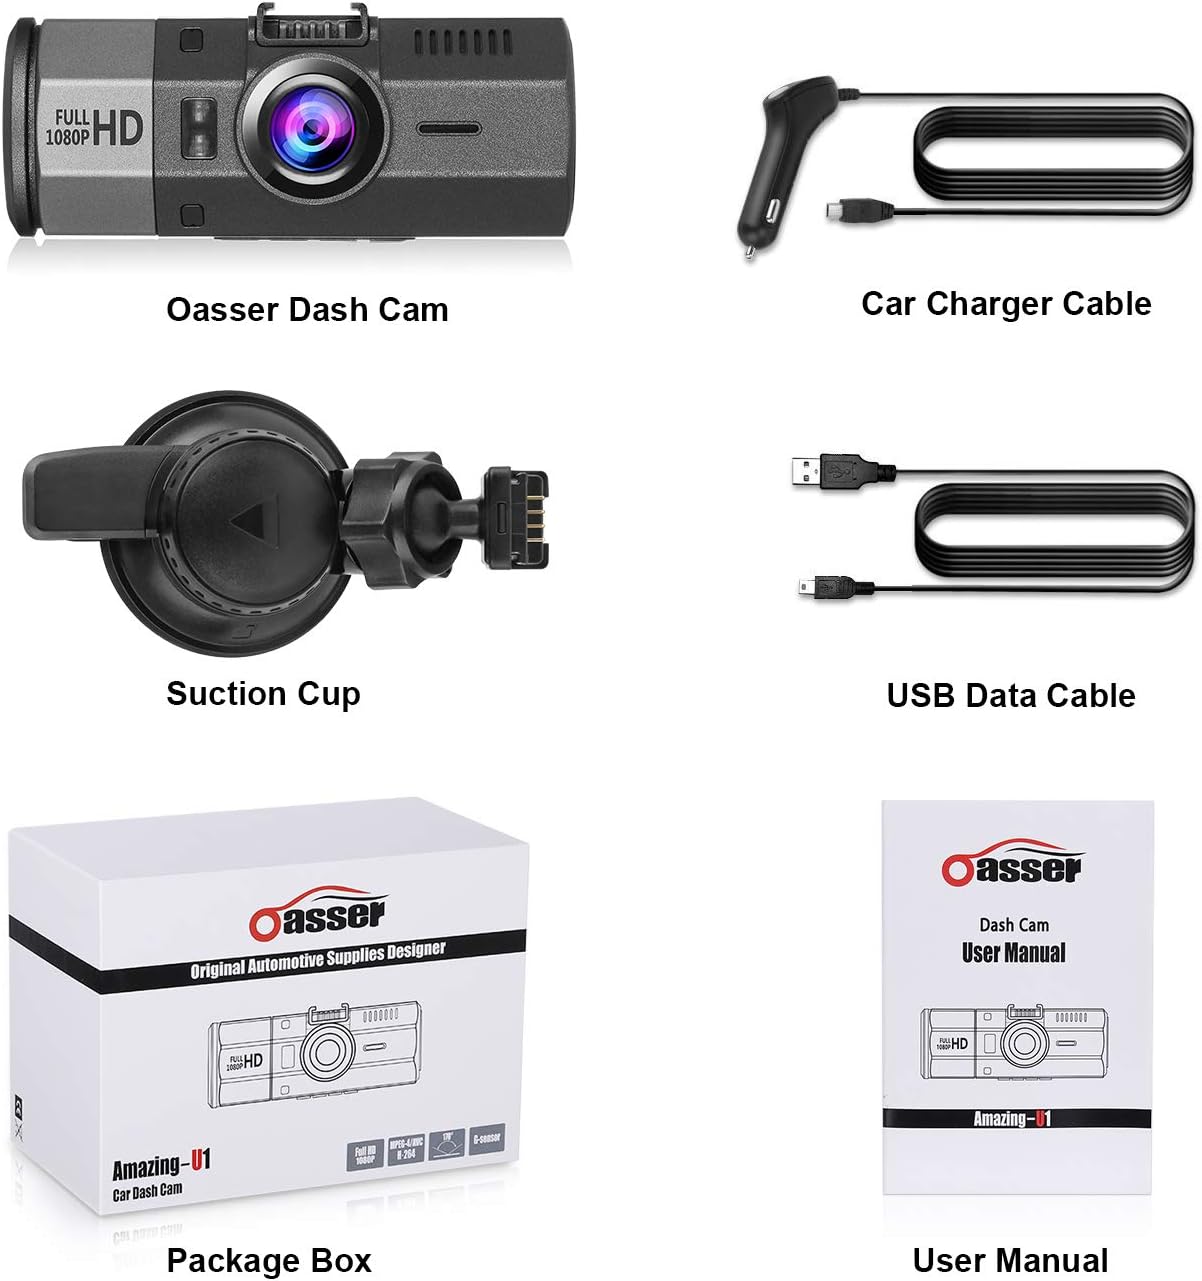
2. Pakkens innhold
Vennligst sjekk at alle varene som er oppført nedenfor er inkludert i pakken din. Hvis noen varer mangler eller er skadet, vennligst kontakt kundestøtte.
- Oasser Dash Cam U1 Unit
- Billaderkabel
- Sugekoppmontering
- USB-datakabel
- Brukerhåndbok
- Pakkeboks

Image 2.1: Contents of the Oasser Dash Cam U1 package, including the dash cam, car charger, suction cup mount, USB cable, and user manual.
3. Produktet er overview
The Oasser Dash Cam U1 features a compact design with a 1.5-inch LCD screen for easy navigation and playback. It is equipped with a high-resolution lens and various ports for connectivity.

Bilde 3.1: Foran view of the Oasser Dash Cam U1 with the suction cup mount attached, showcasing the lens and main body.

Bilde 3.2: Ovenfra og ned view of the Oasser Dash Cam U1 showing both the front lens and the rear LCD screen with control buttons.
3.1. Enhetskomponenter
- Frontlinse: Tar opp video footage.
- LCD-skjerm: Viser live view, menu, and playback.
- Kontrollknapper: For navigation and function selection.
- USB-port: For strøm og dataoverføring.
- HDMI-port: For videoutgang.
- MicroSD-kortspor: For innsetting av minnekort.
- Høyttaler/mikrofon: For lydopptak og avspilling.
Bilde 3.3: Nærbilde view of the Oasser Dash Cam U1's side, showing the USB port, HDMI port, and the slot for a MicroSD card. Note that the SD card is not included with the product.
4. Oppsett
Follow these steps to properly set up your Oasser Dash Cam U1.
4.1. Sette inn MicroSD -kortet
- Sørg for at dashkameraet er slått av.
- Finn MicroSD-kortsporet på siden av enheten.
- Insert a Class 10 or higher MicroSD card (not included) into the slot until it clicks into place.
- For å ta ut, skyv kortet forsiktig inn til det spretter ut.
Viktig: For optimal performance, it is recommended to format the MicroSD card within the dash cam's settings before first use and periodically thereafter.
4.2. Montering av Dash Cam
- Rengjør det ønskede området på frontruten grundig.
- Fest sugekoppfestet til dashkameraet.
- Press the suction cup firmly against the windshield and rotate the locking mechanism clockwise to secure it.
- Juster vinkelen på dashbordet for å sikre fri view av veien videre.

Image 4.1: Diagram illustrating the attachment of the suction cup mount to the windshield and the connection of the car charger cable to the dash cam.
4.3. Koble til strøm
- Koble billaderkabelen til USB-porten på dashkameraet.
- Koble den andre enden av billaderen til sigarettenneruttaket i bilen.
- Dashkameraet slår seg automatisk på og begynner å ta opp når bilens tenning slås på.
5. Bruksanvisning
Understand the various functions and modes of your Oasser Dash Cam U1.
5.1. Videoopptak
The dash cam records video in Full HD 1080p resolution at 30 frames per second, capturing a wide 170-degree viewing vinkel.

Image 5.1: Comparison of video recording quality during day and night conditions, demonstrating the FHD 1080P capability of the Oasser Dash Cam U1.

Image 5.2: Illustration of the 170-degree ultra-wide viewing angle, showing how it captures a broader perspective of the road.
5.2. Sløyfeopptak
The dash cam continuously records video in segments (e.g., 1, 3, or 5 minutes). When the MicroSD card is full, the oldest unlocked video segments are automatically overwritten by new recordings. This ensures continuous recording without manual intervention.
5.3. G-sensor (tyngdekraftsensor)
The built-in G-Sensor detects sudden movements or impacts, such as collisions. When an event is detected, the current video segment is automatically locked and saved to prevent it from being overwritten by loop recording. This ensures critical footage er bevart.

Image 5.3: Visual representation of the G-Sensor automatically locking video files during an impact event, indicated by a padlock icon on the screen.
5.4. Smart Parking Monitoring
When enabled, the parking monitor feature uses motion detection to record any moving objects close to your parked car. It can also utilize time-lapse recording, taking photos at set intervals to record changes, which are then compiled into a video clip. This provides surveillance when your vehicle is stationary.

Image 5.4: The Oasser Dash Cam U1 mounted in a vehicle, demonstrating its smart parking monitoring feature in a parking garage setting.
5.5. Nattesyn
The dash cam is equipped with night vision capabilities to enhance video clarity in low-light conditions. While it improves visibility, it is not military-grade night vision and relies on available ambient light sources.
5.6. Demp funksjon
The dash cam includes a mute function, allowing you to disable audio recording when desired. This can be useful for privacy or to reduce file størrelse.
6. Vedlikehold
Proper maintenance ensures the longevity and reliable operation of your dash cam.
- Rengjøring: Bruk en myk, tørr klut til å rengjøre linsen og skjermen. Unngå slipende rengjøringsmidler eller løsemidler.
- SD-kortformatering: Regularly format your MicroSD card (at least once a month) through the dash cam's settings. This helps prevent data corruption and ensures smooth recording.
- Fastvareoppdateringer: Check the official Oasser website periodically for firmware updates. Updating the firmware can improve performance and address known issues. Follow the instructions provided with the firmware update carefully.
- Temperatur: Avoid exposing the dash cam to extreme temperatures for extended periods, especially direct sunlight in a parked car, as this can affect battery life and internal components.
7. Feilsøking
If you encounter issues with your Oasser Dash Cam U1, refer to the following common problems and solutions.
| Problem | Mulig årsak/løsning |
|---|---|
| Dashkameraet slår seg ikke på. | Check the car charger connection and ensure the vehicle's cigarette lighter socket is functional. The dash cam requires continuous power from the car charger to operate. |
| Opptaket stopper eller fryser. | Ensure you are using a Class 10 or higher MicroSD card. Format the MicroSD card regularly. The card may be full or corrupted. Try a different MicroSD card. |
| Video segments have gaps or transitions issues. | Ensure the latest firmware is installed. Formatting the MicroSD card can also resolve this. |
| G-sensoren er for følsom eller ikke følsom nok. | Adjust the G-Sensor sensitivity setting in the dash cam's menu. A lower setting will trigger less frequently, while a higher setting will trigger more easily. |
| Suction cup mount does not stay in place. | Ensure the windshield surface is clean and dry. Apply firm pressure and rotate the locking mechanism fully. If the mount is old, the suction cup material may have degraded and require replacement. |
| Night vision quality is poor. | Night vision enhances low-light recording but does not create light. Performance depends on ambient light. Ensure the windshield is clean and free of obstructions. |
| License plates are difficult to read in recordings. | While the dash cam records in 1080p, factors like speed, distance, lighting conditions, and reflections can affect license plate readability. Ensure the lens is clean. |
| Camera reboots or shuts down unexpectedly. | This can occur if the power supply is unstable or if the internal battery is low. Ensure a stable power connection. If the issue persists, the internal battery may need service. |
8. Spesifikasjoner
Key technical specifications for the Oasser Dash Cam U1.
| Trekk | Spesifikasjon |
|---|---|
| Modell | Amazing-U1 |
| Visningstype | LCD |
| Visible Screen Area Size | 1.5 tommer / 4 cm |
| Videoopptaksoppløsning | 1080p (Full HD) |
| Virkelig View Vinkel | 170 grader |
| Spesielle funksjoner | G-Sensor, Loop Recording, Mute Function, Night Vision, Parking Monitoring |
| Tilkoblingsteknologi | HDMI, USB |
| Batterisammensetning | Litiumion |
| Produktdimensjoner | 9.5 x 3.91 x 3.91 cm |
| Produktvekt | 520 g |
9. Garanti og støtte
Oasser products are designed for reliability and performance. For warranty information, technical support, or any inquiries regarding your Oasser Dash Cam U1, please refer to the contact details provided in your product packaging or visit the official Oasser webnettstedet. Vennligst ta vare på kjøpsbeviset for garantikrav.