Introduksjon
This manual provides comprehensive instructions for the MaximalPower 2-Wire Surveillance Earpiece Headset. Designed for professional and industrial use, this headset offers clear and discreet communication. Please read this manual thoroughly before using the product to ensure proper setup, operation, and maintenance.
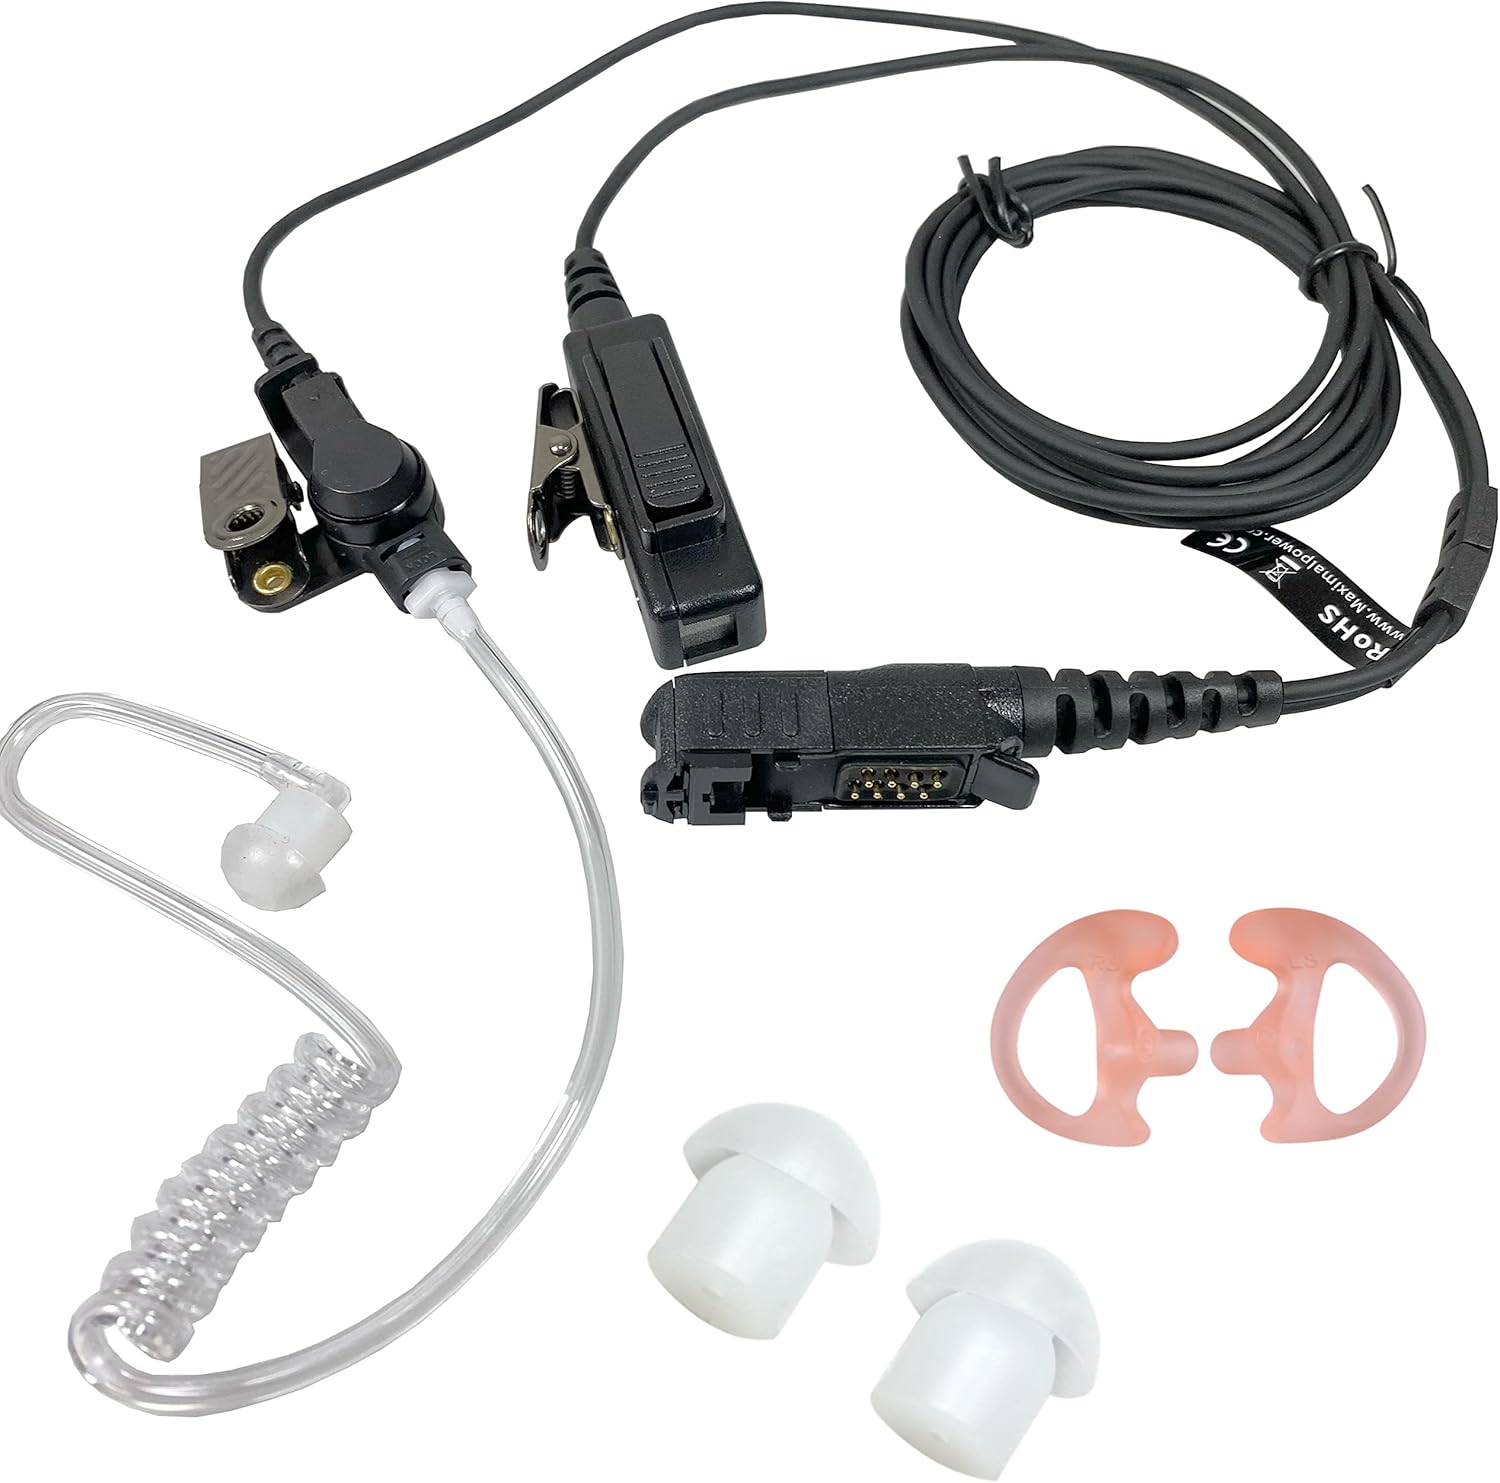
Figur 1: Overview of the MaximalPower 2-Wire Surveillance Earpiece Headset components.
Hva er i esken
Your MaximalPower 2-Wire Surveillance Earpiece Headset package includes the following items:
- 1x 2-Wire Surveillance Earpiece Headset with PTT Mic and Acoustic Tube
- 2x Ear Tips (additional sizes for comfort)
Oppsett
Follow these steps to properly connect your earpiece headset to your compatible two-way radio:
- Identify the Radio Port: Locate the audio accessory port on your Motorola XPR/DEP series radio. This is typically covered by a protective flap.
- Align the Connector: The earpiece features a multi-pin connector. Carefully align the connector with the radio's port. Ensure the notch on the earpiece connector aligns with the corresponding lock symbol or notch on your radio.
- Sett inn og sikre: Gently push the connector into the radio port until it is fully seated and clicks into place. A proper connection will ensure reliable transmission and prevent the earpiece from becoming loose.
- Position the PTT Mic: Use the metal clip on the Push-To-Talk (PTT) microphone to attach it securely to your lapel or collar. Position it conveniently for easy access during communication.
- Ta på deg øreproppen: Place the acoustic tube earpiece into your ear. Adjust the clear coil tube for a comfortable and discreet fit.
Video 1: Demonstrates how to properly lock the earpiece pin into a compatible radio, ensuring a secure connection for optimal performance.

Figur 2: Detaljert view of the multi-pin connector designed for compatible Motorola two-way radios.
Bruksanvisning
Once the headset is properly connected, operating it is straightforward:
- Receiving Communications: Audio will be transmitted directly to your ear via the clear acoustic tube. The low-profile design ensures discreet reception.
- Transmitting Communications (PTT): To speak, press and hold the Push-To-Talk (PTT) button located on the microphone unit. Speak clearly into the microphone. Release the PTT button when you are finished speaking to return to receive mode.

Figure 3: The Push-To-Talk (PTT) microphone unit with its integrated metal clip for easy attachment.
Video 2: Shows the assembly and usage of a flexible stretch cable walkie-talkie earpiece with a microphone, demonstrating how to connect the acoustic tube and use the PTT button.
Vedlikehold
For å sikre at headsettet ditt varer lenge og har optimal ytelse, bør du følge disse vedlikeholdsretningslinjene:
- Rengjøring: Regularly wipe down the earpiece, acoustic tube, and PTT mic with a soft, damp klut. Unngå bruk av sterke kjemikalier eller slipende materialer.
- Stell av akustiske rør: The clear acoustic tube can be detached for cleaning or replacement. Gently twist and pull to remove. Clean with mild soap and water, then rinse thoroughly and allow to air dry completely before reattaching.
- Lagring: When not in use, store the headset in a clean, dry place away from direct sunlight and extreme temperatures. Avoid tangling the wires.
- Undersøkelse: Periodically inspect the cables for any signs of wear, fraying, or damage. Ensure the connectors are clean and free of debris.
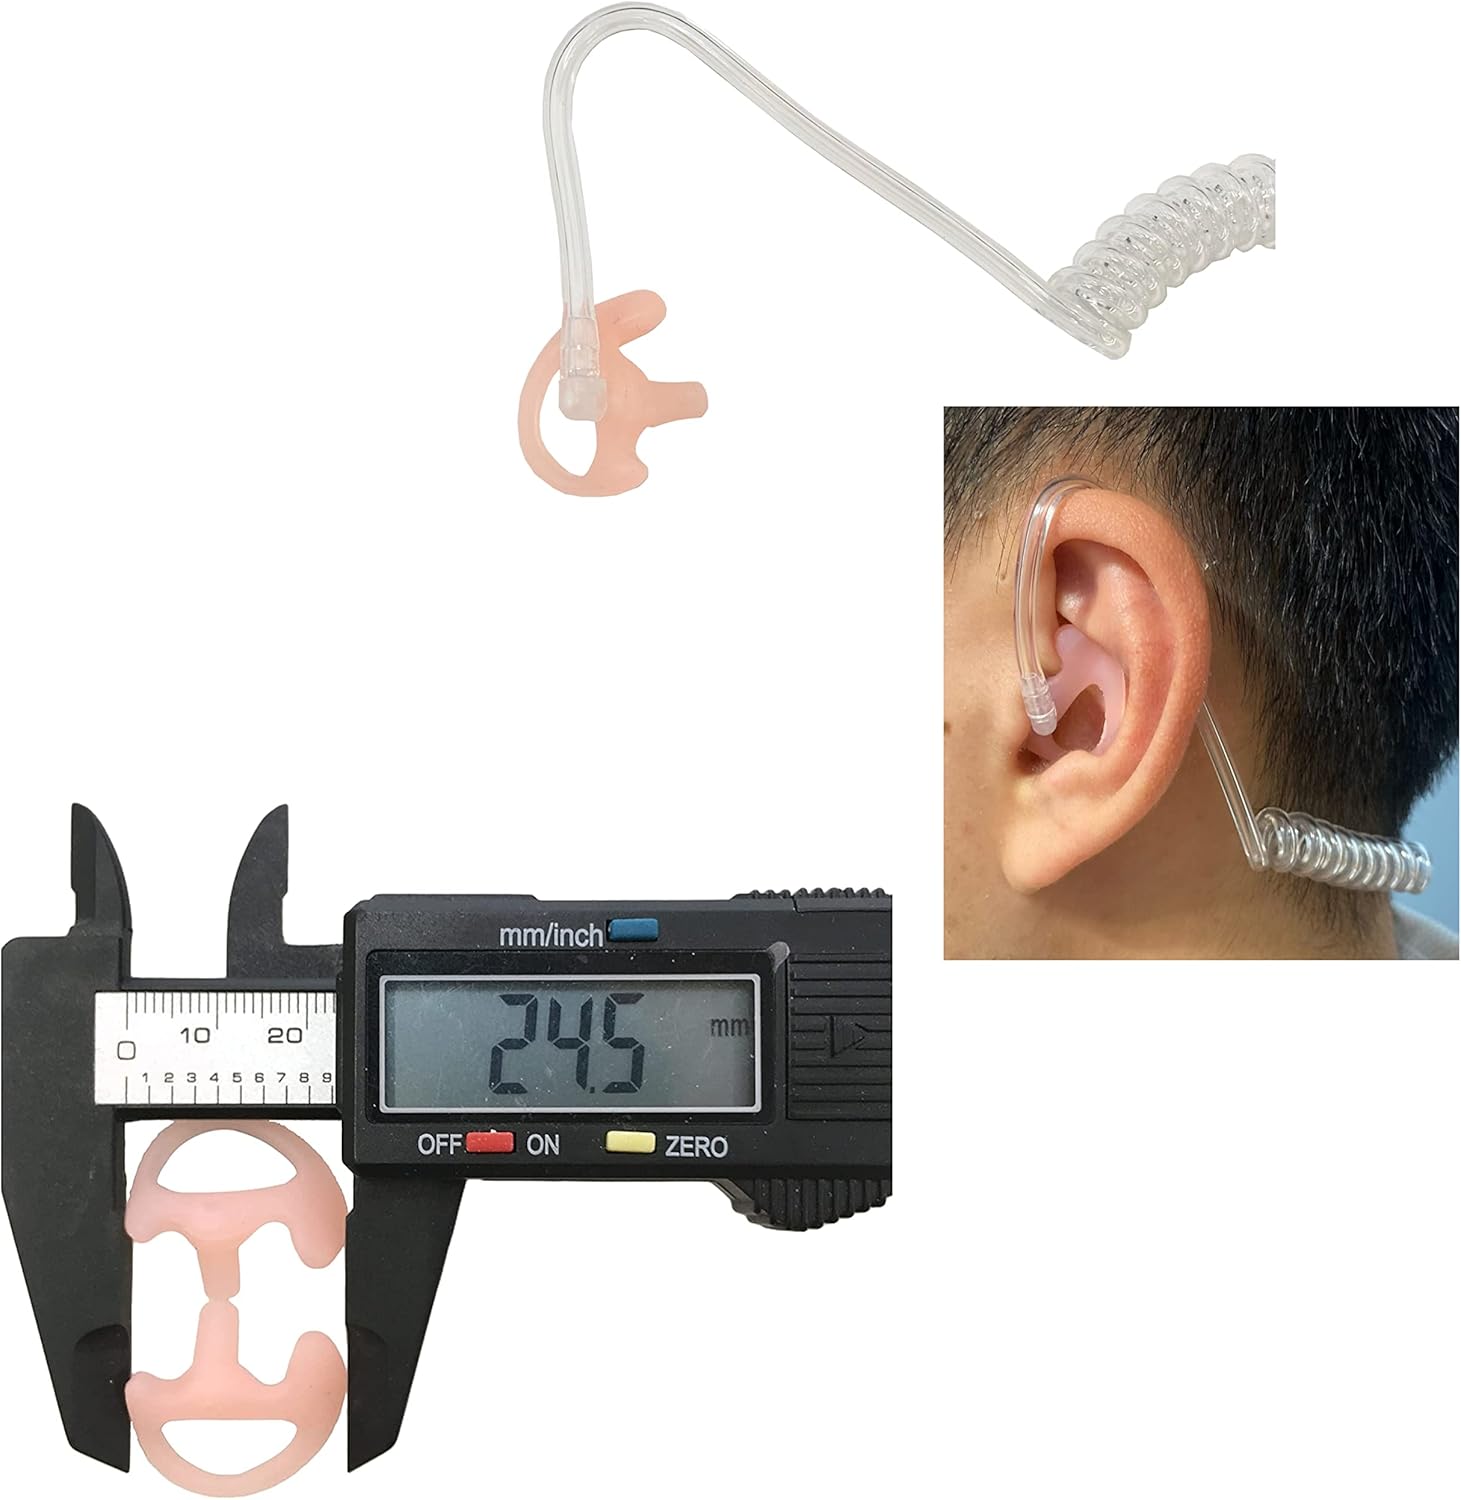
Figure 4: Various ear tips and the acoustic tube, highlighting replaceable components for hygiene and comfort.
Feilsøking
Hvis du støter på problemer med headsettet, kan du se følgende vanlige problemer og løsninger:
- No Audio / Intermittent Audio:
- Ensure the connector is fully and securely inserted into the radio port.
- Check the radio's volume settings.
- Inspect the acoustic tube for kinks or blockages.
- Verify the earpiece is compatible with your specific radio model.
- Unclear or Distorted Audio:
- Clean the acoustic tube and ear tip.
- Sørg for at mikrofonen ikke er blokkert og at den er riktig plassert.
- Sjekk om det er noen skader på kablene eller kontaktene.
- PTT Button Not Responding:
- Confirm the connector is firmly seated in the radio.
- Ensure the PTT button is not stuck or damaged.
Spesifikasjoner
| Trekk | Detalj |
|---|---|
| Modellnavn | XPR 3500e XPR 3300e (Compatible with XPR3300, XPR3000, XPR3300e, XPR3500, XPR3500e, DEP550, DEP500e) |
| Tilkoblingsteknologi | Kablet |
| Inkluderte komponenter | 2 x Ear Tip |
| Materiale | Polykarbonat (PC) |
| Spesifikke bruksområder for produktet | Professional/Industrial Use |
| Kabelfunksjon | Uttrekkbar |
| Kontrollmetode | Fjernkontroll (PTT) |
| Varevekt | 2.3 unser |
| Spesialfunksjon | Lett |
| Øreplassering | In Ear |
| Formfaktor | In Ear |
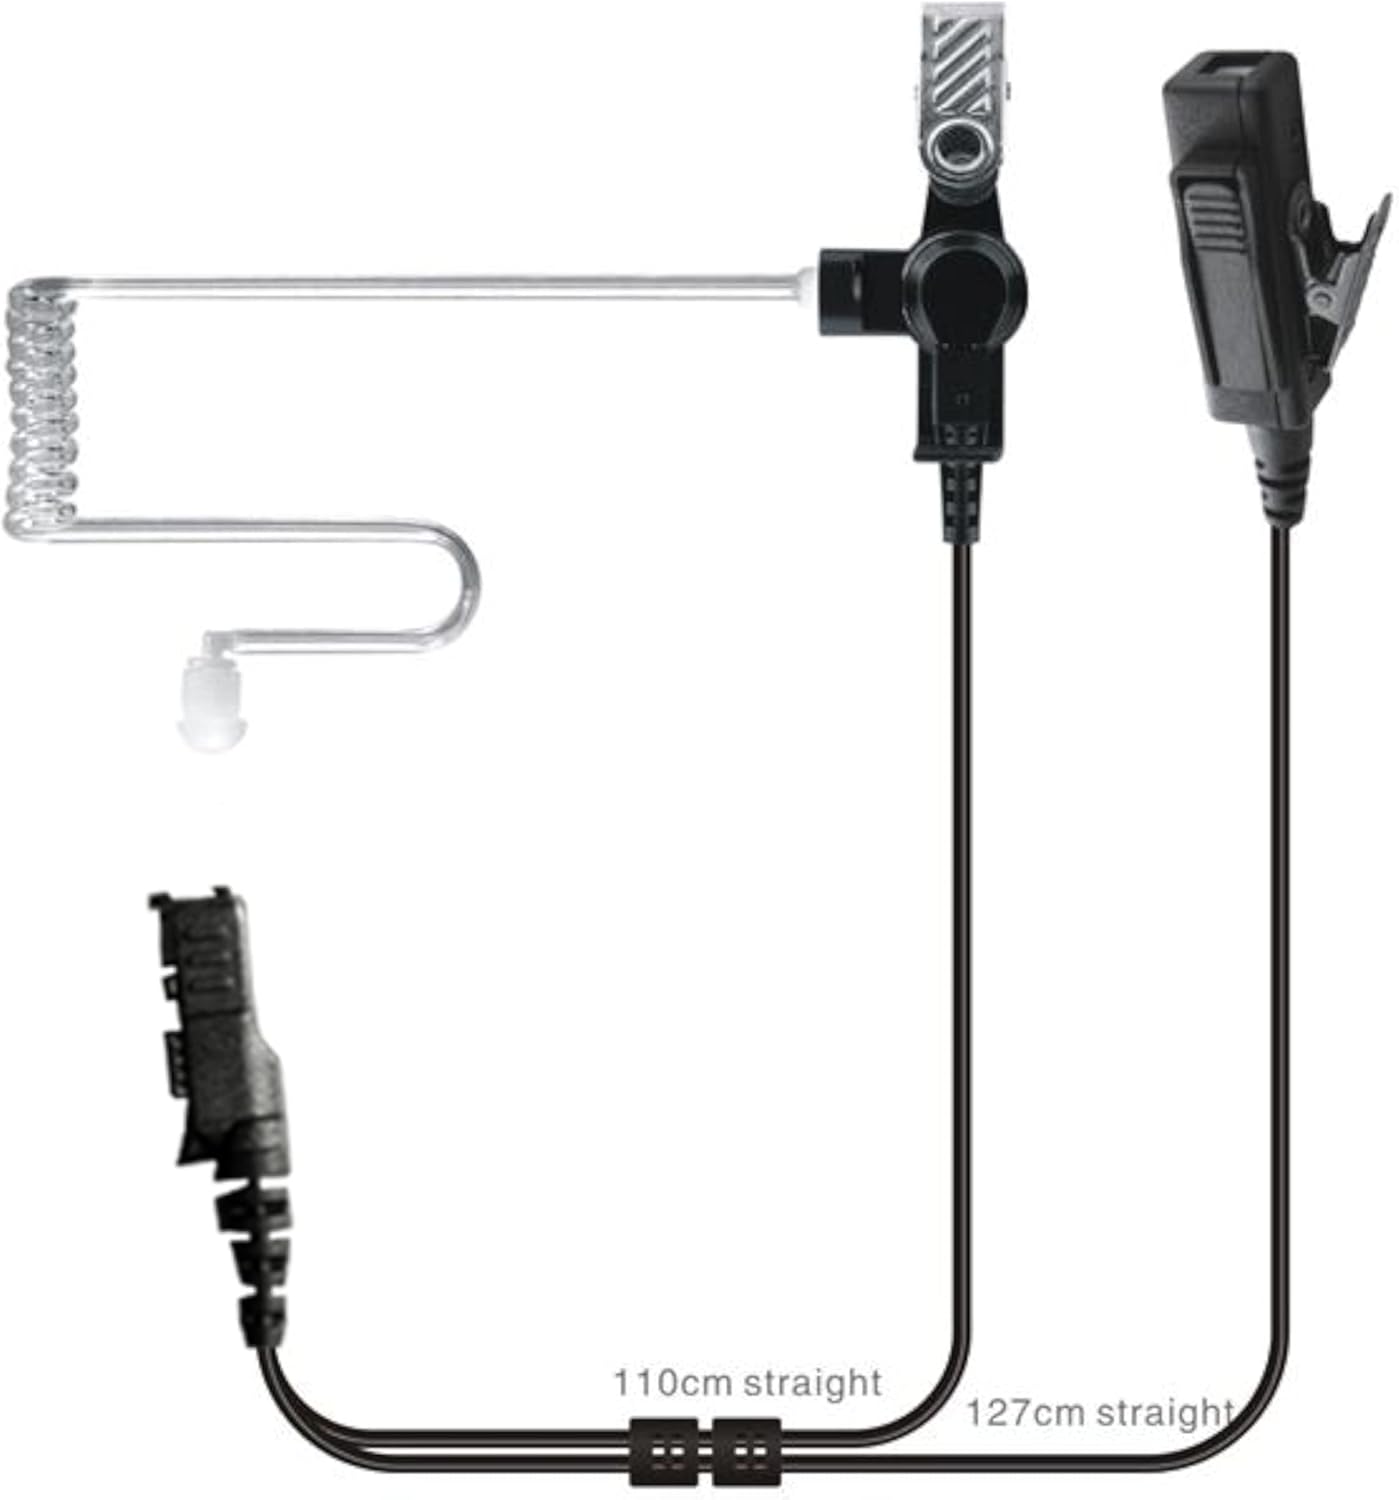
Figure 5: Cable length diagram for the 2-wire surveillance earpiece headset.
Garanti og støtte
MaximalPower is a USA-based brand committed to providing quality products and excellent customer service. This product comes with a manufacturer's warranty. For warranty claims, technical support, or any inquiries, please contact MaximalPower customer service directly.