1. Introduksjon
Thank you for choosing the KONKA Robot Vacuum Cleaner and Mop. This device is designed to provide efficient and convenient cleaning for various floor types, including hard floors and carpets. Featuring strong suction, remote control operation, and automatic charging, it simplifies your cleaning routine. Please read this manual thoroughly before use to ensure proper operation and maintenance.
2. Hva er i esken
Ved utpakking, vennligst sørg for at alle varene som er oppført nedenfor er til stede og i god stand:
- 1 x KONKA Robot Vacuum Cleaner
- 2 x sidebørster
- 1 x fjernkontroll (batterier ikke inkludert)
- 1 x Cleaning Mop Pad
- 1 x ladestasjon
- 1 x strømadapter
- 1 x brukerhåndbok (dette dokumentet)

Bilde: Alle komponenter er inkludert i produktpakken.
3. Produktfunksjoner
The KONKA Robot Vacuum Cleaner and Mop is equipped with several advanced features to enhance your cleaning experience:
- Kraftig sug: 1800Pa suction power effectively cleans dust, pet hair, and debris from various surfaces including wooden floors, tiles, marble, and carpets.
- Slank design: Its thin body allows it to easily clean under beds, sofas, and other low-clearance furniture.
- Forbedret mobilitet: Large diameter wheels facilitate climbing over obstacles and navigating different floor levels.
- Large Capacity Dust Box: Features a 650ml dust box with a built-in HEPA filter for double filtration and high dust interception.
- Lang batterilevetid: A 4400mAh high-performance lithium battery provides up to 90 minutes of cleaning time.
- Automatic Route Planning: Roboten planlegger intelligent rengjøringsruten sin for omfattende dekning.
- Auto-Recharge Function: The robot automatically returns to its charging dock when cleaning is complete or the battery is low.
- Anti-Impact and Fall Prevention: Equipped with sensors to detect obstacles and prevent falls from stairs or elevated surfaces.
- Feiing og mopping: Combines sweeping and mopping functionalities for a thorough clean.

Image: The KONKA Robot Vacuum Cleaner and Mop on a hard floor, demonstrating its compact design.

Image: The robot vacuum demonstrating its 1800Pa strong suction, capable of cleaning hair, particles, dust, and bacteria.

Image: Visual representation of the robot's automatic route planning, anti-fall sensors, and ability to navigate around obstacles.
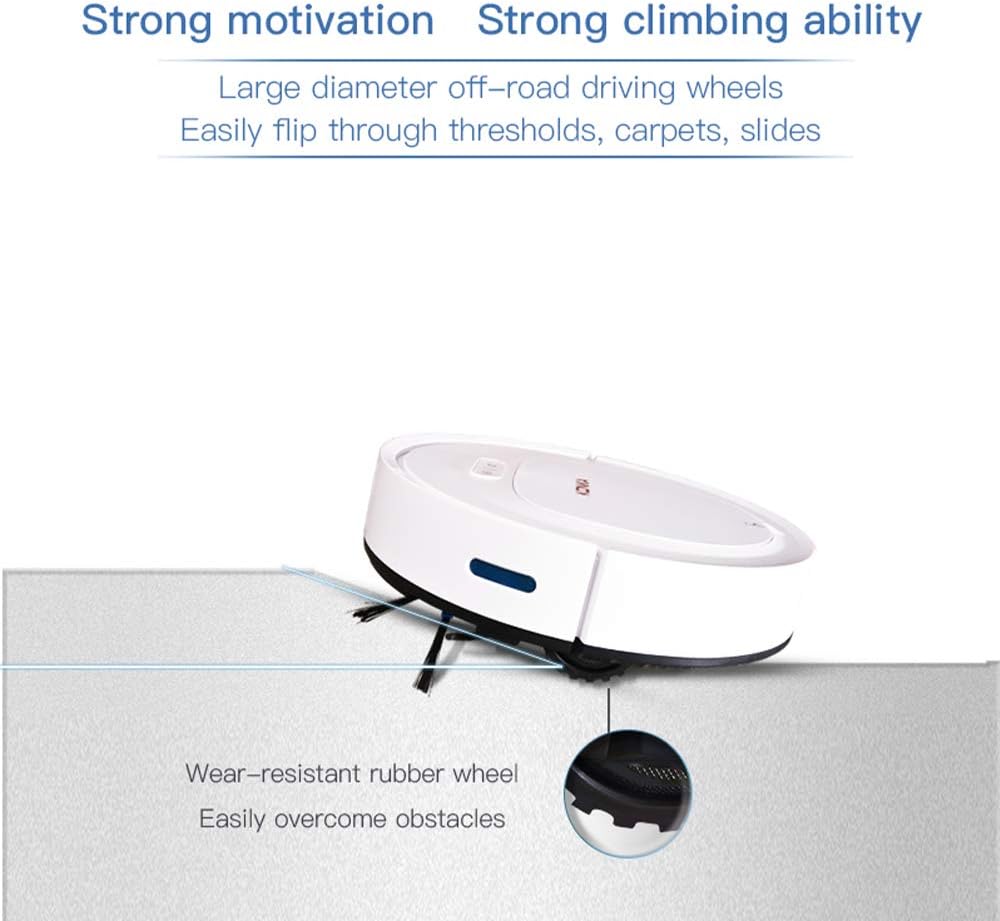
Image: The robot vacuum showcasing its strong climbing ability over thresholds and carpets, supported by wear-resistant rubber wheels.

Image: Illustration of the robot's large 4400mAh high-performance lithium battery, providing approximately 90 minutes of working time and covering about 100m².

Image: The robot vacuum's anti-impact sensors preventing collisions with furniture.

Image: The robot vacuum's fall prevention sensors detecting edges and avoiding drops.
Video: An official demonstration of the KONKA Robot Vacuum Cleaner and Mop's various cleaning modes, obstacle navigation, and mopping function.
4. Oppsett
- Pakk ut roboten: Ta robotstøvsugeren og alt tilbehør forsiktig ut av emballasjen. Fjern eventuell beskyttelsesfilm eller emballasjemateriale.
- Installer sidebørster: Attach the two side brushes to the designated posts on the bottom of the robot until they click into place.
- Position the Charging Dock: Place the charging dock against a wall in an open, uncluttered area. Ensure there is at least 1 meter (3 feet) of clear space on both sides and 2 meters (6 feet) in front of the dock for the robot to easily return and charge. Connect the power adapter to the charging dock and plug it into a power outlet.
- Innledende kostnad: Place the robot onto the charging dock, ensuring the charging contacts on the robot align with those on the dock. The indicator light on the robot will show charging status. For first-time use, charge the robot for at least 6 hours to ensure the battery is fully conditioned.
- Prepare for Mopping (Optional): If using the mopping function, dampen the cleaning mop pad and attach it to the bottom of the robot.

Image: The robot vacuum automatically docking for charging.
5. Bruksanvisning
- Slå på/av: Press and hold the power button on the robot for a few seconds to turn it on or off. The indicator light will illuminate when powered on.
- Start rengjøring: Press the power button once to start cleaning in automatic mode. The robot will begin cleaning and intelligently navigate your home.
- Bruk av fjernkontrollen: The remote control allows you to select different cleaning modes and direct the robot manually.
- Autorengjøring: Press the 'Auto' button for general cleaning.
- Rengjøring av flekker: Press the 'Spot' button to clean a specific area more intensely.
- Kantrengjøring: Press the 'Edge' button for cleaning along walls and corners.
- Manuell kontroll: Use the directional arrows to guide the robot.
- Tilbake til lading: Press the 'Home' button to send the robot back to its charging dock.
- Automatisk lading: When the battery level is low, or cleaning is complete, the robot will automatically return to the charging dock. Ensure the charging dock is powered on and accessible.

Image: The remote control used to operate the robot vacuum, enabling various cleaning modes and manual navigation.
6. Vedlikehold
Regelmessig vedlikehold sikrer optimal ytelse og forlenger levetiden til robotstøvsugeren din.
6.1. Cleaning the Dust Box and HEPA Filter
- Åpne toppdekselet på roboten.
- Remove the dust box by pulling it out.
- Åpne støvboksen og tøm innholdet i en søppelbøtte.
- Remove the HEPA filter and tap it gently to remove dust. The HEPA filter can be rinsed with water, but ensure it is completely dry before reinserting.
- Rinse the dust box with water if necessary, and allow it to air dry completely.
- Reassemble the HEPA filter and dust box, then reinsert into the robot.
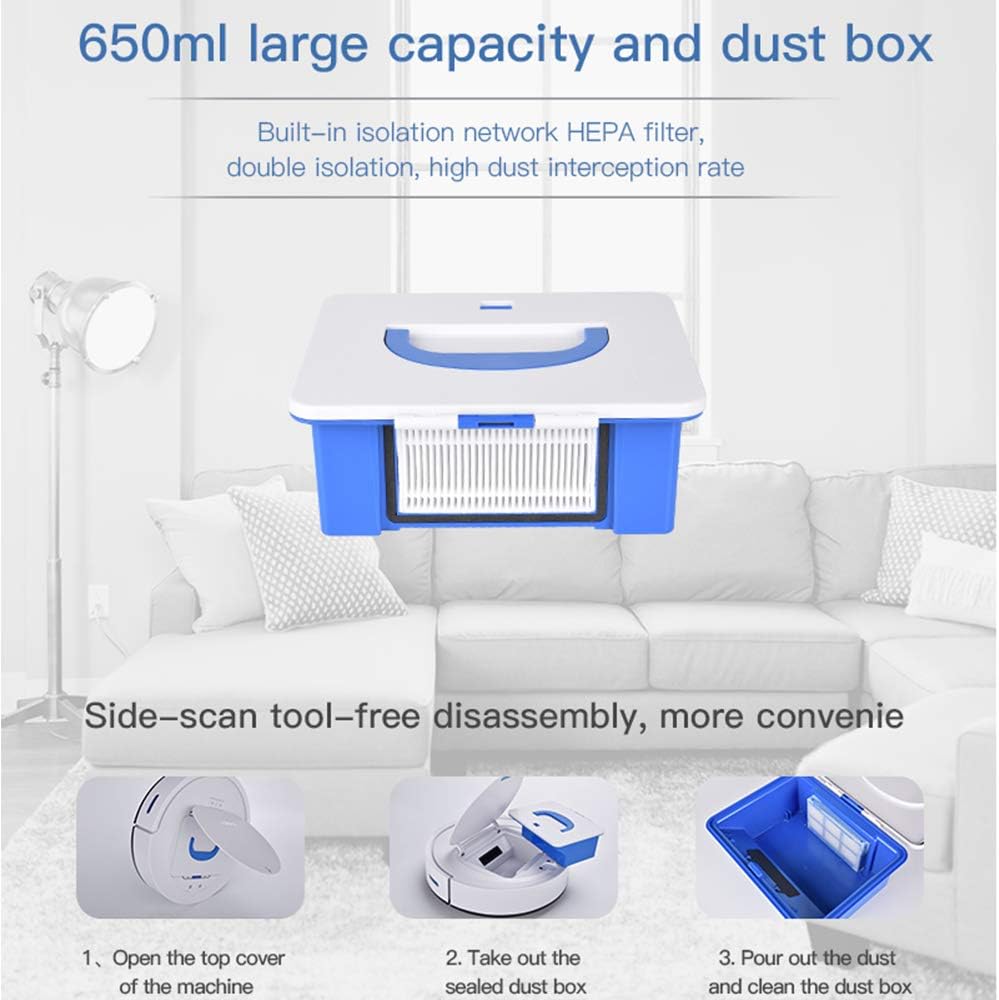
Image: The robot vacuum's 650ml dust box with a built-in HEPA filter, designed for easy removal and cleaning.


Image: Step-by-step guide for cleaning the dust box.
6.2. Rengjøring av sidebørster
Periodically check the side brushes for tangled hair or debris. Remove them by gently pulling upwards and clean any obstructions. Reinstall them firmly.
6.3. Rengjøring av sensorer
Wipe the cliff sensors (located on the bottom of the robot) and the anti-collision sensors (on the front bumper) with a clean, dry cloth to ensure they function correctly.
6.4. Cleaning the Mopping Pad
After each mopping session, remove the mopping pad, rinse it thoroughly with water, and allow it to air dry before reattaching.
7. Feilsøking
Hvis du støter på problemer med robotstøvsugeren din, kan du se følgende vanlige problemer og løsninger:
| Problem | Mulig årsak | Løsning |
|---|---|---|
| Roboten slår seg ikke på. | Lavt batteri; Av/på-knappen er ikke trykket riktig inn. | Lad roboten helt opp; Trykk og hold inne av/på-knappen i noen sekunder. |
| Roboten lader ikke. | Charging dock not powered; Contacts are dirty; Robot not properly docked. | Ensure charging dock is plugged in; Clean charging contacts on robot and dock; Re-dock the robot. |
| Dårlig rengjøringsevne. | Dust box full; Filter clogged; Side brushes worn or tangled. | Empty and clean dust box; Clean or replace filter; Clean or replace side brushes. |
| Roboten setter seg ofte fast. | Obstacles on the floor; Robot stuck on high thresholds. | Clear obstacles from cleaning path; Use virtual barriers if available; Manually move the robot. |
| Roboten faller ned trappen. | Cliff sensors are dirty or obstructed. | Clean cliff sensors with a dry cloth. |
Hvis problemet vedvarer etter at du har prøvd disse løsningene, kan du kontakte kundestøtte for ytterligere hjelp.
8. Spesifikasjoner
| Trekk | Spesifikasjon |
|---|---|
| Merke | KONKA |
| Modell | Robotstøvsuger og mopp |
| ASIN | B083K7CZDM |
| Sugekraft | 1800 Pa |
| Overflateanbefaling | Teppe, hardt gulv |
| Spesielle funksjoner | HEPA Filter, Wheels |
| Farge | Hvit |
| Kontrollertype | Fjernkontroll |
| Filtertype | Disk (HEPA) |
| Batterilevetid | 90 minutter |
| Batteritype | Litiumionbatteri (4400 mAh) |
| Støvkapasitet | 0.65 liter |
| Strømkilde | Batteridrevet |
| Varevekt | 2.29 kilo |
9. Garanti og støtte
KONKA products are manufactured to high-quality standards and come with a standard manufacturer's warranty. For specific warranty details, including coverage period and terms, please refer to the warranty card included in your product packaging or visit the official KONKA webnettstedet.
For technical support, troubleshooting assistance, or to inquire about replacement parts, please contact KONKA customer service through the contact information provided on the official website or your purchase platform. Please have your product model and ASIN (B083K7CZDM) ready when contacting support.