
Introduksjon
This manual provides detailed instructions for the assembly, operation, and maintenance of your Sunnydaze 10x13 Soft Top Patio Gazebo. Please read all instructions carefully before beginning assembly and retain this manual for future reference.

Image: Fully assembled Sunnydaze 10x13 Soft Top Patio Gazebo in tan.
Sikkerhetsinformasjon
ADVARSEL: Unnlatelse av å følge disse sikkerhetsinstruksjonene kan føre til personskade eller skade på produktet.
- Monter alltid lysthuset med minst to personer.
- Forsikre deg om at alle tilkoblinger er sikre før bruk.
- Do not use the gazebo in strong winds, heavy rain, or snow. Disassemble or secure the canopy during adverse weather conditions to prevent damage.
- Hold alle flammer og varmekilder unna lysthusets stoff. Stoffet er ikke brannsikkert.
- Ikke heng tunge gjenstander fra rammen.
- Supervise children around the gazebo.
- Periodically check all nuts and bolts for tightness.
- This gazebo is designed for temporary shade and shelter. It is not intended as a permanent structure.
Pakkeinnhold
Before assembly, verify that all components listed below are present and undamaged. If any parts are missing or damaged, contact customer support.
- 4 x ben
- 4 x føtter
- 8 x Beams
- 13 x Trusses
- 4 x Sidewalls
- 4 x Screens (Mosquito Netting)
- 2 x Peak Hubs
- 1 x Main Canopy
- 1 x Upper Canopy
- 4 x Long Net Poles
- 4 x Short Net Poles
- 1 x Hardware Kit (includes nuts, bolts, wrenches, etc.)
Monteringsveiledning
Assembly requires two people. Please follow these steps carefully. Refer to the diagrams for visual guidance.
Trinn 1: Monter grunnrammen
- Lay out the 4 legs and 4 feet on a flat, level surface.
- Attach the feet to the bottom of each leg using the provided hardware.
- Connect the 8 beams to the top of the legs to form the rectangular base structure. Ensure all bolts are finger-tight at this stage.
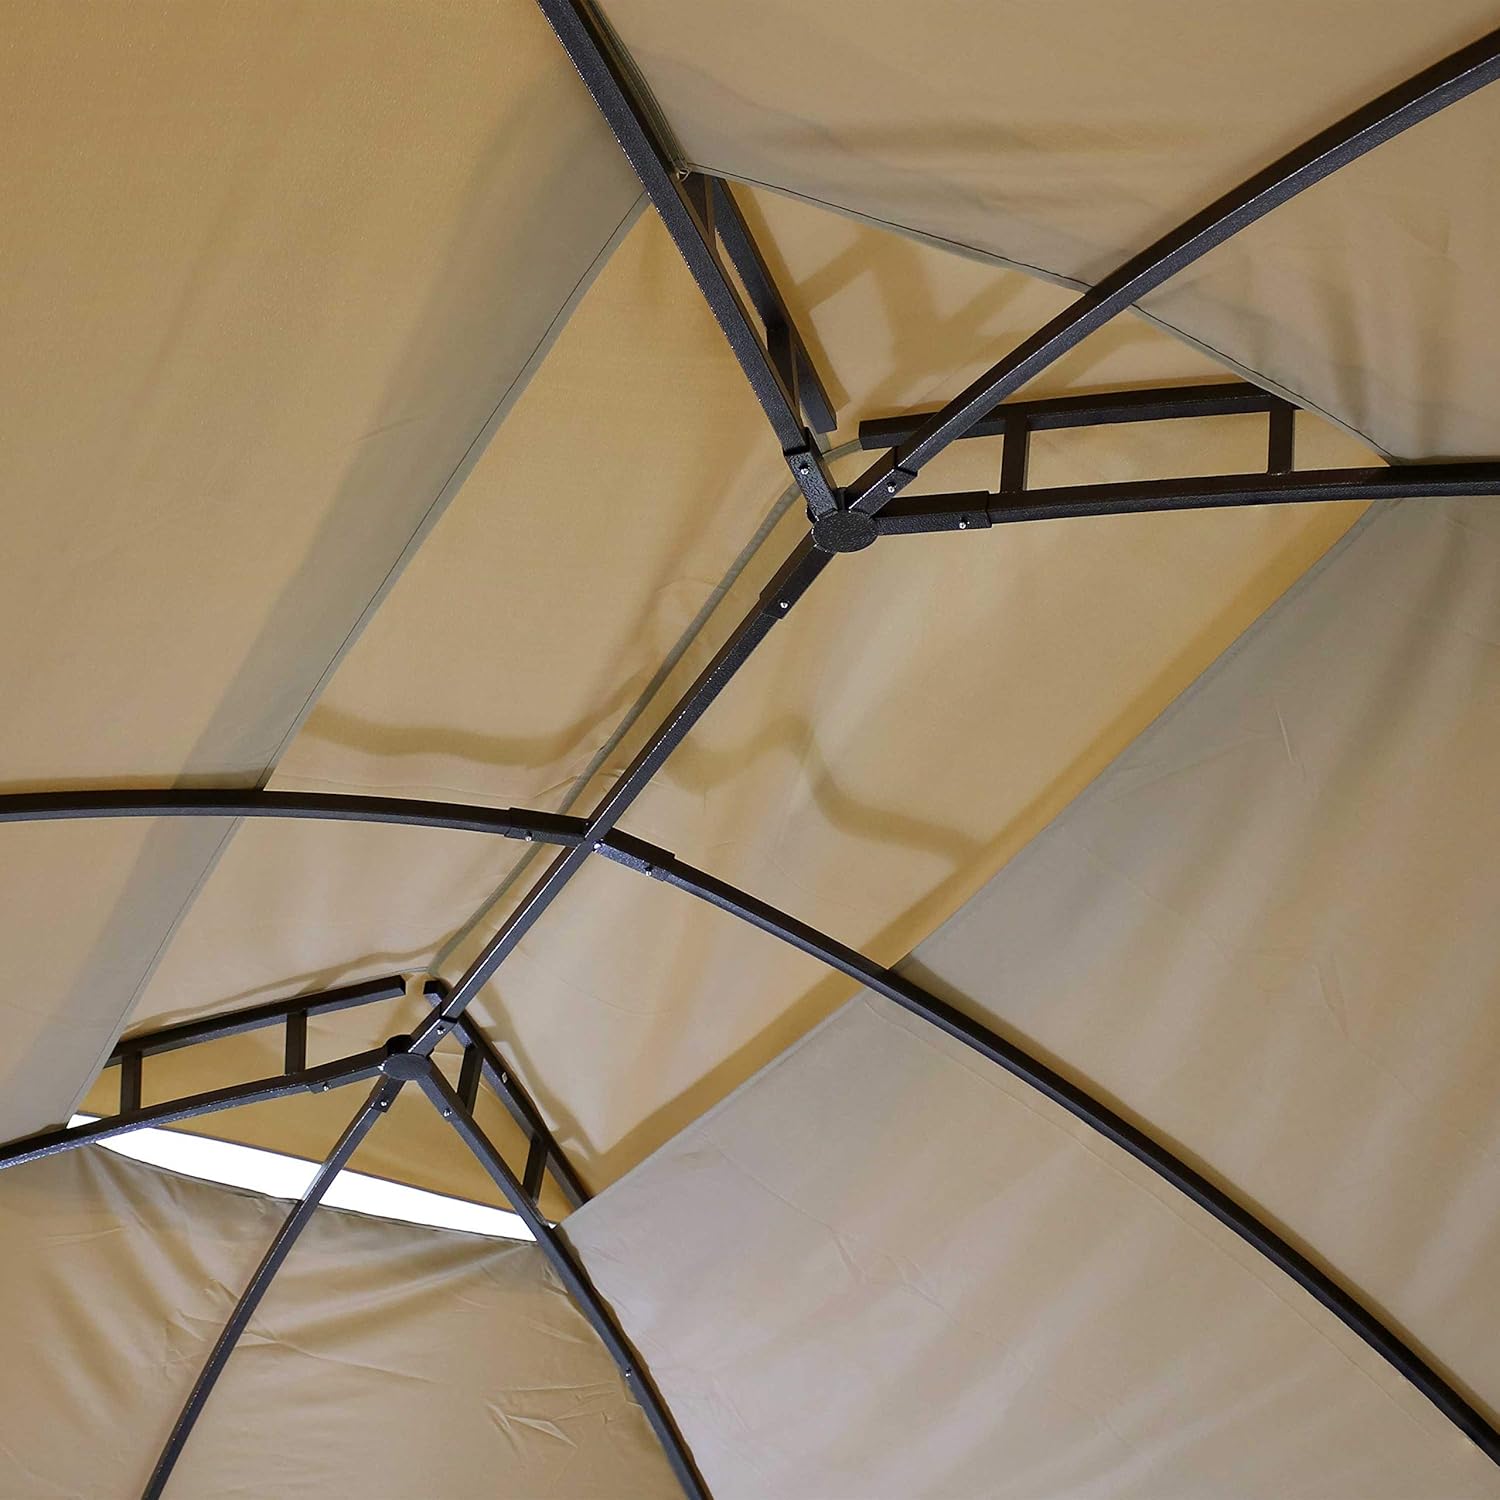
Bilde: Detaljert view of the steel frame structure.
Step 2: Install the Roof Trusses and Peak Hubs
- Attach the 13 trusses to the beams and connect them to the 2 peak hubs to form the roof structure.
- Sørg for at alle tilkoblinger er sikre.
Step 3: Attach the Canopies
- Carefully place the main canopy over the assembled roof frame. Ensure it is centered and all corners are aligned.
- Secure the main canopy to the frame using the integrated fasteners.
- Install the upper canopy onto the smaller top frame, ensuring it is properly seated for ventilation.

Image: Canopy fabric secured to the frame.
Step 4: Install Sidewalls and Screens
- Attach the long and short net poles to the frame as indicated in the diagram.
- Hang the 4 screens (mosquito netting) from the designated tracks or hooks on the frame.
- Hang the 4 sidewalls (privacy curtains) over the screens. The double zippers allow independent operation of screens and sidewalls.
- Use the fabric hook-and-loop fasteners to secure the sidewalls to the legs or tie them back when not in use.
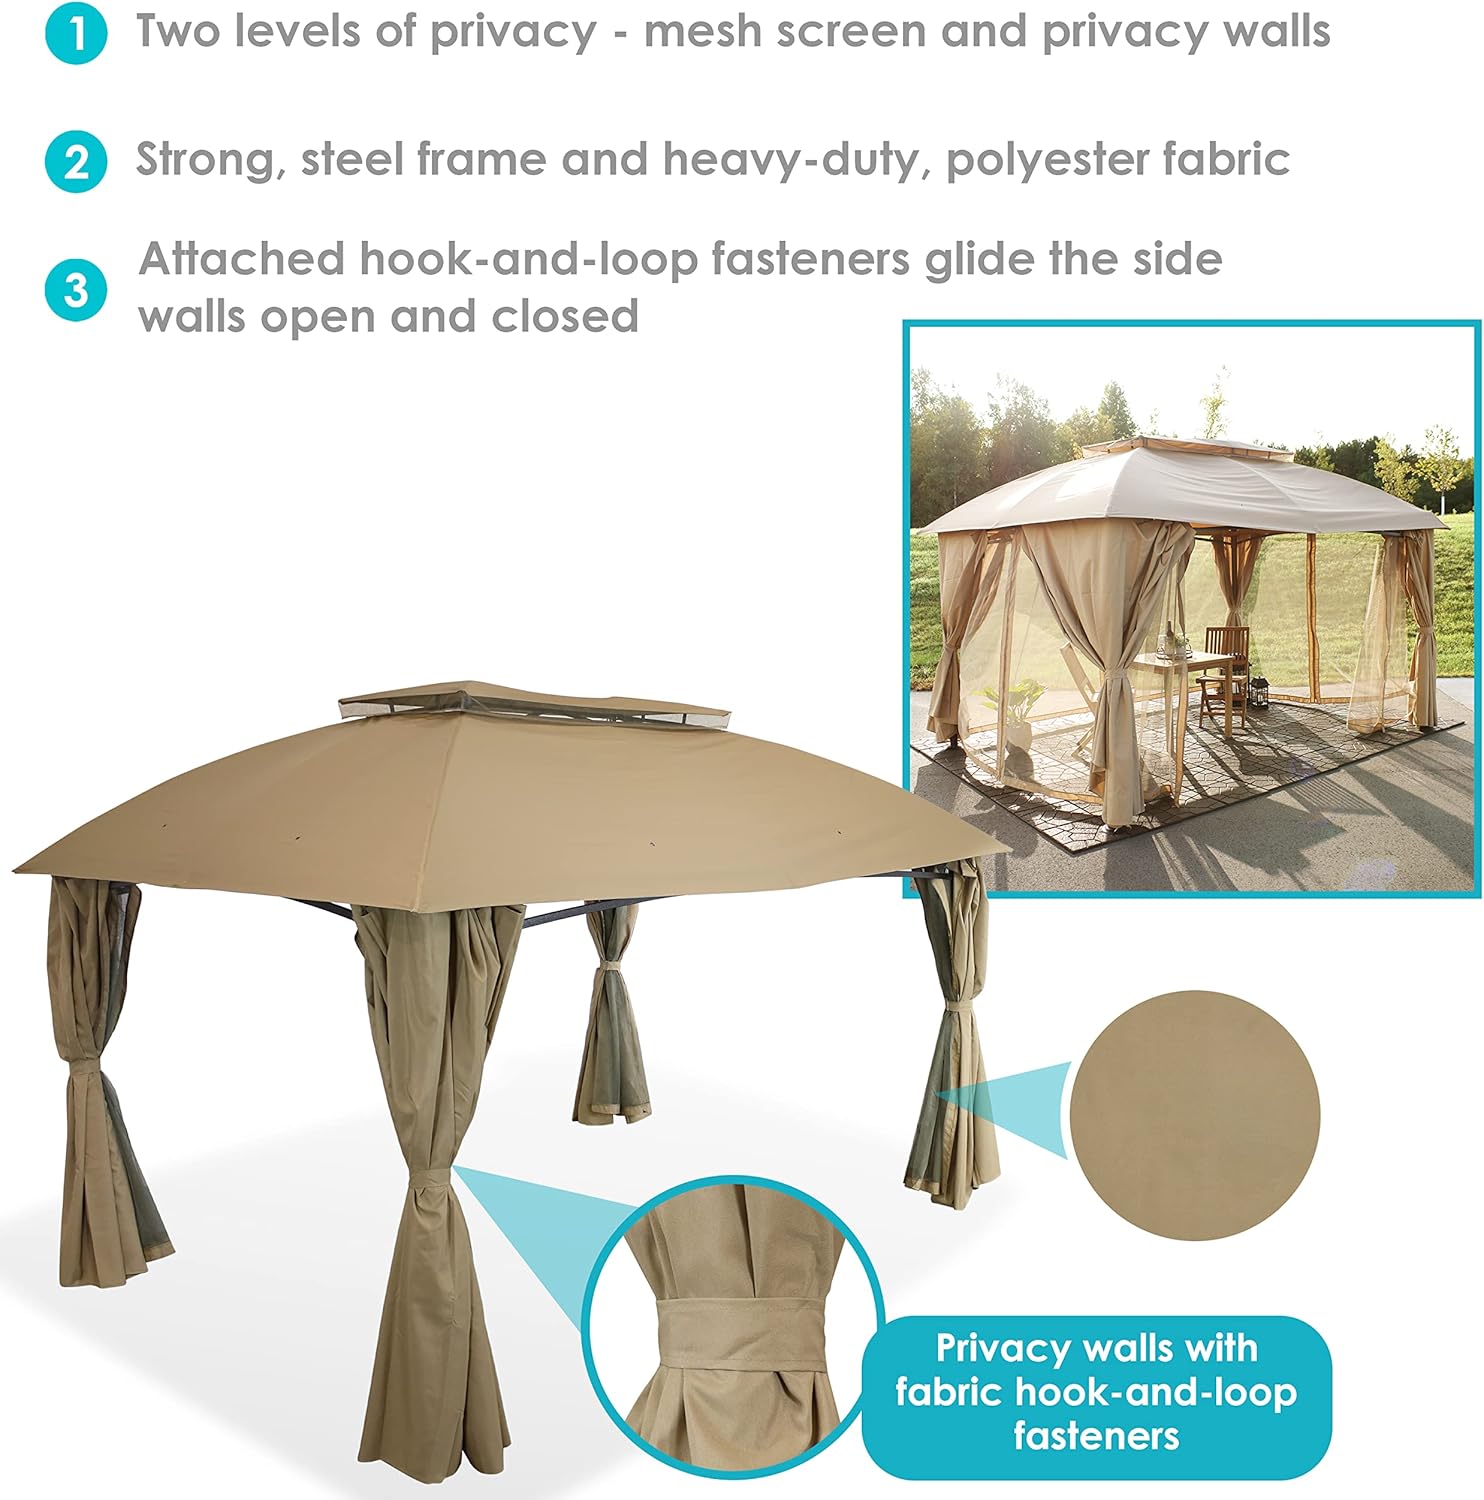
Image: Features of the gazebo including mesh screens and privacy walls.

Image: Detail of privacy wall with fabric hook-and-loop fastener.

Image: Visual comparison of screens versus privacy walls.
Trinn 5: Siste tilstramming
Once all components are in place, go back and fully tighten all nuts and bolts using the provided tools. Do not overtighten.
Bruksanvisning
Bruk av myggnett
The mesh screens are designed to provide ventilation while keeping insects out. They can be zipped closed for full enclosure or tied back to allow open access.
Using the Privacy Curtains
The privacy curtains offer additional shade and privacy. They can be pulled closed over the mesh screens and secured with zippers, or tied back to the gazebo legs using the integrated fabric fasteners when not needed.
Sikring av lysthuset
For added stability, especially in moderate weather, consider using stakes or weights (not included) to secure the gazebo feet to the ground.
Vedlikehold
Baldakinpleie
- Clean the polyester canopy fabric with mild soap and water. Do not use harsh chemicals or abrasive cleaners.
- Allow the canopy to air dry completely before folding and storing to prevent mildew.
- Remove the canopy during strong winds or heavy precipitation to prolong its lifespan.
Rammepleie
- Tørk av stålrammen med annonseamp klut for å fjerne skitt og rusk.
- Inspect the frame periodically for any signs of rust or damage. Touch up any scratches with rust-inhibiting paint if necessary.
- Ensure all bolts and connections remain tight.
Sesongbasert lagring
For prolonged periods of non-use or during winter months, it is recommended to disassemble the gazebo and store all components in a dry, protected area to prevent damage and extend product life.
Feilsøking
| Problem | Mulig årsak | Løsning |
|---|---|---|
| Canopy does not fit or is too tight. | Incorrect assembly of frame; canopy not stretched evenly; fabric shrinkage. | Ensure frame is assembled correctly and square. Try loosening frame connections slightly, fitting the canopy, then re-tightening. Allow fabric to stretch over time. |
| Vannansamling på kalesjen. | Canopy not taut enough; improper installation of upper canopy; heavy rainfall. | Ensure canopy is stretched tightly over the frame. Verify upper canopy is correctly positioned for drainage. Remove canopy during heavy rain. |
| Lysthuset føles ustabilt. | Løse forbindelser; ikke ordentlig forankret. | Check and tighten all bolts and connections. Use ground stakes or weights to secure the gazebo legs. |
| Zippers on sidewalls/screens stick or break. | Dirt or debris in zipper teeth; excessive force. | Clean zipper teeth with a small brush. Apply a zipper lubricant. Operate zippers gently. |
Spesifikasjoner

Image: Dimensional diagram of the gazebo.
| Trekk | Detalj |
|---|---|
| Merke | Sunnydaze |
| Modellnummer | CRE-168 |
| Product Dimensions (Overall/Roof) | 156" L x 116.5" B x 106.5" H |
| Frame Dimensions (Base) | 140" B x 105" D |
| Hodeklaring | 75.25" (103.5" at frame peak) |
| Skyggelagt område | Opptil 126.2 kvadratmeter |
| Varevekt | 106 pund |
| Rammemateriale | Alloy Steel (60mm) |
| Materiale for baldakin | 100 GSM Polyester |
| Farge | Tan |
| Vannmotstandsnivå | Ikke vannbestandig |
| UV-beskyttelse | UPF 30 |
| Montering påkrevd | Yes (Two people recommended) |
Garanti og støtte
Produsentens garanti
Sunnydaze Decor backs its products with a 1 års produsentgaranti fra kjøpsdatoen. Denne garantien dekker defekter i materialer og utførelse ved normal bruk.
Kundestøtte
For questions, missing parts, or warranty claims, please contact Sunnydaze Decor customer service. Refer to your purchase documentation or the official Sunnydaze Decor webnettstedet for oppdatert kontaktinformasjon.
Nettressurser: You may find additional support and product information on the Sunnydaze Decor Brand Store.