
1. Introduksjon
Thank you for choosing the IPOTOOLS OL-BKY26-A011A2 Portable Air Conditioner. This manual provides essential information for the safe and efficient operation, installation, and maintenance of your appliance. Please read it thoroughly before use and keep it for future reference.

Figur 1: Front view of the IPOTOOLS OL-BKY26-A011A2 Portable Air Conditioner. The unit is white with a black control panel on top and horizontal vents on the front.
2. Produktet er overview
The IPOTOOLS OL-BKY26-A011A2 is a versatile 3-in-1 portable air conditioner designed to provide cooling, ventilation, and dehumidification. It features a compact design, remote control operation, and an environmentally friendly R290 refrigerant.
Nøkkelfunksjoner:
- 3-i-1-funksjonalitet: Cooling, Ventilation, and Dehumidification.
- Kjølekapasitet: 9000 BTU (2600 W) suitable for rooms 12-40 m².
- Avfukting: Up to 52 liters per day.
- Temperaturområde: Justerbar fra 16 °C til 32 °C.
- Viftehastigheter: 2 levels (High, Low).
- Bekvemmelighet: 24-hour timer, Sleep mode, Remote control.
- kjølemiddel: Environmentally friendly R290.
- Støynivå: Approximately 65 dB in normal mode.
Komponenter:

Figur 2: Side view of the unit, showing its sleek, white design and integrated handle.

Figur 3: Tilbake view of the unit, showing the air intake and exhaust ports.

Figur 4: Fjernkontroll for praktisk betjening.

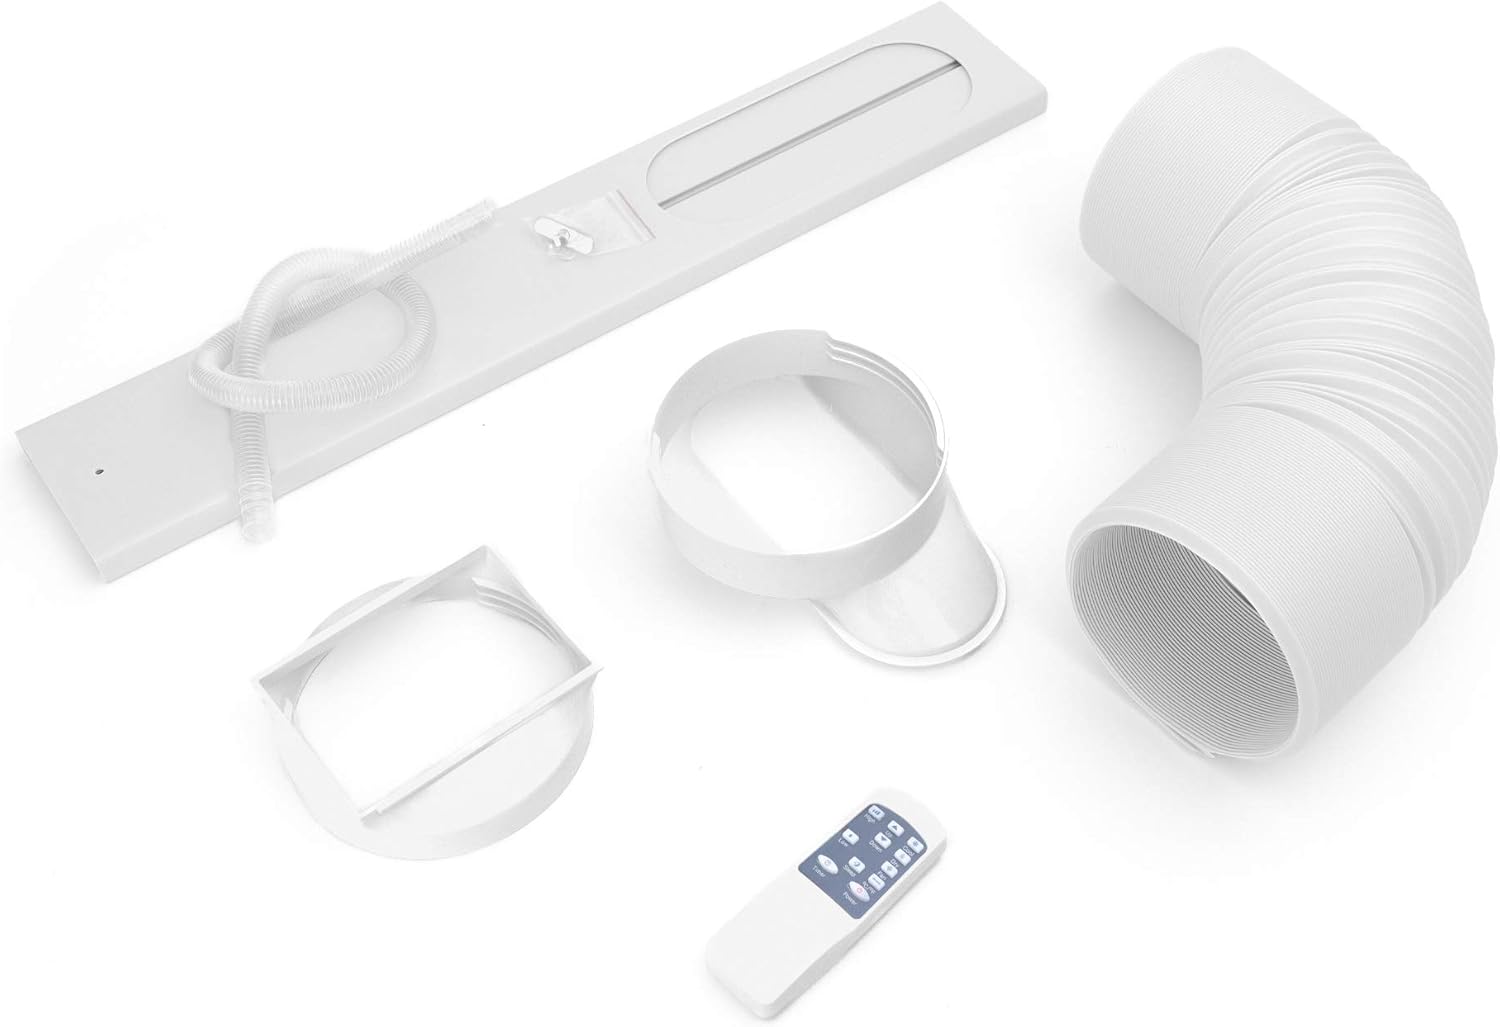
Figur 5: Included accessories: exhaust hose, window kit components, and remote control.
3. Spesifikasjoner
| Trekk | Spesifikasjon |
|---|---|
| Merke | IPOTOOLS |
| Modellnummer | OL-BKY26-A011A2 |
| Dimensjoner (L x B x H) | 37.3 x 40.1 x 80.6 cm |
| Kjølekapasitet | 9000 BTU (2600 W) |
| Energieffektivitetsklasse | A |
| Støynivå | 55 dB |
| Installasjonstype | Bærbar |
| Spesielle funksjoner | Avfukter |
| Farge | Hvit |
| Voltage | 230 volt (AC) |
| Wattage | 2600 watt |
| Kjølemiddel | R290 |
| Sesongbasert energieffektivitetsforhold (SEER) | 14 |
4. Oppsett
Proper setup is crucial for optimal performance and safety. Follow these steps for installation:
- Utpakking: Ta klimaanlegget og alt tilbehør forsiktig ut av emballasjen. Ta vare på emballasjen for senere oppbevaring eller transport.
- Plassering: Place the unit on a flat, stable surface. Ensure there is at least 30 cm (12 inches) of clear space around the unit for proper airflow. Do not block the air inlets or outlets.
- Installasjon av eksoslange:
- Attach one end of the exhaust hose to the air outlet on the back of the unit. Twist clockwise until secure.
- Assemble the window sealing kit according to the instructions provided with the kit.
- Extend the exhaust hose and attach the window kit adapter to the other end.
- Insert the window kit into a compatible window opening, ensuring a tight seal to prevent warm air from entering the room.

Figur 6: Unit with exhaust hose properly installed in a window.
- Strømtilkobling: Koble strømledningen til en jordet stikkontakt. Sørg for at volumet er riktig.tage matches the unit's requirements (230V AC).
5. Bruksanvisning
Your air conditioner can be operated using the control panel on the unit or the remote control.
Kontrollpanel:

Figur 7: Detaljert view of the control panel with various buttons and display.
- Strømknapp: Slår enheten PÅ eller AV.
- Modusknapp: Cycles through Cooling, Fan, and Dry (Dehumidification) modes.
- Temperaturjusteringsknapper (opp/ned): Adjusts the desired temperature (16-32°C).
- Viftehastighetsknapp: Velger mellom høy og lav viftehastighet.
- Timerknapp: Sets the 24-hour timer for automatic ON/OFF.
- Dvaleknapp: Activates Sleep mode for quiet operation and optimized temperature during sleep.
Fjernkontroll:
The remote control duplicates most functions of the control panel, allowing convenient operation from a distance.
Figur 8: Remote control layout.
Driftsmoduser:
- Kul modus: Provides cooling to the set temperature. The compressor will cycle ON/OFF to maintain the desired temperature.
- Viftemodus: Sirkulerer luft uten kjøling. Velg mellom høy og lav viftehastighet.
- Tørkemodus (avfukting): Reduces humidity in the room. The fan operates at a low speed, and the compressor cycles to remove moisture.
- Sove modus: Gradually increases the set temperature over several hours to ensure comfortable sleep while saving energy. The fan operates at a low speed.
6. Vedlikehold
Regelmessig vedlikehold sikrer klimaanleggets levetid og effektivitet.
Rengjøring av luftfilteret:
Luftfilteret bør rengjøres annenhver uke eller oftere, avhengig av bruk og luftkvalitet.
- Slå av enheten og trekk støpselet ut av stikkontakten.
- Locate the air filter panel on the back of the unit.
- Trekk forsiktig ut filteret.
- Vask filteret med varmt såpevann. Skyll grundig og la det lufttørke helt før du setter det inn igjen.
- Reinsert the dry filter and close the panel.
Figur 9: Removing the air filter for cleaning.
Drenering av kondensvann:
In high humidity conditions or when using Dry mode, the internal water tank may fill up. The unit will stop operating and display an error code when the tank is full.
- Slå av enheten og koble den fra.
- Plasser en grunn panne eller beholder under dreneringsporten nederst bak på enheten.
- Fjern gummiproppen fra dreneringsporten.
- Allow all the water to drain completely.
- Sett gummiproppen godt på plass igjen.

Figur 10: Draining condensed water from the unit.
7. Feilsøking
Før du kontakter kundestøtte, se følgende tabell for vanlige problemer og løsninger:
| Problem | Mulig årsak | Løsning |
|---|---|---|
| Enheten slår seg ikke på | Ingen strømforsyning | Sjekk om strømledningen er ordentlig koblet til og om stikkontakten fungerer. |
| Enheten kjøler ikke effektivt | Skittent luftfilter | Rengjør luftfilteret som beskrevet i vedlikeholdsdelen. |
| Vindussettet er ikke ordentlig forseglet | Ensure the exhaust hose and window kit are securely installed and sealed. | |
| Romstørrelsen er for stor | Ensure the unit's capacity matches the room size (12-40 m²). | |
| Vannlekkasje | Drainage plug loose or tank full | Check the drainage plug for tightness. Drain the water tank if full. |
| Høy støy under drift | Enheten står ikke på en jevn overflate | Plasser enheten på en flat, stabil overflate. |
8. Garanti og støtte
For warranty information, technical support, or to order replacement parts, please refer to the warranty card included with your product or visit the official IPOTOOLS webnettstedet. Ta vare på kjøpskvitteringen som kjøpsbevis.