1. Introduksjon
Thank you for choosing the CREATE SILKAIR CONNECT 3-in-1 Mobile Air Conditioner. This versatile appliance is designed to provide cooling, dehumidification, and fan functions for your living space. With its Wi-Fi connectivity, you can conveniently control the unit via a mobile application. Please read this manual thoroughly before operation to ensure safe and efficient use.
Modell: 64274_145198
Merke: SKAPE
2. Sikkerhetsinformasjon
Følg alltid grunnleggende sikkerhetsregler når du bruker elektriske apparater for å redusere risikoen for brann, elektrisk støt og skade.
- Sørg for at strømforsyningen samsvarer med voltage angitt på merkelappen.
- Ikke bruk enheten med en skadet ledning eller støpsel.
- Hold enheten borte fra varmekilder og direkte sollys.
- Ikke blokker luftinntak eller -uttak.
- Trekk alltid ut støpselet til enheten før rengjøring eller vedlikehold.
- Dette apparatet bruker kjølemiddel R290. Ikke punkter kjølemiddelkretsen.
- Hold oppsyn med barn og sørg for at de ikke leker med apparatet.
3. Pakkens innhold
Carefully unpack your air conditioner and check that all items are present and in good condition.
- CREATE SILKAIR CONNECT Mobile Air Conditioner Unit
- Eksosslange
- Window Sealing Kit (Adjustable window slider, hose adapter)
- Fjernkontroll
- Brukerhåndbok

Figure 1: The CREATE SILKAIR CONNECT Mobile Air Conditioner unit shown alongside a smartphone displaying its control application interface.
4. Produktet er overview
4.1 Kontrollpanel

Figure 2: Close-up of the top-mounted control panel, featuring an LED display and touch-sensitive buttons for various functions such as power, mode selection, fan speed, and timer.
4.2 Komponenter og dimensjoner
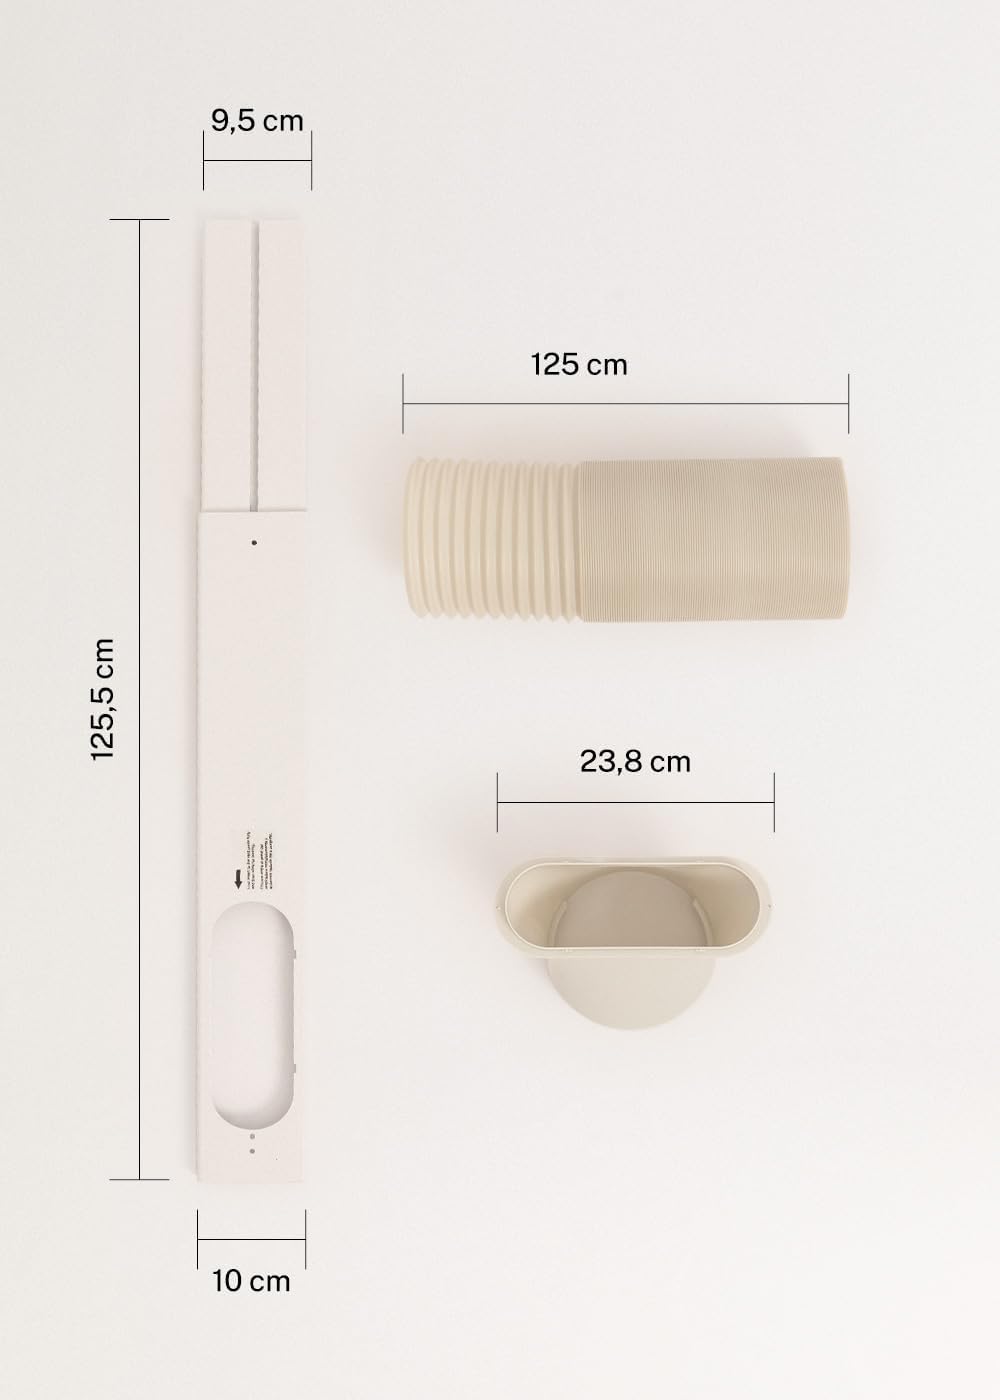
Figure 3: Detailed diagram illustrating the dimensions of the window sealing plate (125.5 cm length, 10 cm width, 9.5 cm adjustable width) and the exhaust hose (125 cm length) with its adapter (23.8 cm diameter).
5. Oppsett og installasjon
Proper installation is crucial for the efficient operation of your mobile air conditioner.
5.1 Plassering av enheten
- Plasser enheten på en flat, stabil overflate.
- Ensure there is at least 30 cm of space around the unit for proper airflow.
- Plasser enheten i nærheten av et vindu eller en åpning for avtrekksslangen.
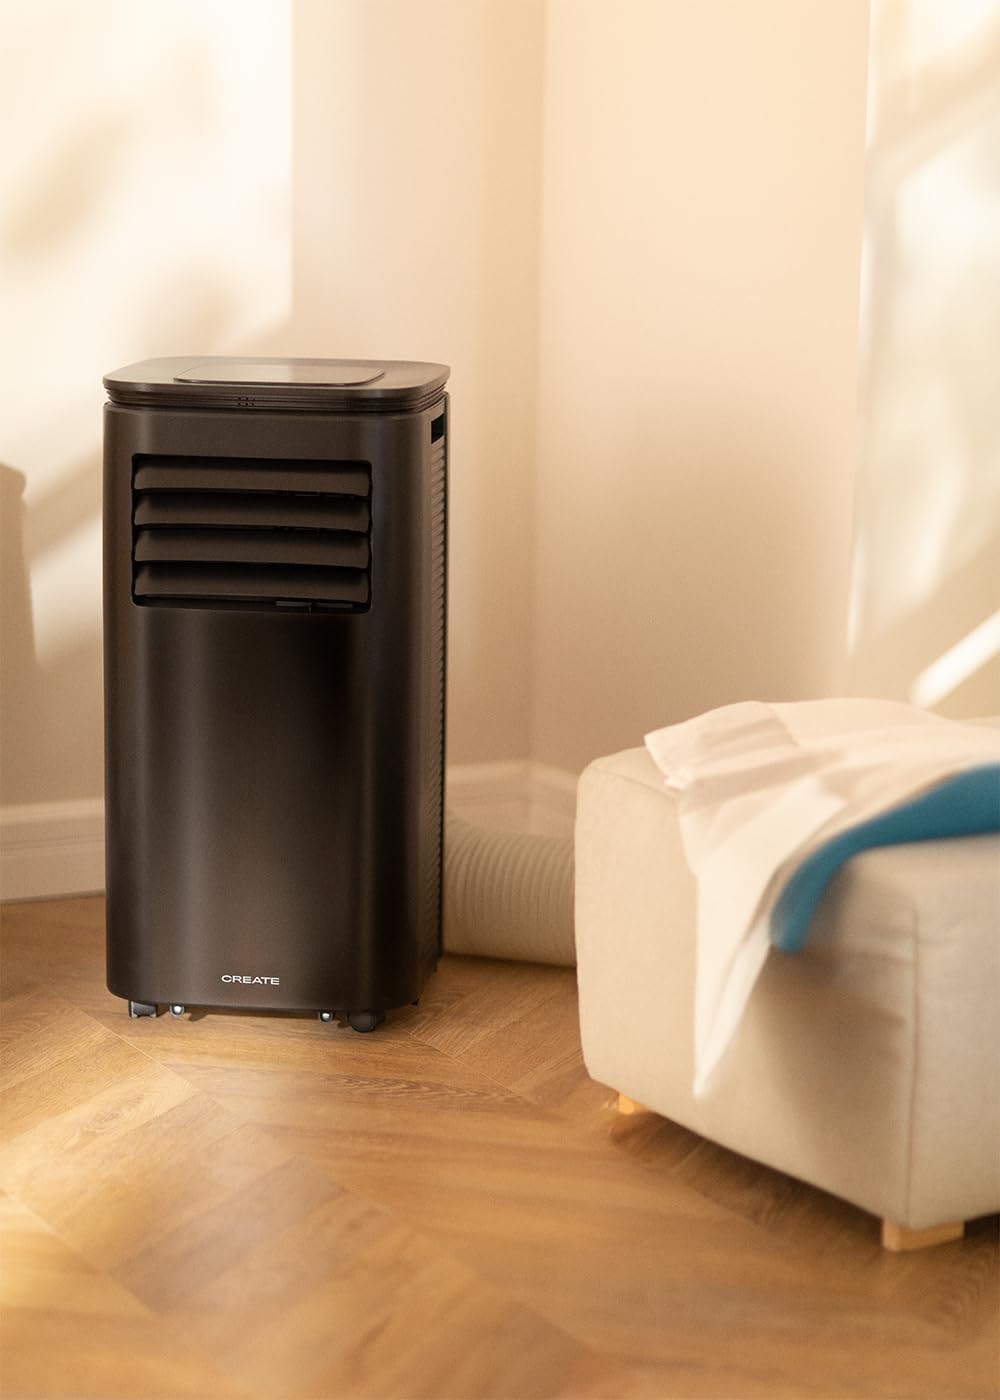
Figure 4: The air conditioner unit positioned in a room, demonstrating the typical setup with the exhaust hose directed towards a window for heat expulsion.
5.2 Installing the Exhaust Hose and Window Kit
- Attach the hose adapter to one end of the exhaust hose.
- Connect the other end of the exhaust hose to the air outlet on the back of the unit.
- Install the adjustable window sealing kit in your window opening. Extend it to fit the window frame.
- Insert the hose adapter into the opening of the window sealing kit.

Figure 5: Illustrates the secure connection of the flexible exhaust hose to the designated port at the rear of the air conditioning unit.
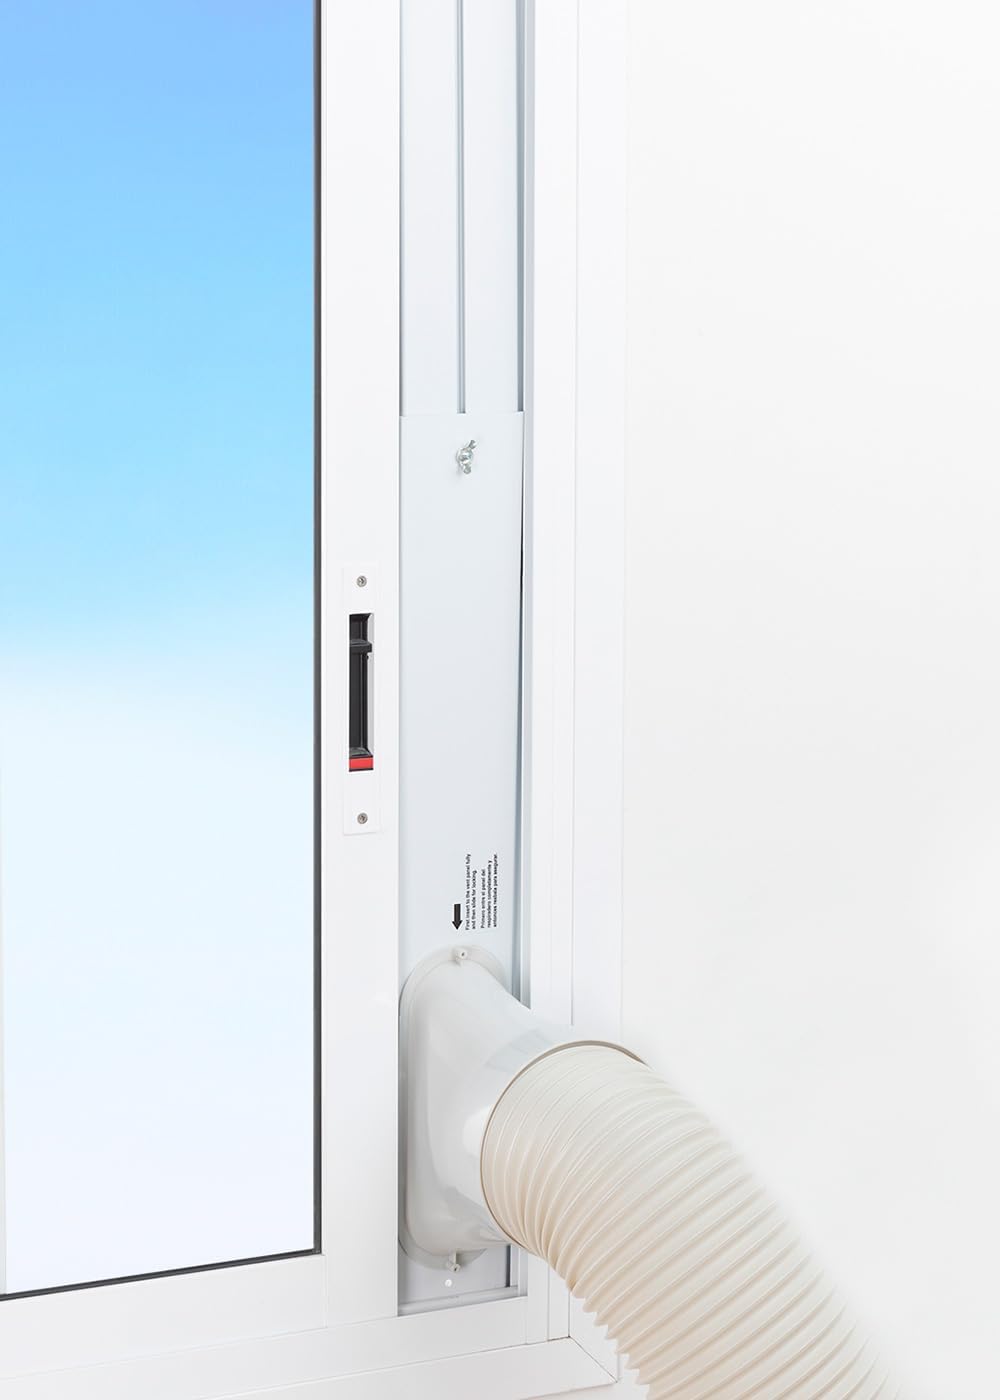
Figure 6: The window sealing kit is shown properly installed in a window frame, with the exhaust hose securely fitted into the kit's opening to vent hot air outside.
6. Bruksanvisning
6.1 Bruke kontrollpanelet
The control panel on top of the unit allows direct operation.
- Strømknapp: Trykk for å slå enheten PÅ eller AV.
- Modusknapp: Cycle through Cooling, Fan, and Dehumidifier modes.
- Viftehastighetsknapp: Adjust fan speed (Low, High).
- Temperaturknapper (+/-): Adjust desired temperature in Cooling mode.
- Timerknapp: Set the auto-on or auto-off timer (up to 24 hours).
- Dvalemodusknapp: Aktiverer en stillere driftsmodus for bruk om natten.
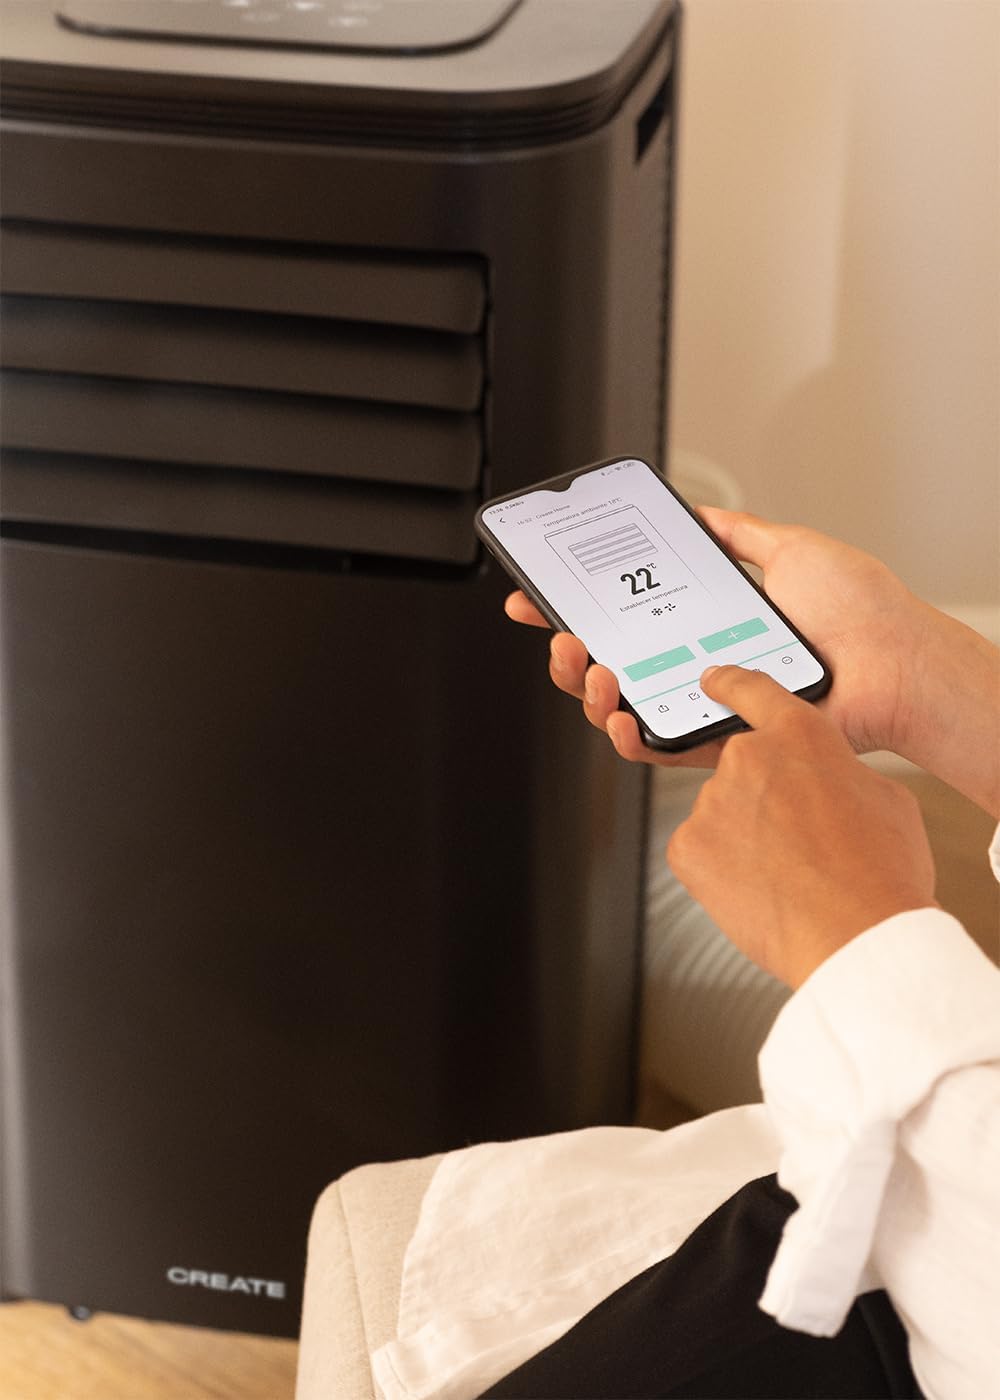
Figure 7: A user's hand interacting with the touch-sensitive control panel located on the top surface of the air conditioner, demonstrating direct manual operation.
6.2 Bruke fjernkontrollen
Fjernkontrollen gir praktisk betjening på avstand.

Figure 8: A hand holding the dedicated remote control for the air conditioner, illustrating its use for convenient operation from a distance.
6.3 Wi-Fi og appkontroll
Download the CREATE Home app from your smartphone's app store. Follow the in-app instructions to connect your air conditioner to your home Wi-Fi network. Once connected, you can control all functions of the unit from your smartphone, including mode selection, temperature adjustment, fan speed, and timer settings.
Figure 9: A user interacting with the mobile application on a smartphone to remotely control the air conditioner, showcasing the Wi-Fi connectivity feature.
7. Vedlikehold
Regelmessig vedlikehold sikrer optimal ytelse og forlenger levetiden til enheten din.
7.1 Rengjøre luftfilteret
Luftfilteret bør rengjøres annenhver uke eller oftere, avhengig av bruk og luftkvalitet.
- Slå av enheten og trekk støpselet ut av stikkontakten.
- Locate the air filter panel on the back of the unit.
- Fjern filteret forsiktig.
- Clean the filter with warm, soapy water or a vacuum cleaner. Rinse thoroughly and allow it to air dry completely before reinserting.

Figure 10: Demonstrates the process of removing the air filter from the rear of the air conditioner unit for cleaning or replacement.
7.2 Tappe vann
In Dehumidifier mode or high humidity conditions, the internal water tank may fill up. The unit will stop operating when the tank is full. Drain the water from the drainage port at the bottom rear of the unit.
8. Feilsøking
| Problem | Mulig årsak | Løsning |
|---|---|---|
| Enheten slår seg ikke på | Ingen strøm; Strømledningen er ikke koblet til; Vanntanken er full. | Check power outlet; Plug in power cord; Drain water tank. |
| Enheten kjøler ikke effektivt | Luftfilteret er skittent; Eksosslangen er ikke riktig installert; Rommet er for stort; Dører/vinduer er åpne. | Clean air filter; Ensure hose is sealed; Use in recommended room size (14-25 m²); Close doors/windows. |
| Høy lyd | Enheten står ikke på en flat overflate; Blokkering i viften. | Place on flat surface; Check for obstructions. |
| Problemer med Wi-Fi-tilkobling | Incorrect Wi-Fi password; Router too far; App issues. | Verify password; Move unit closer to router; Restart app/unit. |
9. Spesifikasjoner
| Trekk | Spesifikasjon |
|---|---|
| Modellnummer | 64274_145198 |
| Kjølekapasitet | 9000 BTU / 2270 Watt |
| Avfuktingskapasitet | 24 liter/dag |
| Luftstrøm | Opptil 350 m³/t |
| Anbefalt romstørrelse | 14-25 m² |
| Støynivå | 65 dB |
| Kjølemiddel | R290 (ECO-friendly) |
| Voltage | 240 volt |
| Wattage | 2600 watt |
| Dimensjoner (L x B x H) | 35.5 x 36.5 x 71.3 cm |
| Materiale | ABS |
| Energieffektivitetsklasse | A |

Figure 11: The energy efficiency label for the CREATE SILKAIR CONNECT, indicating an A-class energy rating, 2.6 kW cooling capacity, and a noise level of 65 dB. More details can be found at eprel.ec.europa.eu/qr/1580267.
10. Garanti og støtte
For warranty information and technical support, please refer to the warranty card included with your product or visit the official CREATE webnettstedet. Ta vare på kjøpskvitteringen som kjøpsbevis.
Produsent: SKAPE
Kontakt: Refer to CREATE's official support channels.