Ortis B09697ZDYF
Ortis Electronic Adjustable Sump Pump Switch Controller User Manual
Model: B09697ZDYF
Introduksjon
This manual provides detailed instructions for the installation, operation, and maintenance of your Ortis Electronic Adjustable Sump Pump Switch Controller. Designed with dual sensors, this controller is suitable for various applications such as sewage pits, fish tanks, and water tanks, operating on both 220V and 110V AC power supplies. Please read this manual thoroughly before use to ensure proper function and safety.
Produkt overview
The Ortis Sump Pump Switch Controller features an intelligent design for precise water level management. It includes LED indicators for operational status, offers multiple operating modes (Water Mode for replenishment, Drain Mode for drainage), and incorporates overload protection for enhanced safety and durability. The adjustable sensors allow for flexible water level settings.

Figur 1: Foran view of the Ortis Water Level Controller, highlighting LED indicators, Water Mode, Drain Mode, Compatibility, and Overload Protection features.

Figure 2: Operational diagram illustrating how the Hi-Lo pump switch functions in sewage pits, showing pump activation when water reaches the 'Hi' sensor and deactivation when it drops below the 'Lo' sensor.

Figure 3: Operational diagram demonstrating the Hi-Lo pump switch's function in fish tanks, where the pump activates when water is below the 'Lo' sensor and turns off when it reaches the 'Hi' sensor, suitable for water replenishment.
Oppsett
Proper setup is crucial for the optimal performance of your Ortis Water Level Controller. Follow these steps carefully:
- Monter kontrolleren: The main control unit can be mounted on a wall using screws or a strong adhesive hook. Ensure it is in a dry, accessible location, away from direct water exposure.
- Connect the Sensors: The dual sensors are adjustable and can be positioned between 0.5 inches and 20 inches apart. Attach them to a stable surface within the water container (e.g., sump pit, tank wall) using zip ties or the provided suction cups for fish tanks. Ensure the 'Hi' sensor is positioned at the desired maximum water level and the 'Lo' sensor at the desired minimum water level.
- Koble til pumpen: Plug your sump pump or other water pump into the designated outlet on the controller unit.
- Strømtilkobling: Plug the controller's power cord into a suitable 220V or 110V AC power outlet.
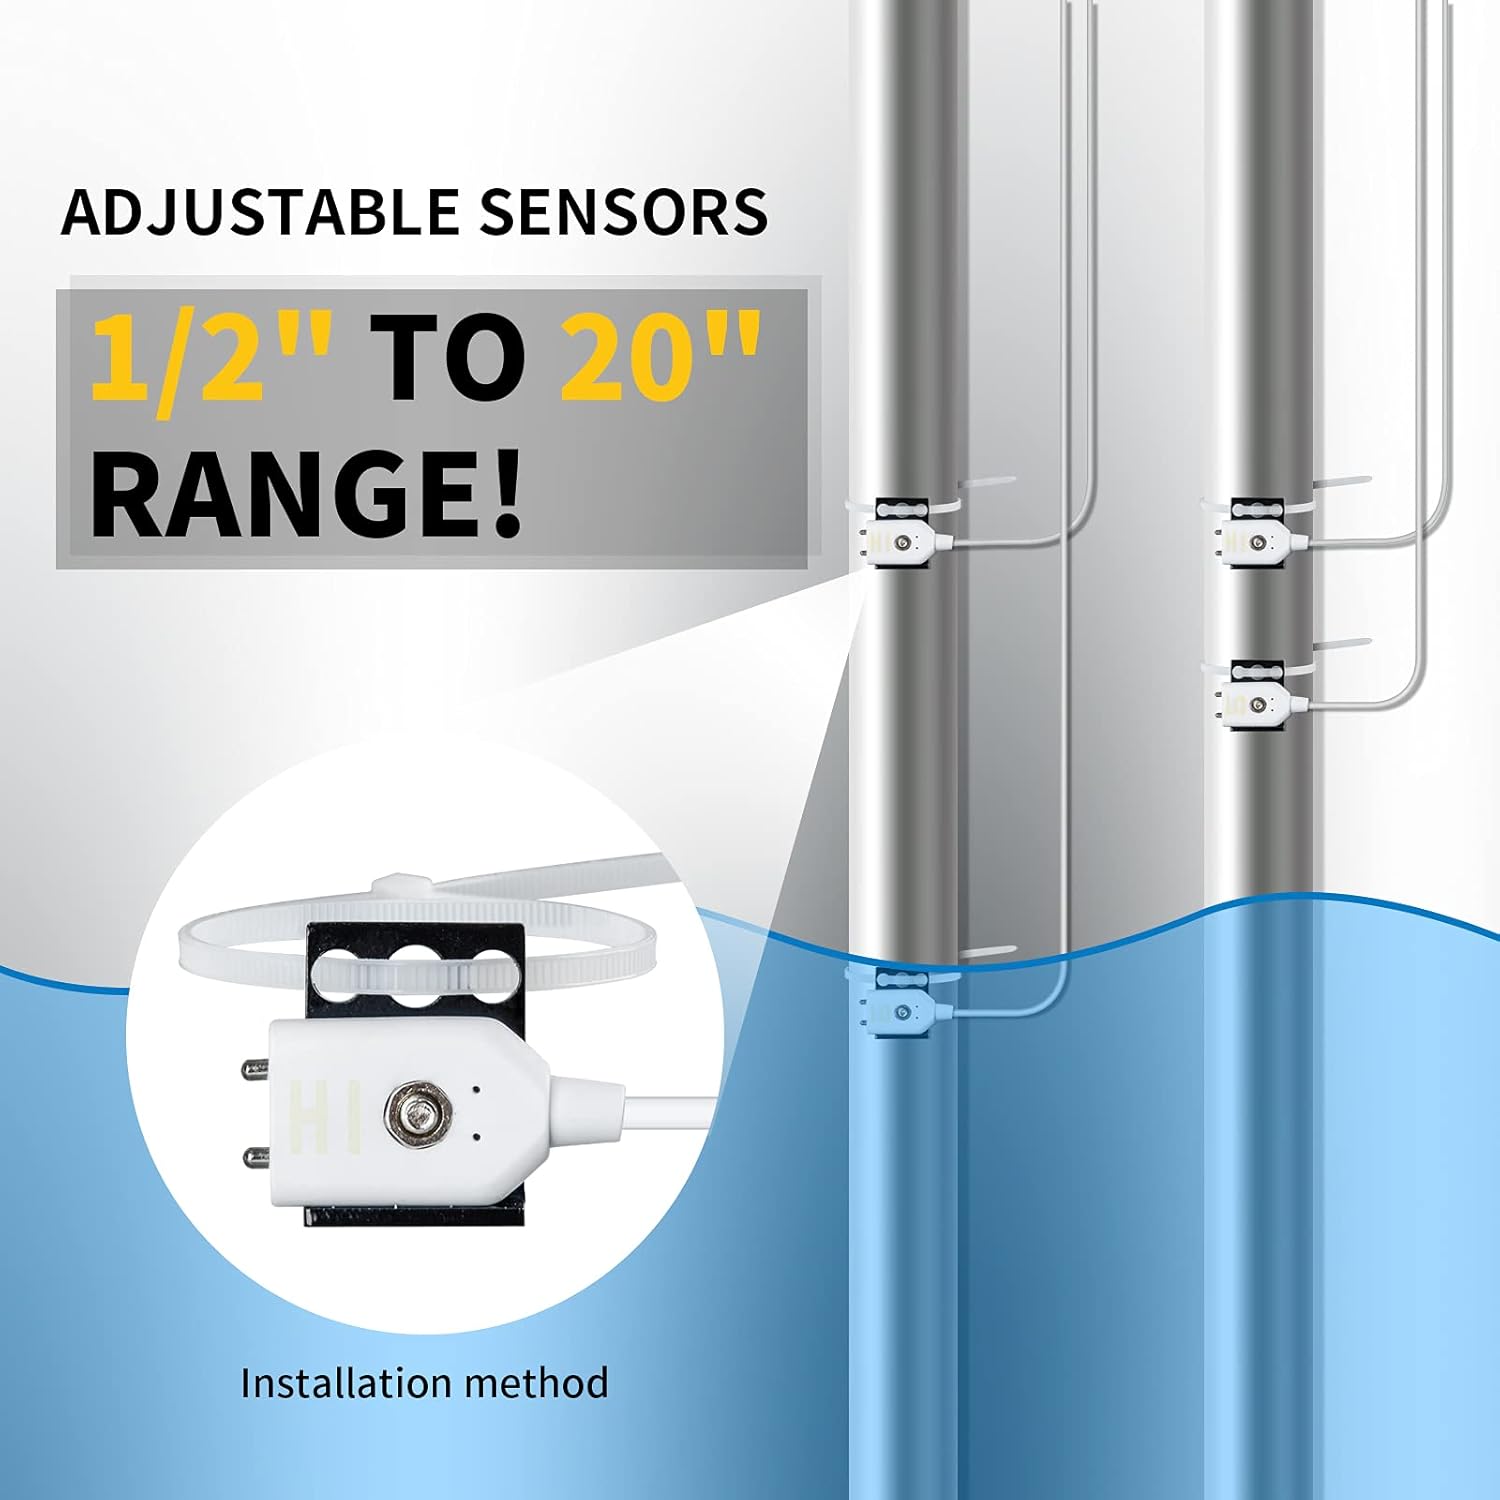
Figure 4: Close-up of the adjustable sensors, demonstrating their flexible range and a typical installation method using zip ties.

Figure 5: Illustration of two primary installation methods for the control unit: direct wall mounting with screws and attachment using an adhesive hook.

Figur 6: Et eksample diagram showing the complete installation of the Ortis controller and sensors within a typical basement sump pit setup.
Bruksanvisning
The Ortis Water Level Controller offers intuitive operation with distinct modes for different applications:
- Dreneringsmodus: Ideal for drainage applications like sump pits or sewage pits. In this mode, the pump activates when the water level reaches the 'Hi' sensor and continues to pump until the water level drops below the 'Lo' sensor.
- Vannmodus: Suitable for water replenishment in applications such as fish tanks or water towers. In this mode, the pump activates when the water level drops below the 'Lo' sensor and fills until it reaches the 'Hi' sensor.
- Manuell overstyring: The controller typically features an AUTO/OFF/ON switch. Use 'AUTO' for automatic operation based on sensor readings. 'ON' will continuously run the pump, and 'OFF' will keep it off, regardless of water levels.
- Alarmfunksjon: The unit is equipped with an alarm to alert users to potential issues, such as a pump failure or prolonged high water levels. A 'Mute' button is usually available to silence the alarm temporarily.
Refer to the LED indicators on the control unit for current operational status and alerts.
Vedlikehold
Regular maintenance ensures the longevity and reliable operation of your Ortis Sump Pump Switch Controller:
- Sensorrengjøring: Periodically inspect and clean the sensors to prevent buildup of debris, sludge, or mineral deposits, which can interfere with accurate water level detection. Use a soft cloth and clean water.
- Kabelinspeksjon: Check all cables and connections for any signs of wear, damage, or corrosion. Ensure they are securely plugged in.
- Enhetsplassering: Confirm the main control unit remains in a dry environment. If exposed to moisture, dry it thoroughly and relocate if necessary.
- Testoperasjon: Regularly test the system by manually raising or lowering water levels to trigger the pump and ensure the sensors and pump respond correctly.
Feilsøking
If you encounter issues with your controller, refer to the following common troubleshooting steps:
| Problem | Mulig årsak | Løsning |
|---|---|---|
| Pump not activating/deactivating | Dirty or improperly placed sensors, power outage, pump malfunction, incorrect mode selection. | Clean sensors, verify sensor placement, check power supply, inspect pump, ensure correct operating mode (Drain/Water). |
| Alarm sounding continuously | Water level not receding (Drain Mode) or not filling (Water Mode) within expected time, sensor issue, pump failure. | Check pump operation, inspect sensors for blockages, verify power to pump, press 'Mute' to silence temporarily while investigating. |
| Controller unit not powering on | No power to outlet, damaged power cord. | Check power outlet with another device, inspect power cord for damage. |
Spesifikasjoner
- Merke: Ortis
- Modell: B09697ZDYF
- Farge: Svart
- Voltage: 220/110 volt (vekselstrøm)
- Materiale: Stainless Steel (sensors)
- Varevekt: 1.1 pund
- Antall enheter: 1.0 telling
- Visningstype: LED
- Adjustable Sensor Range: 0.5" to 20" (approximate, based on images)
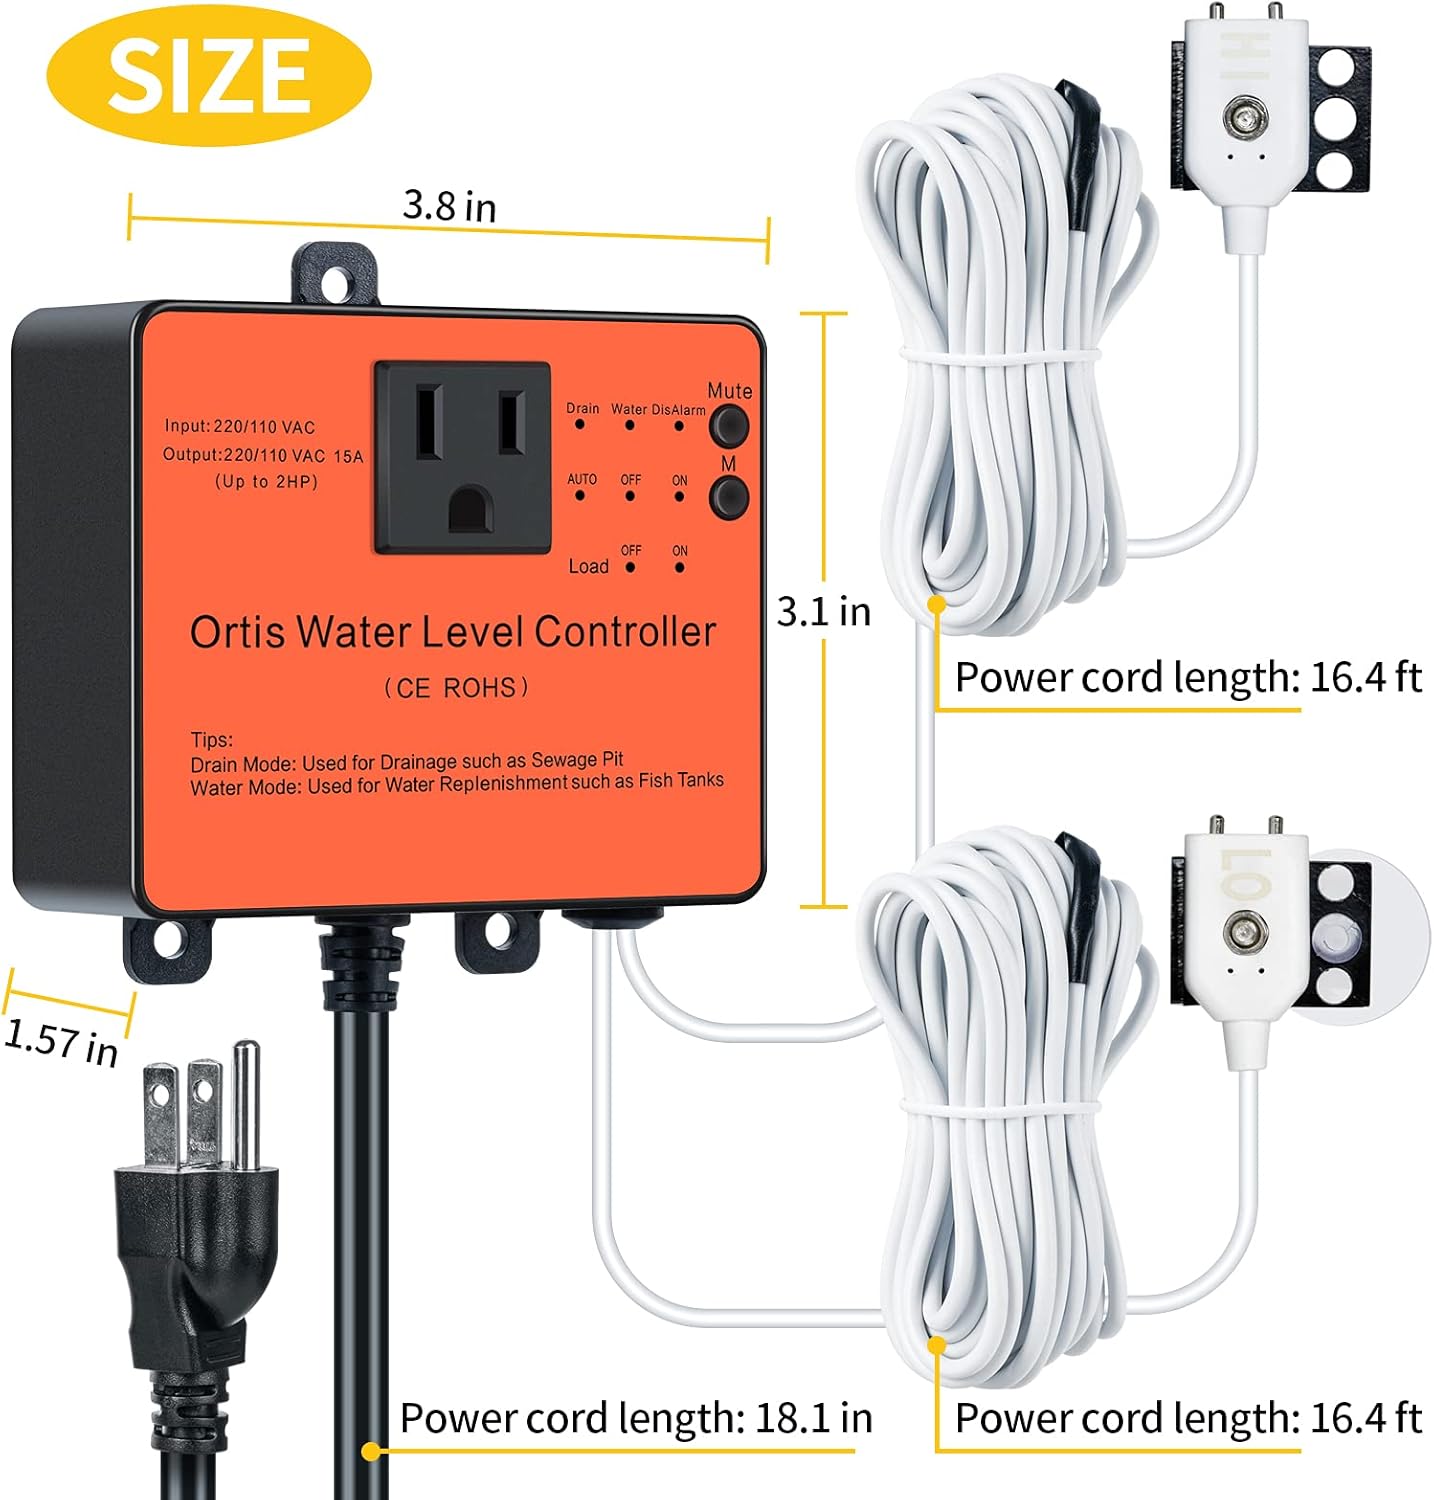
Figure 7: Product dimensions for the controller unit and sensor cables.
Offisielle produktvideoer
Ingen offisielle produktvideoer fra selgeren er tilgjengelige for innebygging for øyeblikket.
Garanti og støtte
For warranty information or technical support, please refer to the product packaging or contact Ortis customer service directly. Keep your purchase receipt as proof of purchase.