1. Introduksjon
This manual provides essential information for the safe and efficient operation, maintenance, and troubleshooting of your Profile GE Automatic Espresso Machine + Milk Frother. Please read these instructions thoroughly before first use and retain for future reference.

Image 1.1: The Profile GE Automatic Espresso Machine with a prepared espresso and a latte.
2. Sikkerhetsinformasjon
Følg alltid grunnleggende sikkerhetsregler når du bruker elektriske apparater for å redusere risikoen for brann, elektrisk støt og personskade.
- Ensure the appliance is connected to a grounded outlet.
- Ikke senk maskinen, ledningen eller pluggen i vann eller andre væsker.
- Trekk ut støpselet når det ikke er i bruk og før rengjøring.
- Ikke bruk noe apparat med en skadet ledning eller støpsel.
- Hold hender og ledninger unna varme overflater.
- Bruk kun tilbehør som er anbefalt av produsenten.
3. Produktet er overview
Proffenfile GE Automatic Espresso Machine is designed for convenience and quality, featuring an integrated grinder, milk frother, and smart connectivity.
3.1 Komponenter
- Kontrollpanel: Touch-sensitive buttons for various drink selections and functions.
- Bønnebeholder: Stores whole coffee beans for grinding.
- Vannreservoar: Avtakbar tank for vannforsyning.
- Kaffetut: Dispenserer brygget kaffe.
- Dampstav: For å skumme melk.
- Dryppskål: Collects excess liquids.
- Grutbeholder: Samler opp brukt kaffegrut.

Image 3.1: The top control panel with buttons for Espresso, Americano, My Brew, Steam, and Hot Water.

Image 3.2: The integrated bean hopper with whole coffee beans and grind size adjustment knob.

Image 3.3: The removable water reservoir being lifted from the machine.
4. Oppsett
4.1 Utpakking og første plassering
- Fjern forsiktig alt emballasjemateriale.
- Place the machine on a stable, level surface away from heat sources and direct sunlight.
- Sørg for tilstrekkelig plass rundt maskinen for ventilasjon og tilgang til komponenter.
4.2 Innledende rengjøring
Before first use, clean all removable parts with warm water and mild detergent. Rinse thoroughly and dry. Wipe the exterior of the machine with a damp klut.
4.3 Fylling av vannbeholderen
- Remove the water reservoir from the machine (refer to Image 3.3).
- Fill with fresh, cold drinking water up to the MAX line.
- Replace the reservoir securely into the machine.
4.4 Tilsetning av kaffebønner
- Open the lid of the bean hopper (refer to Image 3.2).
- Hell hele kaffebønner i beholderen. Ikke fyll for mye.
- Lukk lokket godt.
4.5 Slå på og første skylling
- Koble strømledningen til en jordet stikkontakt.
- Press the power button on the control panel. The machine will perform an initial rinse cycle.
- Place a container under the coffee spout to collect the rinse water.
4.6 SmartHQ App Connection
For enhanced customization and software updates, connect your espresso machine to the SmartHQ app.
- Download the SmartHQ app from your device's app store.
- Follow the in-app instructions to pair your espresso machine.
- Customize drink preferences, volume, and strength through the app.

Image 4.1: Using the SmartHQ app to control and customize the espresso machine.
5. Bruksanvisning
5.1 Å brygge kaffe
The machine offers Espresso, Americano, Lungo, and Hot Water options. The 'My Cup' setting is pre-set to Ristretto and can be adjusted via the SmartHQ app.
- Ensure the water reservoir is filled and the bean hopper contains coffee beans.
- Sett en kopp under kaffetuten.
- Select your desired drink (Espresso, Americano, Lungo, My Cup) from the control panel.
- Maskinen vil automatisk male bønnene, brygge og tappe kaffen din.

Image 5.1: The espresso machine dispensing a fresh shot of espresso.
5.2 Justering av kvernstørrelse
The integrated conical burr grinder allows for 5 levels of grind size adjustment, from coarsest to finest, to optimize flavor extraction.
- Locate the grind size adjustment knob inside the bean hopper (refer to Image 3.2).
- Turn the knob to select your desired grind setting. Finer grinds are suitable for espresso, while coarser grinds are better for longer coffee types.
5.3 Using the Steam Frother
The steam frother creates various milk textures for cappuccinos, lattes, and more.
- Fill the included stainless steel frothing pitcher with cold milk.
- Plasser damprøret i melken.
- Trykk på «Damp»-knappen på kontrollpanelet.
- Move the pitcher to achieve desired foam texture.
- Once finished, press the 'Steam' button again to stop.
- Immediately clean the steam wand after each use to prevent milk residue buildup.
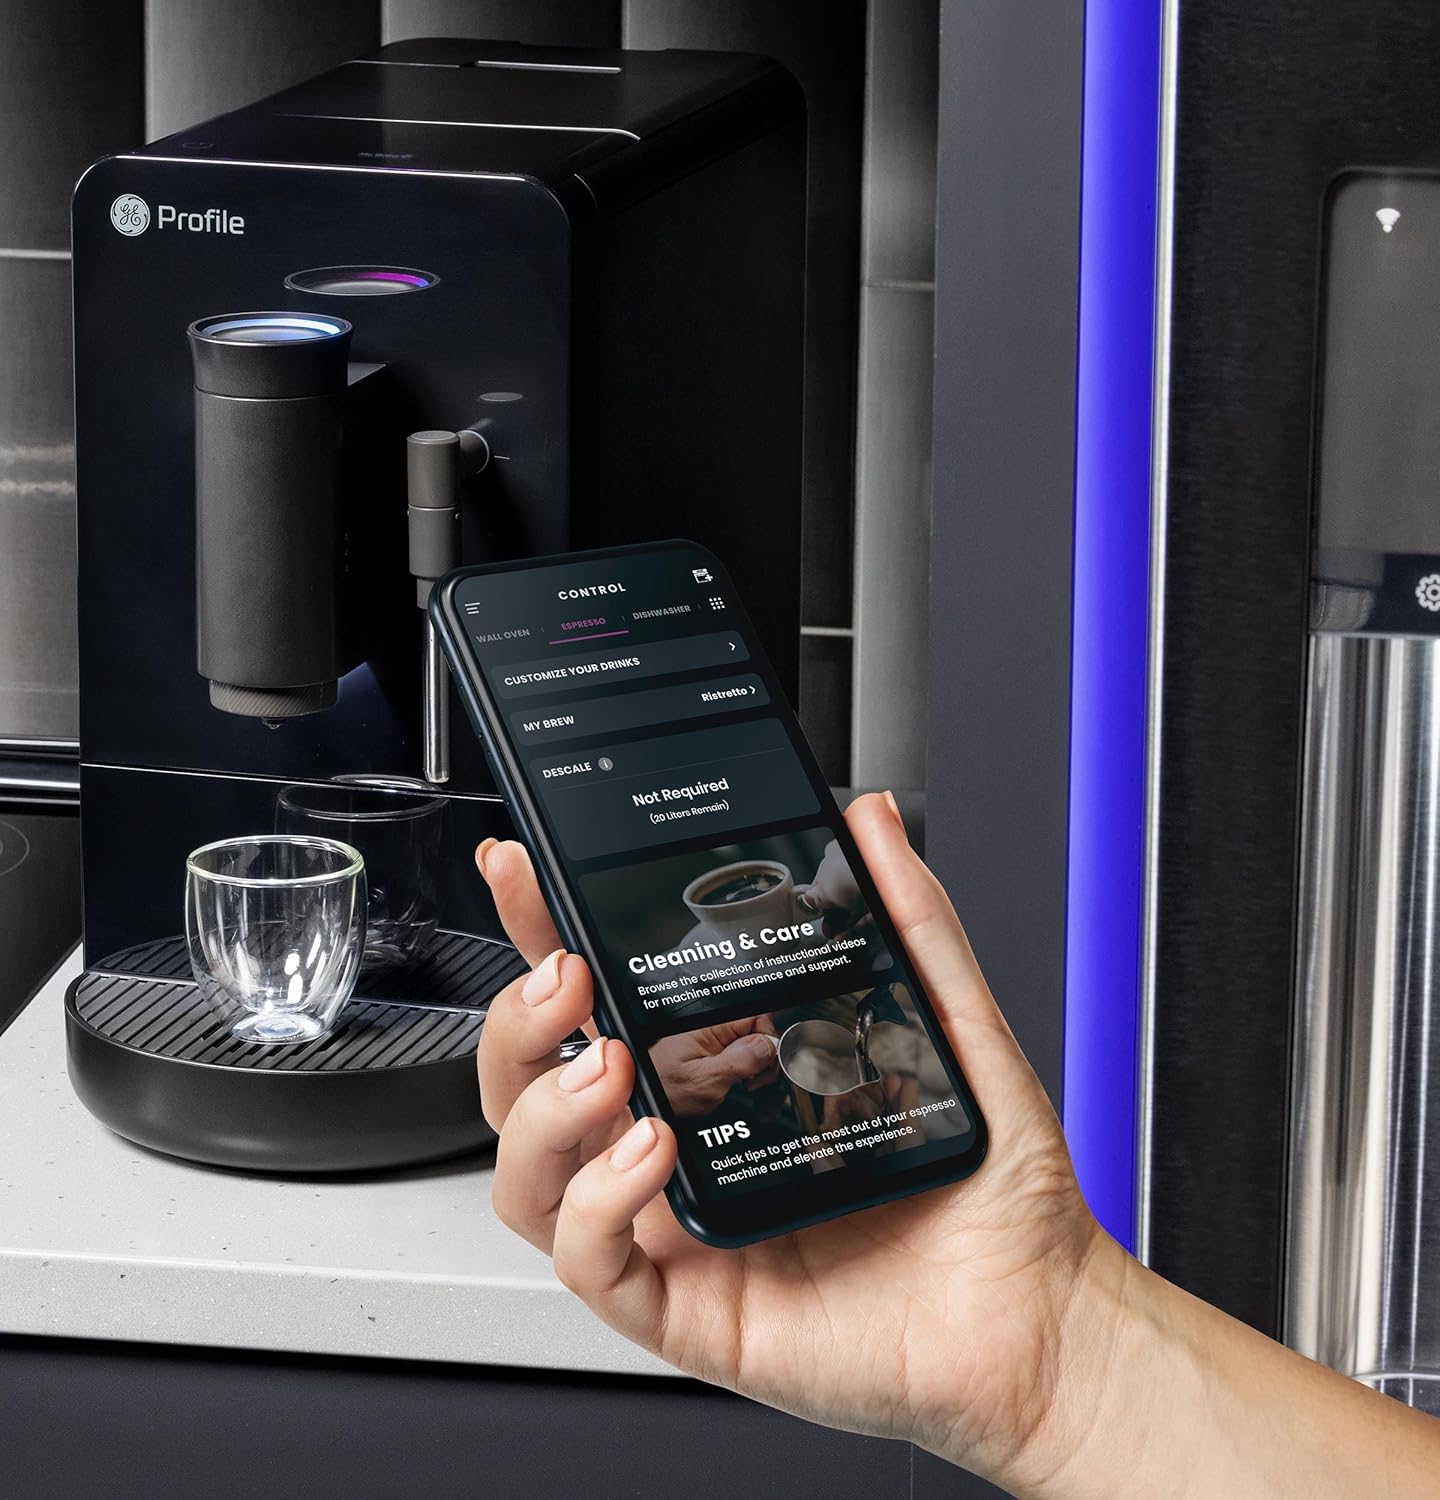
Image 5.2: A hand using the steam wand to froth milk in a stainless steel pitcher.
6. Vedlikehold
Regelmessig rengjøring og vedlikehold sikrer optimal ytelse og levetid for espressomaskinen din.
6.1 Daglig rengjøring
- Dampstav: Tørk av damprøret med en liten mengde vann etter hver bruk.amp klut. Slipp ut dampen kort for å fjerne eventuelle melkerester fra dysen.
- Dryppbrett og beholder for kaffegrut: Tøm og skyll daglig. Maskinen vil indikere når grutbeholderen må tømmes.
- Vannreservoar: Skyll daglig og fyll på med friskt vann.
6.2 Ukentlig rengjøring
- Bryggeenhet: The brew unit is typically removable for rinsing under running water. Refer to the included cleaning kit instructions for detailed steps.
- Bønnebeholder: Periodically clean out any oil residue or old beans.
6.3 Avkalking
The machine will prompt you when descaling is required. Use a descaling solution specifically designed for espresso machines and follow the instructions provided with the descaling agent or in the SmartHQ app.
7. Feilsøking
Denne delen tar for seg vanlige problemer du kan støte på med espressomaskinen din.
| Problem | Mulig årsak | Løsning |
|---|---|---|
| No coffee dispensed / "Add Beans" message | Bean hopper empty or beans not feeding correctly. | Refill bean hopper. Gently stir beans to ensure they feed into the grinder. |
| Kaffen er for svak eller vannaktig | Grind size too coarse, insufficient coffee dose, or descaling needed. | Adjust grind size to a finer setting. Check SmartHQ app for strength settings. Perform descaling if prompted. |
| Melk skummer ikke ordentlig | Steam wand clogged, milk type unsuitable, or insufficient steam pressure. | Clean steam wand thoroughly. Use fresh, cold milk. Ensure machine is heated to steam temperature. |
| Maskinen slår seg ikke på | Ikke koblet til, slå av strømmentage, eller sikringsbryteren er utløst. | Check power connection. Verify power outlet functionality. Reset circuit breaker if necessary. |
| SmartHQ app connectivity issues | Incorrect Wi-Fi password, network interference, or app bug. | Verify Wi-Fi credentials. Ensure machine is within Wi-Fi range. Restart app and machine. Check for app updates. |
8. Spesifikasjoner
- Merke: Profile
- Modellnavn: GE Profile Automatic Espresso Machine + Frother
- Varemodellnummer: P7CEBBS6RBB
- Farge: Svart
- Produktdimensjoner: 7" D x 16" B x 12.5" H
- Varevekt: 16 pund
- Voltage: 120V
- Driftsmodus: Helautomatisk
- Spesielle funksjoner: Built-In Bean Hopper, Built-In Conical Burr Grinder & Adjustable Grind Size, Programmable My Brew Setting, Steam Frother & Frothing Pitcher, WiFi Connected
- Inkluderte komponenter: Cleaning Kit, Coffee Bean Container, Espresso Machine, Steam Wand, Milk Pitcher, Water Tank
- Kaffeinngangstype: Hele bønner
- Inndata for menneskelig grensesnitt: Berøringsskjerm

Image 8.1: Product dimensions of the espresso machine.
9. Garanti og støtte
This product is covered by a manufacturer's warranty. For specific warranty details, registration, or technical support, please refer to the warranty card included with your product or visit the official GE Profile website. You may also contact customer service through the SmartHQ app for assistance.