Introduksjon
Thank you for choosing the hykolity 72-inch 8-blade ceiling fan. This manual provides detailed instructions for the safe installation, efficient operation, and proper maintenance of your new ceiling fan. Please read all instructions carefully before beginning installation or operation to ensure correct usage and to prevent potential hazards. Keep this manual for future reference.
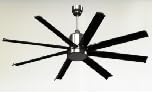
Figure 1: hykolity 72-inch 8-blade ceiling fan installed in a bedroom.
Sikkerhetsinformasjon
Always disconnect power at the main circuit breaker before attempting any installation, maintenance, or troubleshooting. Ensure all wiring connections comply with local electrical codes and national electrical codes. If you are unsure about wiring procedures, consult a qualified electrician. The fan must be mounted to a ceiling joist or a support structure capable of supporting the fan's weight. Keep hands, clothing, and other objects clear of the fan blades when the fan is in operation. Do not operate the fan if there are any signs of damage or malfunction. This fan is designed for indoor use only.
Pakkeinnhold
Kontroller at alle komponenter er til stede før installasjonen starter. Hvis noen deler mangler eller er skadet, må du ikke fortsette med installasjonen og kontakte kundestøtte.
- Vifte Motor Montering
- Taktak
- Downrod (various lengths may be included)
- Monteringsbrakett
- Vifteblader (8 stk.)
- Blade Holders/Brackets
- LED-lyssett
- Remote Control with Receiver
- Maskinvarepakke (skruer, trådmuttere, skiver osv.)
- Bruksanvisning
Oppsett og installasjon
Professional installation is recommended for safety and optimal performance. Ensure power is disconnected at the circuit breaker before proceeding.
- Montering av monteringsbrakett: Secure the mounting bracket to a ceiling joist or a suitable support structure using the provided screws. Ensure the bracket is firmly attached and can support the fan's weight.
- Downrod Montering: Select the appropriate downrod length for your ceiling height. Thread the fan's electrical wires through the downrod. Attach the downrod to the fan motor assembly, securing it with the provided pin and set screws.
- Henge viften: Carefully lift the fan motor assembly and hang it onto the mounting bracket. Ensure the downrod ball is properly seated in the bracket's opening.
- Kablingstilkoblinger: Connect the fan's wiring to the household electrical supply according to the wiring diagram in the manual. Typically, this involves connecting live, neutral, and ground wires. Ensure all connections are secure using wire nuts.
- Montering av baldakin: Slide the ceiling canopy up the downrod and secure it to the mounting bracket, covering the wiring connections.
- Bladfeste: Attach each fan blade to its respective blade holder/bracket using the provided screws. Then, attach the assembled blade and holder to the fan motor housing. Ensure all screws are tightened securely.
- LED Light Kit Installation: Connect the LED light kit wires to the corresponding wires from the fan motor assembly. Secure the LED light kit to the bottom of the fan motor housing.
- Sluttsjekker: Dobbeltsjekk alle tilkoblinger og sørg for at ingen ledninger er i klem. Gjenopprett strømmen ved sikringen.
Bruksanvisning
Your hykolity ceiling fan is operated via the included remote control.
- Slå på/av: Press the power button on the remote to turn the fan on or off.
- Viftehastighetskontroll: Use the speed buttons (1-6) to adjust the fan's rotation speed. Level 1 is the lowest speed, and Level 6 is the highest.
- Lys på/av: Trykk på lysknappen for å slå den integrerte LED-lampen av eller på.
- Lys fargetemperatur: Cycle through three different light color temperatures (warm white, natural white, cool white) by pressing the color temperature button.
- Dimmefunksjon: Use the dimming buttons to adjust the brightness of the LED light.
- Omvendt modus: The fan features a reverse mode to change the direction of blade rotation. This is useful for circulating warm air in winter or creating a downdraft in summer. Ensure the fan is completely stopped before activating reverse mode.
- Timer funksjon: Set the fan to automatically turn off after a specified period (e.g., 1H, 2H, 4H) using the timer buttons.
Vedlikehold
Regelmessig vedlikehold sikrer takviftens levetid og optimale ytelse. Koble alltid fra strømmen før du utfører vedlikehold.
- Rengjøring: Bruk en myk, damp klut til å rengjøre viftebladene og motorhuset. Ikke bruk slipende rengjøringsmidler eller løsemidler.
- Stram til skruene: Periodically check all screws on the fan blades and mounting hardware to ensure they are tight. Loose screws can cause wobbling or noise.
- Bladbalansering: If the fan wobbles, ensure all blades are securely attached and balanced. A balancing kit may be used if necessary.
Feilsøking
If you encounter any issues with your fan, refer to the following common problems and solutions:
- Viften starter ikke: Check the circuit breaker and wall switch. Ensure all wiring connections are secure. Verify remote control batteries are functional.
- Viften svinger: Sørg for at alle skruene på bladet er strammet. Sjekk at monteringsbraketten er godt festet til taket. Kontroller at bladene ikke er bøyd eller skadet.
- Lyset virker ikke: Check the light switch and circuit breaker. Ensure the LED light kit wires are properly connected.
- Støyende operasjon: Ensure all screws are tight. Check for any obstructions in the fan's path.
Spesifikasjoner
- Modellnavn: WHG-0606
- Størrelse: 72 tommer
- Antall kniver: 8
- Elektrisk viftedesign: Ceiling Fan
- Strømkilde: Elektrisk med ledning
- Voltage: 120 volt
- Wattage: 19 watt
- Antall effektnivåer: 6
- Kontrollmetode: Fjernkontroll
- Innendørs/utendørs bruk: Innendørs
- Varevekt: 30.9 pund
- Produktdimensjoner: 72" D x 72" B x 18.5" H
- Ferdig type: Børstet
- Spesifikasjon oppfylt: ETL
Garanti og støtte
For warranty information or technical support, please refer to the contact details provided in your product packaging or visit the hykolity official webnettstedet. Ta vare på kjøpskvitteringen som kjøpsbevis for eventuelle garantikrav.