1. Produktet er overview
The KUMIO ICM-1216 is a stainless steel countertop ice maker designed for convenient ice production. It features an LCD digital control panel for easy operation, producing bullet-shaped ice in two sizes (S/L) within minutes. With a 2.1L water tank and a self-cleaning function, it is suitable for various settings including home, parties, and outdoor activities.
Nøkkelfunksjoner:
- Rask isproduksjon: Produces 9 bullet-shaped ice cubes in 6-8 minutes, up to 26.5 lbs per day.
- Enkel betjening: LCD smart control panel with advanced infrared sensor technology.
- Automatiske funksjoner: Stops ice production when basket is full, alerts for low water level.
- Selvrensende: Integrert selvrensende funksjon for enkelt vedlikehold.
- Vannfiltrering: Equipped with a water filtration system for clean ice.
- To isstørrelser: Selectable small (S) or large (L) bullet ice.
- Kompakt og bærbar: Designed for easy movement and fits most countertops.

2. Sikkerhetsinstruksjoner
Les alle instruksjonene nøye før du bruker apparatet for å sikre sikker bruk og forhindre skade.
- Sørg for at apparatet er koblet til en jordet stikkontakt med riktig volum.tage (110-120V).
- Ikke senk apparatet, strømledningen eller støpselet ned i vann eller andre væsker.
- Keep the appliance away from heat sources, direct sunlight, and corrosive gases.
- Do not operate the appliance with a damaged cord or plug. Contact qualified service personnel for repairs.
- Hold oppsyn med barn når apparatet er i bruk.
- Bruk kun drikkevann i vanntanken.
- Trekk ut støpselet til apparatet før rengjøring eller når det ikke er i bruk over lengre tid.
- Ikke blokker ventilasjonsåpningene. Sørg for tilstrekkelig luftsirkulasjon rundt enheten.
- Ikke oppbevar eksplosive stoffer som spraybokser med brennbart drivmiddel i dette apparatet.
3. Pakkens innhold
Bekreft at alle varene er til stede i pakken:
- KUMIO ICM-1216 Ice Maker Unit
- Iskurv
- Isskje
- Brukerhåndbok (dette dokumentet)
4. Oppsett
4.1 Utpakking
- Ta ismaskinen forsiktig ut av emballasjen.
- Remove all packaging materials, tapes, and protective films.
- Inspect the appliance for any damage during transit. If damaged, do not operate and contact customer support.
4.2 Plassering
- Plasser ismaskinen på en flat, stabil og jevn overflate.
- Sørg for at det er minst 15 cm (6 tommer) plass rundt enheten for tilstrekkelig ventilasjon.
- Unngå å plassere enheten i nærheten av varmekilder (f.eks. ovner, radiatorer) eller i direkte sollys.
- Do not place the unit in an enclosed cabinet, as this can hinder ventilation and affect performance.
4.3 Innledende rengjøring
Før første gangs bruk anbefales det å rengjøre ismaskinen.
- Åpne lokket og ta ut iskurven.
- Clean the interior of the water tank and the ice basket with a soft cloth and warm, soapy water. Rinse thoroughly.
- Tørk av utsiden med annonseamp klut.
- Sørg for at alle deler er tørre før de monteres igjen.
5. Bruksanvisning
5.1 Tilsetning av vann
- Ensure the drain plug at the bottom is securely closed.
- Åpne topplokket på ismaskinen.
- Pour potable water into the water tank. Do not exceed the maximum water level mark.
- Lukk lokket.
5.2 Valg av isstørrelse
- Plug the ice maker into a power outlet. The LCD display will illuminate.
- Press the "S/L" button on the control panel to select your desired ice cube size: 'S' for small or 'L' for large. The selected size indicator will light up on the LCD.

5.3 Oppstart av isproduksjon
- After adding water and selecting the ice size, press the "Start/Stop" button to begin the ice-making cycle.
- The "Ice Making" indicator on the LCD will light up.
- The first batch of ice will be ready in approximately 6-8 minutes.
- The ice maker will continue to produce ice until the ice basket is full or the water level is low.


5.4 Monitoring and Indicators
- Vann Shortage-indikator: If the water level is too low, this indicator will flash, and the ice maker will pause operation. Refill the water tank to resume.
- Indikator for full is: When the ice basket is full, this indicator will light up, and the ice maker will stop producing ice. Remove ice from the basket to resume.
- Rengjøringsindikator: Lights up during the self-cleaning cycle.
6. Vedlikehold
Regelmessig rengjøring og vedlikehold vil sikre ismaskinens levetid og optimale ytelse.
6.1 Regelmessig rengjøring
- Trekk ismaskinen ut av stikkontakten.
- Fjern iskurven.
- Rengjør interiøret med en myk klut dampened with a mild detergent solution. Rinse with clean water.
- Tørk av utsiden med annonseamp klut. Ikke bruk skurende rengjøringsmidler eller løsemidler.
- Sørg for at alle delene er helt tørre før montering og oppbevaring.
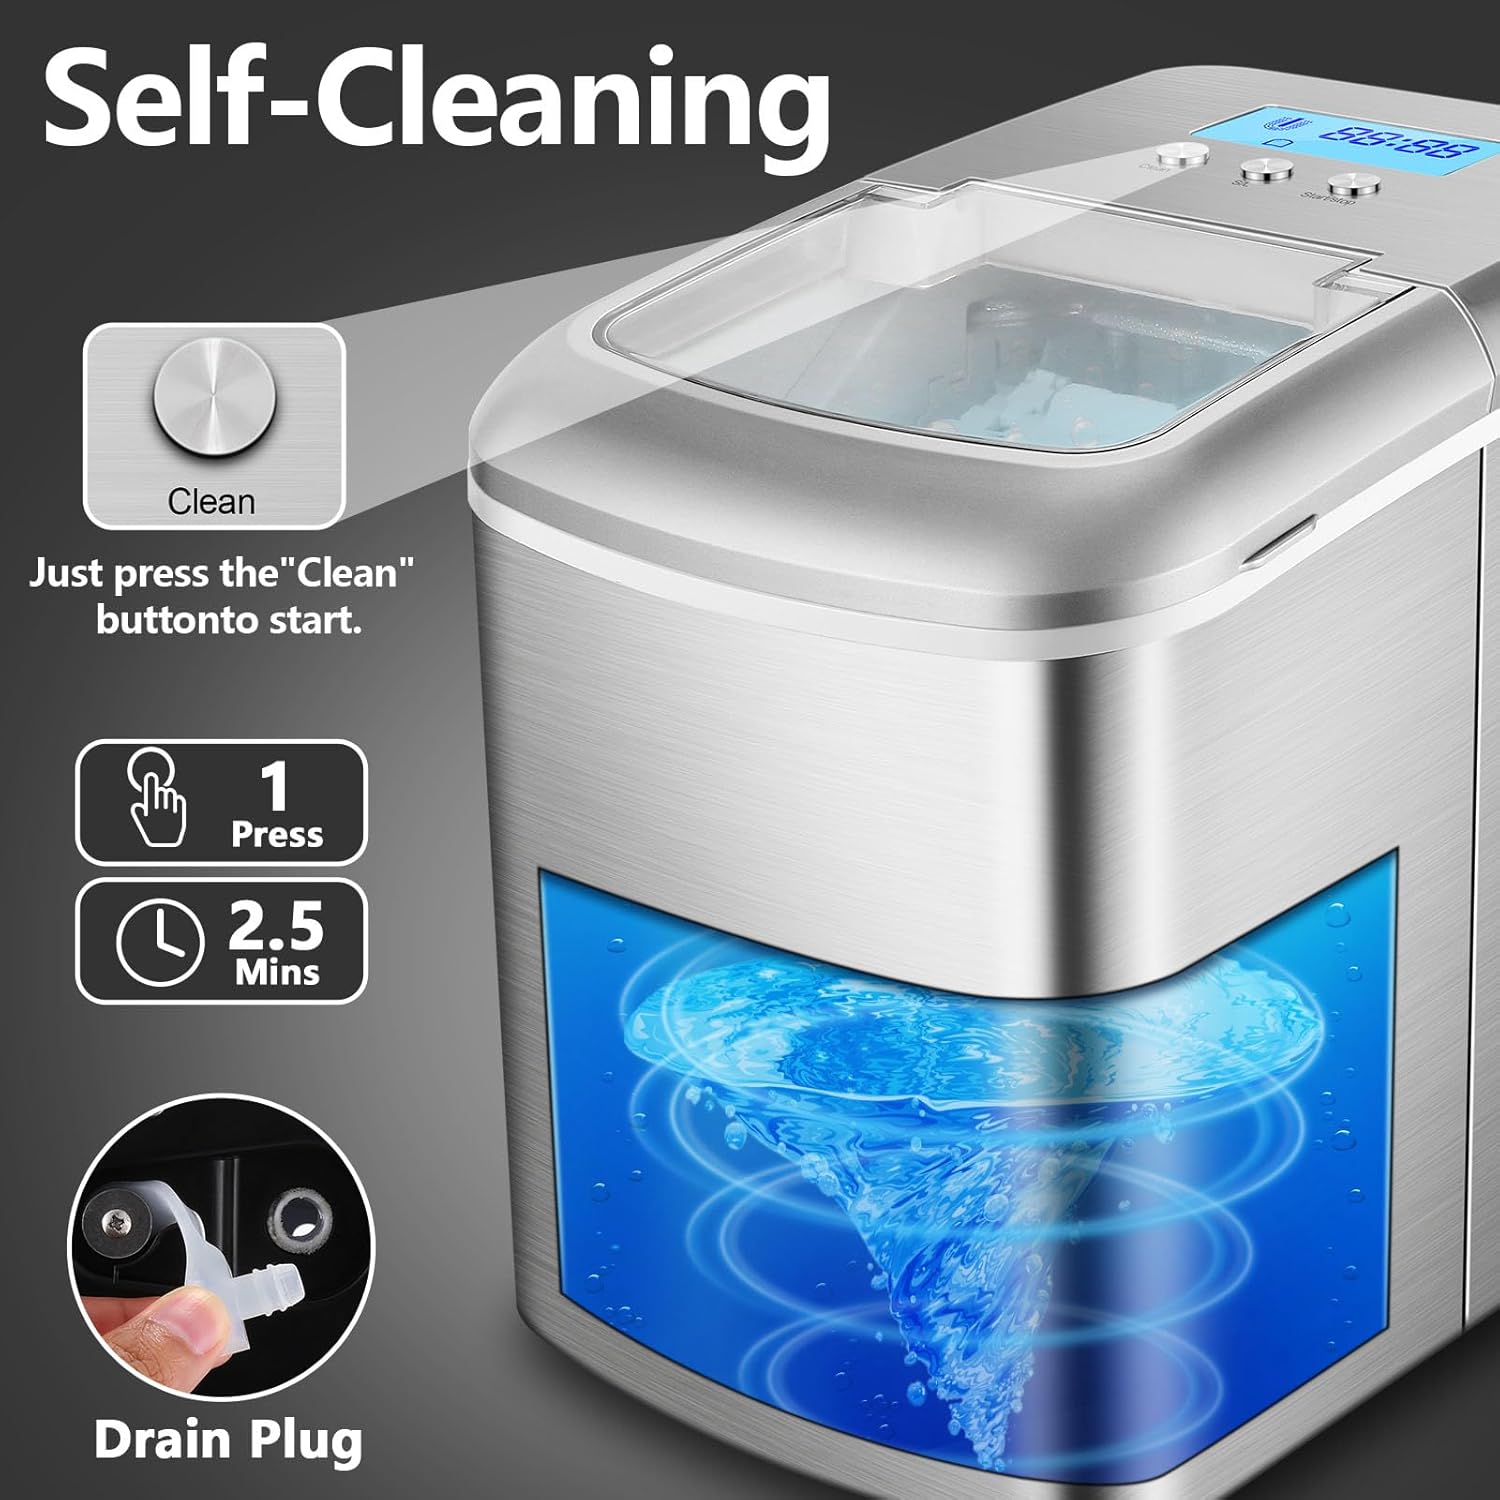
6.2 Selvrensende funksjon
The ice maker features an automatic self-cleaning cycle:
- Sørg for at vanntanken er fylt med rent vann.
- Press and hold the "Clean" button for a few seconds to activate the self-cleaning cycle. The "Cleaning" indicator will light up.
- The cycle typically lasts about 2.5 minutes, circulating water through the system.
- Once the cycle is complete, drain the water as described in section 6.3.
6.3 Tappe vann
To drain water from the tank:
- Place a container under the drain plug located at the bottom of the unit.
- Carefully remove the rubber drain plug.
- La alt vannet renne helt av.
- Sett tappepluggen ordentlig på plass.
7. Feilsøking
If you encounter issues with your ice maker, refer to the following table for common problems and solutions.
| Problem | Mulig årsak | Løsning |
|---|---|---|
| Ismaskinen fungerer ikke | No power; Water shortage; Ice basket full | Check power connection; Add water; Remove ice from basket |
| Ice cubes are too small or melt quickly | Ambient temperature too high; Water temperature too high; Insufficient ventilation | Place in a cooler environment; Use colder water; Ensure proper ventilation around the unit |
| Vannlekkasje | Drain plug not secured; Unit not level | Ensure drain plug is tightly closed; Place unit on a level surface |
| "Water Shortage" indicator on, but water is present | Water level sensor malfunction; Water below minimum level | Ensure water is above the minimum fill line; Contact customer support if issue persists |
| Uvanlig støy under drift | Enheten er ikke i vater; Problem med interne komponenter | Ensure unit is on a level surface; Contact customer support if noise is excessive or unusual |
If the problem persists after attempting these solutions, please contact KUMIO customer support for assistance.
8. Spesifikasjoner
Technical details for the KUMIO ICM-1216 Ice Maker:
| Trekk | Spesifikasjon |
|---|---|
| Modellnummer | ICM-1216 |
| Produktdimensjoner | 37.2D x 24.8W x 31.5H centimeters (9.76 x 14.65 x 12.4 inches) |
| Vekt | 9 kg (19.84 pund) |
| Kapasitet (vanntank) | 2.1 liter |
| Daglig isproduksjon | Omtrent 26.5 kg (12 lbs) |
| Isproduksjonssyklus | 6-8 minutes per batch (9 cubes) |
| Voltage | 110-120 volt |
| Wattage | 120 watt |
| Kjølemiddel | R600a |
| Materiale | Rustfritt stål |

9. Garanti og støtte
KUMIO products are manufactured to high-quality standards. For warranty information, technical support, or service inquiries, please refer to the warranty card included with your purchase or contact KUMIO customer service directly. Please have your model number (ICM-1216) and purchase date available when contacting support.