1. Sikkerhetsinformasjon
Please read and understand all safety warnings and instructions before assembly and use of this product. Failure to follow these instructions may result in injury or property damage.
- This freestanding shelter is not intended for use as a permanent structure or to support significant weight.
- Secure the shelter to a stable, level foundation to prevent tipping or collapse.
- In windy conditions, ensure the shelter is properly secured using ground stakes or other anchoring methods.
- During assembly or disassembly, use caution when handling heavy components.
- Protect your eyes and skin from potential injury when working with sharp edges or tools.
- Allow proper ventilation when using a grill underneath the shelter to prevent carbon monoxide buildup.
2. Produktet er overview
The Aoodor 8x5ft BBQ Grill Gazebo Shelter provides a dedicated space for outdoor grilling, offering protection from sun and light rain. It features a sturdy steel frame, a double-tier polycarbonate canopy, and convenient side shelves.
Nøkkelfunksjoner:
- Dimensjoner: 94.5" L × 59" W × 91.3" H, providing ample space for grilling.
- Robust struktur: Durable steel frame construction with a protective powder-coated finish for rust resistance and weather durability.
- Dobbeltlags polykarbonattopp: Blocks most ultraviolet rays, offers waterproofing, ensures proper ventilation, and allows natural sunlight.
- Effektiv ventilasjon: Intersecting roof design promotes air circulation, preventing smoke and heat stagnasjon.
- Rational Design: Two integrated side shelves for placing food items, tableware, cutlery, or grilling accessories.
Produktdimensjoner:
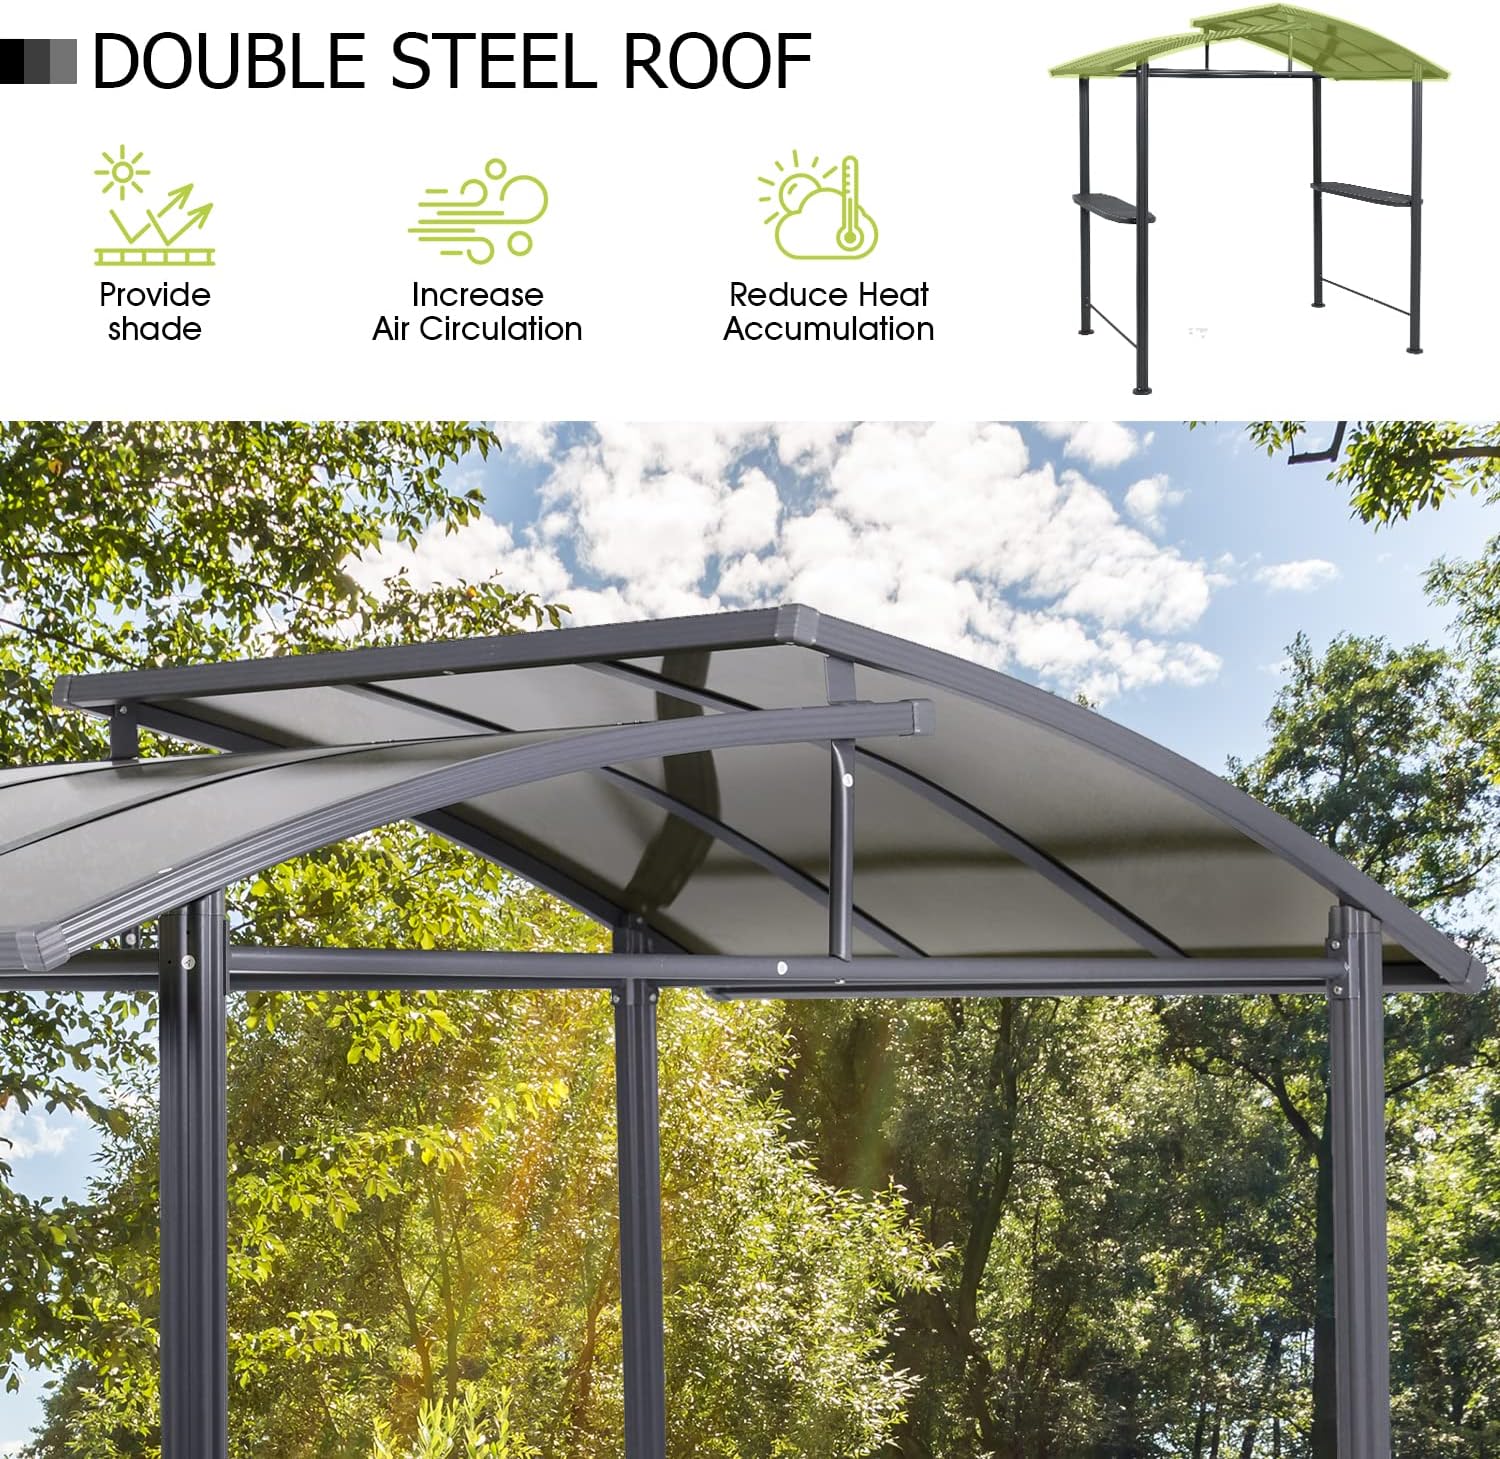
Image: Detailed diagram illustrating the length (94.5"), width (59"), and height (91.3") of the gazebo, including shelf heights and distances.

Image: Two perspective views of the gazebo with key dimensions labeled, including overall height, shelf height, and roof span.
3. Deleliste
Before beginning assembly, ensure all parts listed in your product packaging are present and undamaged. Refer to the detailed parts diagram included in your physical manual for identification.
Typiske komponenter inkluderer:
- Main support posts (4)
- Roof frame sections
- Polycarbonate roof panels
- Side shelves (2)
- Crossbars and reinforcement bars
- Jordspyler/ankre
- Hardware kit (screws, bolts, washers, nuts, tools)
4. Oppsett og montering
Assembly typically requires two adults and can take several hours. Follow the step-by-step instructions and diagrams provided in your physical assembly manual. Ensure you have adequate space and the necessary tools (usually included or standard household tools).
Trinn for generalforsamlingen:
- Pakk ut og identifiser delene: Legg ut alle komponentene og sjekk dem mot delelisten.
- Montering av grunnstruktur: Connect the main support posts using the lower crossbars.
- Fest sidehyller: Secure the two side shelves to the main support posts.
- Konstruer takramme: Assemble the roof frame sections, including any reinforcement bars.
- Installer takpaneler: Carefully place and secure the polycarbonate roof panels onto the roof frame.
- Sikker paviljong: Anchor the gazebo to the ground using the provided ground stakes or other suitable anchoring methods for stability.
Monteringsdetaljer:

Image: Detail of the pre-drilled stake panel at the base of a support post, indicating where ground anchors are secured for stability.

Image: Close-up showing how a side shelf attaches to the main support post with screws, highlighting the secure connection.

Image: Detail of the roof frame connection, showing multiple screws securing the roof beams to the central support structure.

Image: Close-up of a frame joint, illustrating the use of bolts to connect structural components for a solid assembly.
5. Bruksanvisning
The Aoodor BBQ Grill Gazebo Shelter is designed to provide a comfortable and protected area for outdoor grilling and entertaining.
Bruk av lysthuset:
- Position your grill centrally under the gazebo for optimal smoke ventilation through the double-tier roof.
- Utilize the two side shelves for convenient placement of grilling tools, plates, condiments, and beverages.
- Ensure adequate clearance around the grill and within the gazebo to prevent fire hazards.
- Always maintain proper ventilation when grilling to prevent carbon monoxide accumulation.

Image: The gazebo in use, showing a grill placed underneath and people enjoying a barbecue, with items on the side shelves.

Bilde: Et nærbilde view of a grill positioned under the gazebo, with various grilling accessories and condiments on the side shelves.
6. Vedlikehold
Regular maintenance will extend the life and appearance of your Aoodor BBQ Grill Gazebo Shelter.
- Rengjøring av rammen: Tørk av stålrammen med annonseamp cloth and mild soap. Rinse thoroughly and dry to prevent water spots and rust. Avoid abrasive cleaners.
- Cleaning the Polycarbonate Roof: Clean the polycarbonate panels with a soft cloth, warm water, and a non-abrasive cleaner. Do not use harsh chemicals or scrub brushes, as these can scratch the surface.
- Maskinvaresjekk: Periodically inspect all bolts and screws to ensure they are tight. Re-tighten if necessary.
- Vinterlagring (valgfritt): While designed for outdoor use, consider disassembling and storing the gazebo in a dry, protected area during extreme winter weather to prolong its lifespan.
- Forankring: Regularly check the ground stakes or anchors for security, especially after strong winds or heavy rain.
7. Feilsøking
Denne delen tar for seg vanlige problemer du kan støte på med lysthuset ditt.
| Problem | Mulig årsak | Løsning |
|---|---|---|
| Paviljongen føles ustabil eller ustø. | Loose connections; inadequate anchoring; uneven ground. | Ensure all bolts and screws are tightened. Verify ground stakes are securely in place. Relocate to a level surface if possible. |
| Vannansamling på taket. | Improper roof panel installation; debris blocking drainage. | Check roof panel alignment and ensure they are correctly seated. Clear any leaves or debris from the roof channels. |
| Vanskeligheter under montering. | Misaligned parts; incorrect hardware; insufficient manpower. | Double-check the instruction manual diagrams. Ensure you are using the correct hardware for each step. Seek assistance from another person. Do not force parts. |
8. Spesifikasjoner
| Trekk | Detalj |
|---|---|
| Merke | Aoodor |
| Modell | 8x5ft BBQ Grill Gazebo Shelter |
| Produktdimensjoner (L x B x H) | 94.5 cm x 59 cm x 91.3 cm |
| Varevekt | 94.82 pund |
| Rammemateriale | Legert stål |
| Takmateriale | Polykarbonat |
| Vannmotstandsnivå | Vanntett |
| Beskyttelse mot ultrafiolett lys | ekte |
| Montering påkrevd | Ja |
| Farge | Dark Gray Frame, Brown Canopy |
9. Produktvideo overview
Se denne videoen for en visuell oversiktview of the Aoodor BBQ Grill Gazebo Shelter and its features.
Video: A visual demonstration of the Aoodor 8x5ft BBQ Grill Gazebo Shelter, showcasing its design, features, and how it looks in various outdoor settings. This video highlights the product's utility and aesthetic appeal.
10. Garanti og støtte
For warranty information, product support, or to order replacement parts, please refer to the contact details provided in your product packaging or visit the official Aoodor webnettstedet.
Keep your purchase receipt and model number handy for any warranty claims or support inquiries.