1. Introduksjon og overview
This manual provides essential instructions for the safe and efficient use of your Maxcom MM135L Basic Mobile Phone. The MM135L is designed for straightforward communication, featuring a user-friendly interface, large keys, and a 1.77-inch screen. It supports 2G networks and includes dual SIM capability, an SOS button for emergencies, and convenient USB-C charging. Please read this manual thoroughly before operating the device.
2. Pakkens innhold
Bekreft at alle varene er til stede i pakken:
- Maxcom MM135L Mobile Phone
- Battery (Lithium-Ion, 600 mAh)
- USB-kabel
- SIM-brettutkaster
- Brukerhåndbok (dette dokumentet)
3. Enhetsoppsett
Familiarize yourself with the physical components of your Maxcom MM135L phone.
Figur 3.1: Bak view of the Maxcom MM135L phone, showing the blue textured back cover, Maxcom logo, and speaker grille at the top.

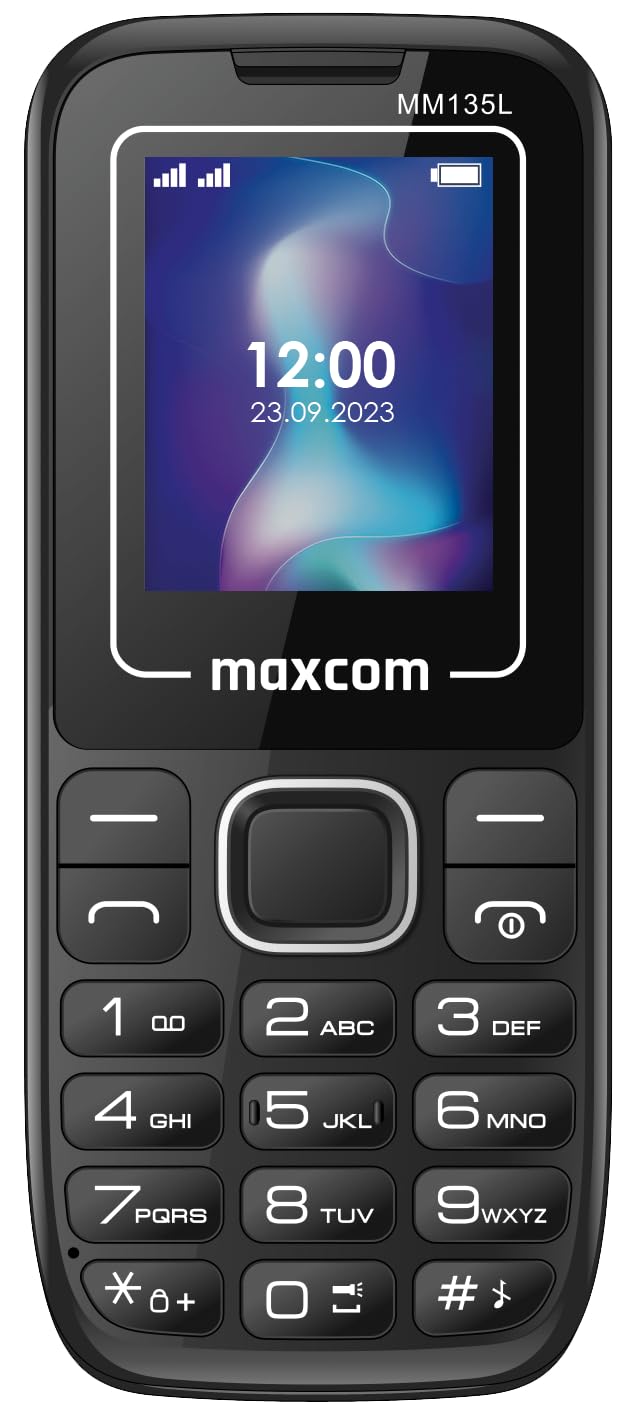
Figur 3.2: Foran view of the Maxcom MM135L phone, displaying the screen, large numeric keypad, and call/end buttons.

Figure 3.3: Bottom edge of the phone, featuring the USB-C charging port and a 3.5mm headphone jack.

Figure 3.4: Top edge of the phone, highlighting the integrated flashlight.
Nøkkelkomponenter:
- Skjerm: 1.77-inch LCD for clear text and call information.
- Numerisk tastatur: Large, tactile buttons for easy dialing and texting.
- Ring/avslutt-knapper: Dedicated buttons for managing calls.
- Navigasjonstaster: For menynavigasjon.
- SOS-knapp: Located on the rear for emergency calls (refer to Figure 3.1).
- Lommelykt: Integrated at the top of the device (refer to Figure 3.4).
- USB-C-port: For charging the device (refer to Figure 3.3).
- Hodetelefonkontakt: 3.5mm port for audio accessories (refer to Figure 3.3).
4. Oppsett
4.1 Installasjon av batteri
- Fjern forsiktig bakdekselet på telefonen.
- Juster batterikontaktene med terminalene inne i batterirommet.
- Trykk batteriet forsiktig på plass.
- Replace the back cover, ensuring it clicks securely.
4.2 Installasjon av SIM -kort
The Maxcom MM135L supports dual SIM cards.
- With the phone powered off and the back cover removed, locate the SIM card slots.
- Sett SIM-kortet/-kortet/-kortene inn i det/de angitte sporet/sporene med gullkontaktene ned, i den retningen som er angitt på telefonen.
- Sørg for at SIM-kortet/-kortet(ene) er helt på plass.
- Replace the back cover and battery.
4.3 Lade telefonen
The phone uses a USB-C port for charging.
- Connect the USB-C cable to the charging port at the bottom of the phone (refer to Figure 3.3).
- Koble den andre enden av USB-kabelen til en kompatibel USB-strømadapter eller en datamaskins USB-port.
- Batteriindikatoren på skjermen vil vise ladestatusen.
- Koble fra laderen når batteriet er fulladet.
Note: For optimal battery life, fully charge the phone before first use.
5. Bruksanvisning
5.1 Strøm på/av
- For å slå på: Trykk og hold inne Call/Power knappen til skjermen lyser opp.
- Slik slår du av: Trykk og hold inne Slutt/kraft -knappen til alternativene for avslåing vises, og bekreft deretter.
5.2 Foreta og motta anrop
- Slik ringer du: Skriv inn telefonnummeret ved hjelp av tastaturet og trykk på Ringe knapp.
- Slik svarer du på et anrop: Trykk på Ringe knappen når telefonen ringer.
- Slik avslutter du en samtale: Trykk på Slutt knapp.
5.3 Sende og motta meldinger
- Navigate to the "Messages" menu using the navigation keys.
- Select "Create New Message" to compose an SMS.
- Skriv inn mottakerens nummer og meldingen din, og send deretter.
- Received messages will appear in the "Inbox".
5.4 Bruk av SOS-knappen
The SOS button is located on the rear of the phone. It is designed for emergency situations.
- Å aktivere: Press and hold the SOS button for several seconds.
- The phone will automatically sound an alarm and send emergency SMS messages to pre-set contacts.
- It will then automatically call the saved emergency contacts in a loop until a call is answered.
- Ensure emergency contacts are properly configured in the phone settings.
5.5 Lommelyktfunksjon
The built-in flashlight can be activated for convenience.
- Refer to the phone's specific settings or a dedicated side button for flashlight activation. Typically, a long press on a designated key or a side switch controls it.
6. Vedlikehold
- Rengjøring: Bruk en myk, tørr klut til å rengjøre telefonens overflate. Unngå flytende rengjøringsmidler.
- Batteripleie: Ikke utsett batteriet for ekstreme temperaturer. Unngå å lade batteriet helt ut ofte.
- Lagring: Oppbevar telefonen på et kjølig og tørt sted når den ikke er i bruk over lengre tid.
- Vannmotstand: Denne telefonen er ikke vanntett. Unngå kontakt med væsker.
7. Feilsøking
| Problem | Mulig løsning |
|---|---|
| Telefonen slår seg ikke på. | Sørg for at batteriet er riktig installert og ladet. Koble til laderen og prøv på nytt. |
| Kan ikke ringe eller motta anrop. | Check if the SIM card is properly inserted and activated. Verify network signal strength. Contact your service provider if issues persist. |
| Batteriet lader ikke. | Ensure the USB-C cable and charger are securely connected and functional. Try a different charging cable or adapter. |
| SOS-knappen fungerer ikke. | Verify that emergency contacts are saved in the phone's settings. Ensure the phone has network coverage. |
| Dårlig samtalekvalitet. | Move to an area with better network reception. Check the speaker and microphone for obstructions. |
8. Spesifikasjoner
| Trekk | Detalj |
|---|---|
| Modellnavn | MM135L |
| Skjermstørrelse | 1.77 tommer |
| Visningstype | LCD |
| Oppløsning | 128 x 160 |
| Mobilteknologi | 2G |
| SIM-støtte | Dobbelt SIM |
| Batteritype | Litium-ion |
| Batterikapasitet | 600 mAh |
| Ladeport | USB-C |
| Dimensjoner (L x B x H) | 7 x 14 x 3.5 cm |
| Vekt | 60 g |
| Spesielle funksjoner | SOS Button, Flashlight, Expandable Memory, Fast Charging Support |
9. Garanti og støtte
For warranty information, technical support, or service inquiries, please refer to the warranty card included with your product or contact Maxcom customer service directly. Keep your proof of purchase for warranty claims.