1. Introduksjon
Thank you for choosing the Grundig KVA 6230 Automatic Coffee Machine. This manual provides essential information for the safe and efficient operation, maintenance, and troubleshooting of your appliance. Please read these instructions carefully before first use and keep them for future reference.
2. Sikkerhetsinstruksjoner
- Sørg alltid for at apparatet er koblet til en jordet stikkontakt.
- Ikke senk apparatet, strømledningen eller støpselet ned i vann eller andre væsker.
- Hold apparatet utilgjengelig for barn og personer med reduserte fysiske, sensoriske eller mentale evner.
- Trekk ut støpselet til maskinen før rengjøring eller når den ikke er i bruk over lengre tid.
- Unngå kontakt med varme overflater, som kaffetuten og damprøret, under bruk.
- Only use original Grundig accessories and spare parts.
- Ikke bruk apparatet hvis ledningen eller støpselet er skadet, eller hvis det ikke fungerer som det skal eller er skadet på noen måte.
3. Produktet er overview
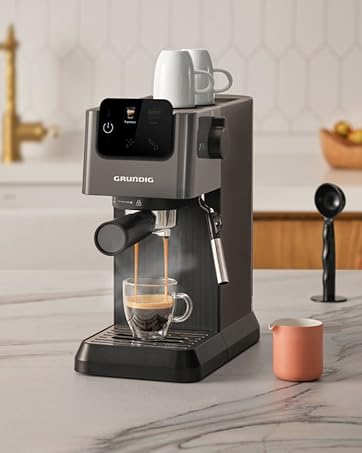
The Grundig KVA 6230 is an automatic coffee machine designed for ease of use and high-quality coffee preparation. It features a powerful 1350W heating element and a 19-bar pump pressure for optimal aroma extraction.

Figur 3.1: Foran view of the Grundig KVA 6230 Automatic Coffee Machine.
Nøkkelfunksjoner:
- Berøringsskjerm: Intuitiv kontroll for alle funksjoner.
- 5 Coffee Specialties: Espresso, Double Espresso, Americano, Ristretto, Lungo.
- Integrated Milk Frothing Nozzle: For cappuccino, latte macchiato, and other milk-based drinks.
- Stainless Steel Grinder: With 13 adjustable grind settings for whole beans.
- Ground Coffee Option: Tillater bruk av ferdigmalt kaffe.
- 2-liters avtakbar vanntank: Easy to refill and clean.
- 250 g bønnebeholder: Ample capacity for coffee beans.
- Double Nozzle with Illumination: Dispenses two cups simultaneously.
- Automatic Cleaning and Descaling Programs: Forenkler vedlikehold.
- Koppvarmer: Keeps up to 6 cups warm.
Figur 3.2: Detaljert view of the coffee machine's design and functionality.
4. Oppsett
4.1 Utpakking og plassering
- Fjern forsiktig alt emballasjemateriale.
- Plasser maskinen på en stabil, jevn og varmebestandig overflate, unna vannkilder og direkte sollys.
- Sørg for tilstrekkelig ventilasjon rundt apparatet.
4.2 Innledende rengjøring
- Ta ut vanntanken og skyll den grundig med friskt vann.
- Clean the drip tray and coffee grounds container with warm, soapy water, then rinse and dry.
- Tørk utsiden av maskinen med adamp klut.
4.3 Fylle vanntanken
- Fill the removable 2-liter water tank with fresh, cold tap water up to the MAX mark.
- Insert the water tank back into the machine until it clicks into place.
4.4 Fylle bønnebeholderen
- Åpne lokket på bønnebeholderen.
- Pour fresh coffee beans into the 250g container. Do not overfill.
- Lukk lokket godt.

Figure 4.1: Filling the bean container and adjusting grind settings.
4.5 Første gangs bruk
Before making your first coffee, perform a rinsing cycle:
- Plasser en stor beholder under kaffetuten og melkeskummende dysen.
- Turn on the machine. It will automatically perform a short rinsing cycle.
- Follow any on-screen prompts to complete the initial setup.
5. Bruksanvisning
5.1 Making Coffee (Espresso, Americano, Ristretto, Lungo)
- Sørg for at vanntanken er fylt, og at bønnebeholderen har nok kaffebønner.
- Place one or two cups under the double coffee spout.
- Turn on the machine. Wait for it to heat up and perform its automatic rinse cycle.
- On the touchscreen display, select your desired coffee specialty (e.g., Espresso, Americano).
- You can adjust the water quantity for your drink if desired.
- Press the start button to begin brewing. The machine will grind the beans and dispense the coffee.

Figure 5.1: The double coffee spout allows for brewing two cups simultaneously.
5.2 Bruk av malt kaffe
Hvis du foretrekker å bruke ferdigmalt kaffe:
- Open the ground coffee compartment (usually next to the bean container).
- Add one level scoop of ground coffee for a single serving. Do not add more than one scoop to avoid blockages.
- Select the 'Ground Coffee' option on the display, then choose your desired drink.
- Trykk på startknappen.
5.3 Melkeskumming
To prepare frothed milk for cappuccinos or latte macchiatos:
- Fyll en melkekanne med kald melk (melkemelk eller melkefri).
- Position the milk frothing nozzle into the milk pitcher.
- Select the 'Steam' or 'Milk Froth' function on the touchscreen.
- Once the desired froth consistency is achieved, turn off the steam function.
- Immediately clean the milk frothing nozzle after use (see Maintenance section).

Figure 5.2: The integrated milk frothing nozzle for creamy milk foam.
5.4 Justering av maleinnstillinger
The stainless steel grinder offers 13 settings to fine-tune your coffee's strength and flavor:
- Finer Grind (lower numbers): For stronger coffee, slower extraction, and more crema. Suitable for espresso.
- Coarser Grind (higher numbers): For mildere kaffe, raskere ekstraksjon.
Adjust the grind setting only when the grinder is operating to prevent damage. Turn the dial inside the bean container to your desired setting.
6. Vedlikehold
Regelmessig rengjøring og vedlikehold sikrer kaffemaskinens levetid og optimale ytelse.
6.1 Daglig rengjøring
- Dryppbrett og kaffegrutbeholder: Tøm og skyll daglig. Maskinen vil gi deg beskjed når grutbeholderen må tømmes.
- Melkeskummingsdyse: Tørk av dysen med en liten mengde vann etter hver bruk.amp cloth. Run a short steam burst to clear any milk residue.
- Ytre: Tørk av med en myk, damp klut. Ikke bruk skurende rengjøringsmidler.
6.2 Rengjøring av bryggeenheten
The brew unit should be removed and rinsed weekly:
- Slå av og trekk ut maskinen.
- Åpne servicedøren (vanligvis på siden eller foran).
- Press the release buttons and carefully pull out the brew unit.
- Rinse the brew unit thoroughly under lukewarm running water until all coffee residue is removed.
- La den lufttørke helt før du setter den inn igjen.
6.3 Avkalking
The machine will indicate when descaling is required. Use a suitable descaling solution for coffee machines and follow the on-screen instructions or the descaling program steps:
- Tøm vanntanken og fyll den med avkalkingsløsningen blandet med vann i henhold til produktinstruksjonene.
- Plasser en stor beholder under kaffetuten og melkeskummende dysen.
- Start the automatic descaling program via the menu.
- The machine will guide you through the process, which typically involves several rinsing cycles.
- After the descaling program, rinse the water tank and fill it with fresh water to perform a final rinse cycle.
7. Feilsøking
Denne delen tar for seg vanlige problemer du kan støte på. Kontakt kundestøtte for problemer som ikke er oppført her.
| Problem | Mulig årsak | Løsning |
|---|---|---|
| Det blir ikke servert kaffe. | Water tank empty, brew unit blocked, coffee spout blocked. | Fill water tank, clean brew unit, clean coffee spout. |
| Kaffen er for svak eller vannaktig. | Grind setting too coarse, insufficient coffee quantity, old beans. | Adjust grind to finer setting, check coffee dose, use fresh beans. |
| Milk frothing is poor. | Milk nozzle blocked, cold milk not used, milk type unsuitable. | Clean milk nozzle thoroughly, use cold milk, try different milk type. |
| Machine displays 'Descaling required'. | Mineraloppbygging i systemet. | Perform the automatic descaling program. |
| Feilmelding på skjermen. | Spesifikt internt problem. | Se den spesifikke feilkoden i den fullstendige håndboken eller kontakt kundestøtte. |
8. Spesifikasjoner
| Trekk | Detalj |
|---|---|
| Modellnavn | KVA 6230 |
| Modellnummer | GMS6070 |
| Dimensjoner (L x B x H) | 41.2 x 27.5 x 35.9 cm |
| Vekt | 12 kg |
| Makt | 1350 watt |
| Pumpetrykk | 19 Bar |
| Vanntankkapasitet | 2 liter (avtakbar) |
| Bønnebeholderens kapasitet | 250 g |
| Kverninnstillinger | 13 (rustfritt stål) |
| Grensesnitt | Berøringsskjerm |
| Kaffe Type | Whole beans, ground coffee |
| Farge | Svart |
| Tåler oppvaskmaskin | Ingen |
9. Garanti og støtte
9.1 Garantiinformasjon
Your Grundig KVA 6230 Automatic Coffee Machine comes with a 3 års produsentgaranti, ensuring quality and reliability. Please retain your proof of purchase for any warranty claims. The warranty covers manufacturing defects and malfunctions under normal use conditions.
9.2 Kundestøtte
Should you encounter any issues not covered in this manual or require further assistance, please contact Grundig customer support. You can find contact information on the official Grundig webnettstedet eller gjennom din lokale forhandler.
When contacting support, please have your model number (KVA 6230 / GMS6070) and purchase date ready.