BlitzWolf BW-VT2EU
BlitzWolf BW-VT2 Miniprojektor Brukerhåndbok
Your comprehensive guide to setting up, operating, and maintaining your BlitzWolf BW-VT2 Mini Projector.
1. Produktet er overview
1.1 Pakkeinnhold
Vennligst sjekk at alle varene er til stede i pakken din:
- BlitzWolf BW-VT2 Mini Projector
- Fjernkontroll
- Strømadapter
- HDMI-kabel
- Brukerhåndbok (dette dokumentet)
1.2 Enhetsoppsett
Familiarize yourself with the various parts and ports of your projector.
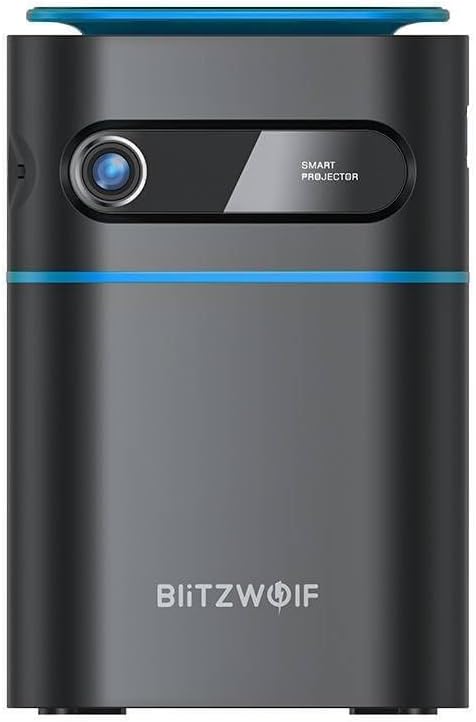
Figur 1.1: Foran View. This image displays the front of the BlitzWolf BW-VT2 Mini Projector, highlighting the projection lens and the 'SMART PROJECTOR' branding.

Figure 1.2: Projector with Remote Control. This image shows the BlitzWolf BW-VT2 Mini Projector alongside its dedicated remote control, illustrating the compact size of both devices.
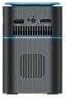
Figur 1.3: Bak View. The rear of the projector is shown, featuring ventilation grilles and various input/output ports.

Figur 1.4: Side View. This image highlights the side of the projector where additional connectivity options such as USB and HDMI ports are located.

Figur 1.5: Øverst View. The top surface of the projector is visible, featuring the integrated touch control panel for direct interaction.
1.3 Porter og kontroller
- HDMI-port: Koble til bærbare datamaskiner, spillkonsoller, Blu-ray-spillere osv.
- USB-port: Koble til USB-minnepinner for avspilling av medier.
- Audio Out (3.5mm) Port: Koble til eksterne høyttalere eller hodetelefoner.
- DC IN-port: Koble til strømadapteren.
- Strømknapp: Slår projektoren på/av.
- Fokushjul: Justerer bildets klarhet.
- Berøringskontrollpanel: Navigate menus and control playback directly on the device.
2. Oppsettveiledning
2.1 Slå på
- Koble strømadapteren til DC IN-porten på projektoren.
- Koble strømadapteren til en stikkontakt.
- Press and hold the Power Button on the projector or the remote control until the device powers on.
2.2 Førstegangsplassering
For optimalt viewing experience, consider the following:
- Plasser projektoren på en stabil, flat overflate.
- Ensure there is adequate ventilation around the projector to prevent overheating.
- Plasser projektoren vinkelrett på projeksjonsflaten (vegg eller lerret) for et rektangulært bilde.
- Adjust the distance to achieve your desired screen size.
2.3 Fokusjustering
After powering on, adjust the focus to ensure a clear image:
- Rotate the focus wheel located near the lens until the projected image appears sharp and clear.
2.4 Fjernkontrolloppsett
Insert batteries into the remote control before first use:
- Åpne batterirommet på baksiden av fjernkontrollen.
- Sett inn to AAA-batterier (ikke inkludert), og sørg for at polariteten er riktig (+/-).
- Lukk batteridekselet.
3. Bruksanvisning
3.1 Navigasjon
You can navigate the projector's interface using either the remote control or the touch control panel on top of the device.
- Fjernkontroll: Use the directional buttons (up, down, left, right) to move through menus and the 'OK' button to select.
- Berøringskontrollpanel: Swipe and tap on the touch-sensitive surface to navigate.
3.2 Koble til enheter
The BW-VT2 supports various input sources:
- HDMI -inngang: Connect your laptop, game console, or other HDMI-enabled devices using an HDMI cable. Select the HDMI input source from the projector's menu.
- USB-inngang: Insert a USB flash drive into the USB port. The projector's media player will typically detect the drive automatically, allowing you to browse and play supported media files (videos, photos, music).
- Wi-Fi-tilkobling: Navigate to the 'Settings' menu, then 'Network' or 'Wi-Fi'. Select your Wi-Fi network and enter the password to connect the projector to the internet. This enables access to online streaming apps and updates.
3.3 Android OS Features
As an Android-powered projector, the BW-VT2 offers smart functionalities:
- App-tilgang: Download and install various streaming apps (e.g., Netflix, YouTube) directly from the pre-installed app store or by sideloading APKs.
- Innstillinger: Customize display settings, audio output, network configurations, and system preferences through the Android settings menu.
- Skjermspeiling: Utilize built-in screen mirroring features (e.g., Miracast, AirPlay compatible apps) to project content from your smartphone or tablet wirelessly.
3.4 Lydutgang
The projector has built-in speakers, but you can also connect external audio devices:
- 3.5 mm lydutgang: Connect headphones or external speakers via the 3.5mm audio jack for enhanced sound.
4. Vedlikehold
Riktig vedlikehold sikrer projektorens levetid og optimale ytelse.
4.1 Rengjøring av linser
To maintain clear image quality, clean the projector lens regularly:
- Bruk en myk, lofri klut som er spesielt utviklet for optiske linser.
- Gently wipe the lens in a circular motion.
- Avoid using abrasive cleaners or excessive force, which can scratch the lens.
4.2 Ventilasjon
Ensure proper airflow to prevent overheating:
- Do not block the ventilation vents on the projector.
- Bruk projektoren i et godt ventilert område.
- Periodically clean dust from the vents using a soft brush or compressed air.
4.3 Oppbevaring
When not in use, store your projector properly:
- Store the projector in a cool, dry place, away from direct sunlight and extreme temperatures.
- Use the original packaging or a protective case to prevent dust accumulation and physical damage.
5. Feilsøking
Se denne delen for vanlige problemer og løsninger på disse.
| Problem | Mulig årsak | Løsning |
|---|---|---|
| Projector does not power on. | Ingen strømtilkobling; defekt strømadapter. | Ensure power adapter is securely connected to both projector and outlet. Try a different outlet. |
| Ingen bilde projisert. | Incorrect input source selected; loose HDMI/USB cable. | Verify the correct input source is selected in the menu. Check cable connections. |
| Bildet er uskarpt. | Focus not adjusted; projector too close/far. | Rotate the focus wheel until the image is clear. Adjust projection distance if necessary. |
| Ingen lyd. | Volume too low; external audio device not connected properly. | Increase volume. Check connections to external speakers/headphones. Ensure audio output is set correctly in settings. |
| Problemer med Wi-Fi-tilkoblingen. | Feil passord; problemer med ruteren; signalforstyrrelser. | Re-enter Wi-Fi password. Restart router. Move projector closer to router. |
| Fjernkontrollen virker ikke. | Utladede batterier; hindring; fjernkontroll ikke paret. | Skift batterier. Sørg for at det ikke er noen hindringer mellom fjernkontrollen og projektoren. |
6. Tekniske spesifikasjoner
Key specifications of the BlitzWolf BW-VT2 Mini Projector:
| Trekk | Spesifikasjon |
|---|---|
| Merke | BlitzWolf |
| Modellnummer | BW-VT2EU |
| Farge | Svart |
| Tilkoblingsteknologi | HDMI, USB, VGA, Wi-Fi |
| Skjermoppløsning | 1920 x 1080 (Full HD) |
| Visningstype | LCD, LED |
| Formfaktor | Bærbar |
| Spesielle funksjoner | Portable, Android OS, Wi-Fi, HDMI, USB, VGA |
| Kompatible enheter | Laptops, Smartphones, Game Consoles, Blu-ray Players, Media Players, Wi-Fi enabled devices |
| Anbefalt bruk | Hjemmekino |
7. Garanti og støtte
7.1 Produsentens garanti
The BlitzWolf BW-VT2 Mini Projector comes with a 2 års produsentgarantiDenne garantien dekker material- og produksjonsfeil ved normal bruk. Vennligst ta vare på kjøpsbeviset for garantikrav.
7.2 Kundestøtte
If you encounter issues not covered in the troubleshooting section or require further assistance, please contact BlitzWolf customer support. Refer to the product packaging or the official BlitzWolf webnettstedet for den mest oppdaterte kontaktinformasjonen.