
1. Introduksjon og sikkerhetsinformasjon
This manual provides essential instructions for the installation, operation, and maintenance of your GAMEMAX GX-850 80 Plus Gold Fully Modular Power Supply. Please read this manual thoroughly before installation and retain it for future reference.
1.1 Viktige sikkerhetsadvarsler
- Fare for elektrisk støt: Power supplies contain high voltage components. Do not open the power supply unit. There are no user-serviceable parts inside. Opening the unit will void the warranty.
- Riktig jording: Ensure your computer system is properly grounded to prevent electrical hazards.
- Koble fra strømmen: Always disconnect the AC power cord from the wall outlet before installing, removing, or servicing the power supply or any other computer components.
- Ventilasjon: Ensure adequate ventilation around the power supply. Do not block any ventilation openings.
- Moisture and Temperature: Do not operate the power supply in high humidity or high-temperature environments. Keep it away from water and heat sources.
- Profesjonell installasjon: Hvis du er usikker på noen av installasjonstrinnene, bør du søke hjelp fra en kvalifisert tekniker.
2. Pakkens innhold
Verify that all items are present in your GAMEMAX GX-850 package:
- GAMEMAX GX-850 80 Plus Gold Fully Modular Power Supply
- Modular Cable Set (including ATX 24-pin, CPU 8-pin, PCIe 6+2-pin, SATA, Peripheral 4-pin cables)
- AC strømledning
- Monteringsskruer
- Brukerhåndbok (dette dokumentet)
3. Produktet er overview
The GAMEMAX GX-850 is an 850-watt 80 Plus Gold certified fully modular power supply designed for desktop computers. It features an LLC and DC-DC circuit design for high efficiency and stable power delivery, along with an ultra-quiet FDB (Fluid Dynamic Bearing) fan for optimal cooling and low noise.
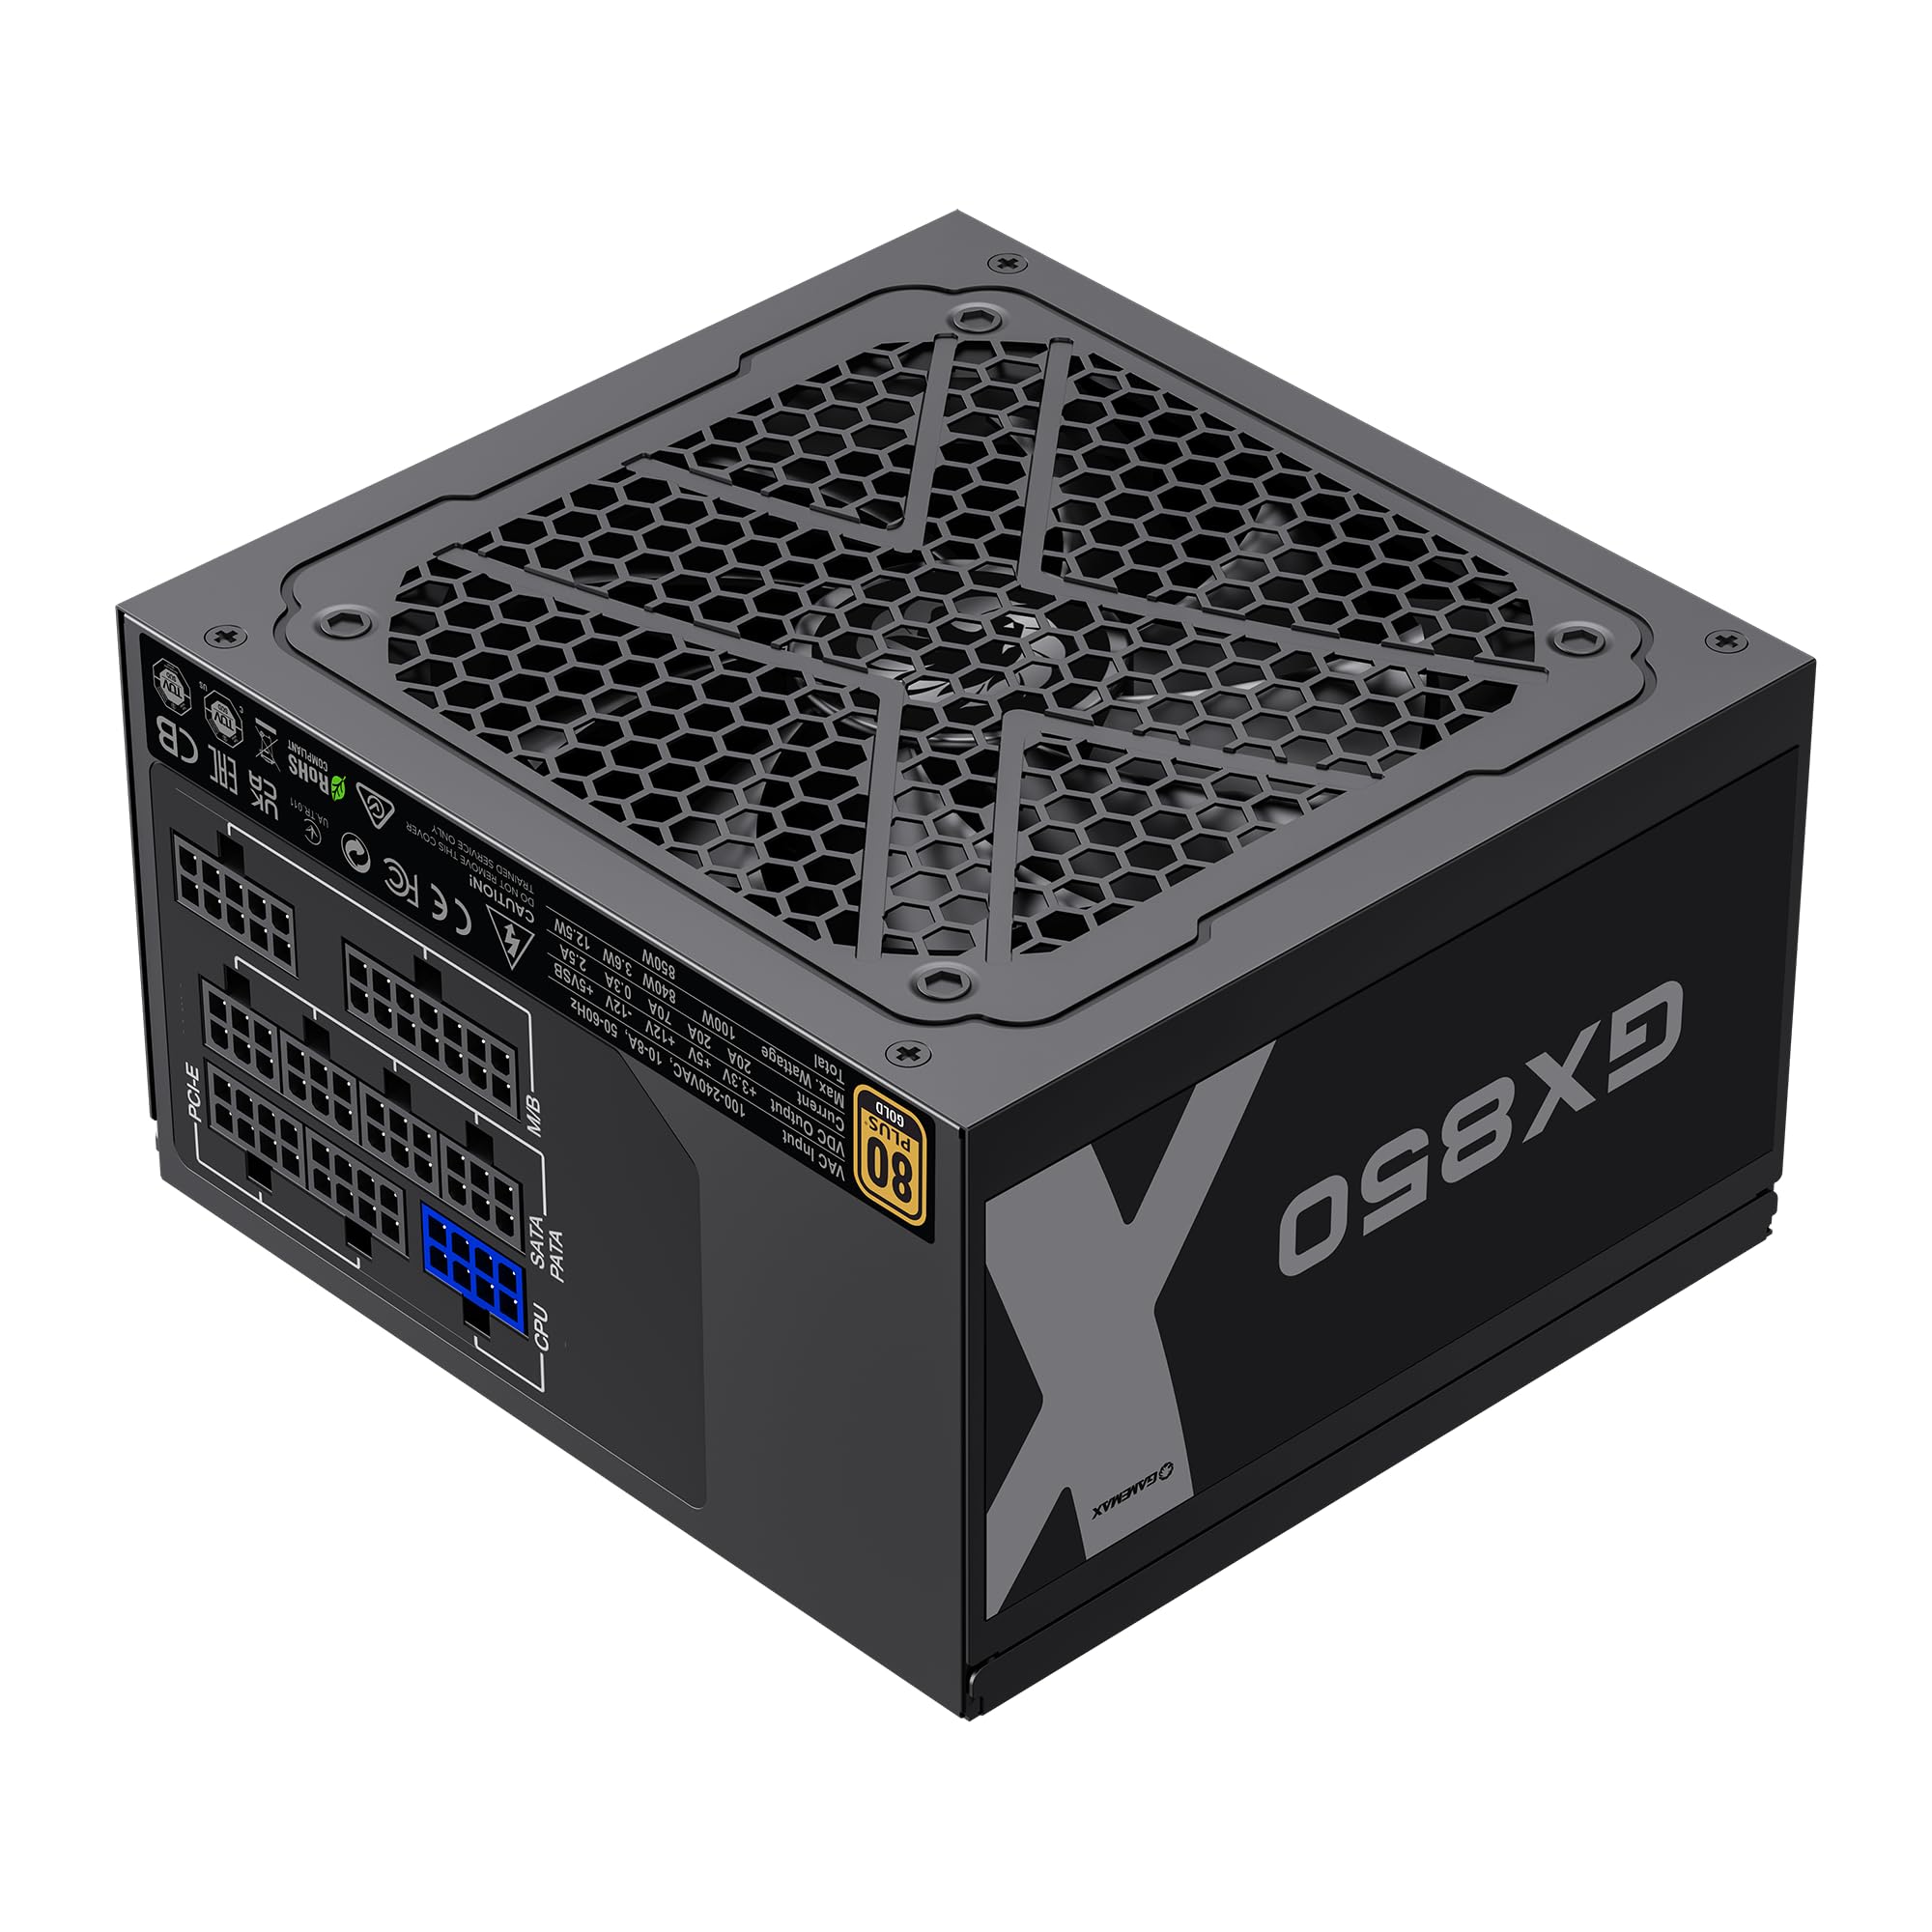
Image: The GAMEMAX GX-850 80 Plus Gold Fully Modular Power Supply, showcasing its black finish and modular design.
3.1 Nøkkelfunksjoner
- 80 Plus Gold Certified: Ensures high power efficiency, reducing heat and operating costs.
- LLC+DC-DC Circuit: Advanced circuit design for stable voltage output and improved efficiency.
- Fullstendig modulær design: Allows for custom cable management, reducing clutter and improving airflow.
- FDB Fan: Ultra-quiet temperature-controlled Fluid Dynamic Bearing fan for silent operation and extended lifespan.
- 105℃ Mainstream Capacitor: High-quality capacitors ensure long life and smooth power output.
- Omfattende beskyttelse: Features SIX levels of protection: Over Temperature Protection (OTP), Over Current Protection (OCP), Short Circuit Protection (SCP), Over Voltage Protection (OVP), Under Voltage Protection (UVP), and Over Power Protection (OPP).
4. Oppsett og installasjon
Follow these steps to properly install your GAMEMAX GX-850 power supply into your computer system.
4.1 Installasjonstrinn
- Klargjør systemet ditt: Sørg for at datamaskinen er helt slått av og koblet fra stikkontakten. Åpne datamaskinkabinettet.
- Fjern gammel strømforsyning (hvis aktuelt): Koble fra alle kablene fra den gamle strømforsyningen og ta den ut av kabinettet.
- Monter den nye strømforsyningen: Carefully place the GAMEMAX GX-850 into the power supply bay of your computer case. Secure it with the provided mounting screws. Ensure the fan is facing the correct direction for optimal airflow (typically facing down if your case has a bottom vent, or up if it's a top-mounted PSU).
- Koble til modulære kabler: Identify the necessary cables for your components. Connect the modular cables to the corresponding ports on the power supply first, then route them to your components.
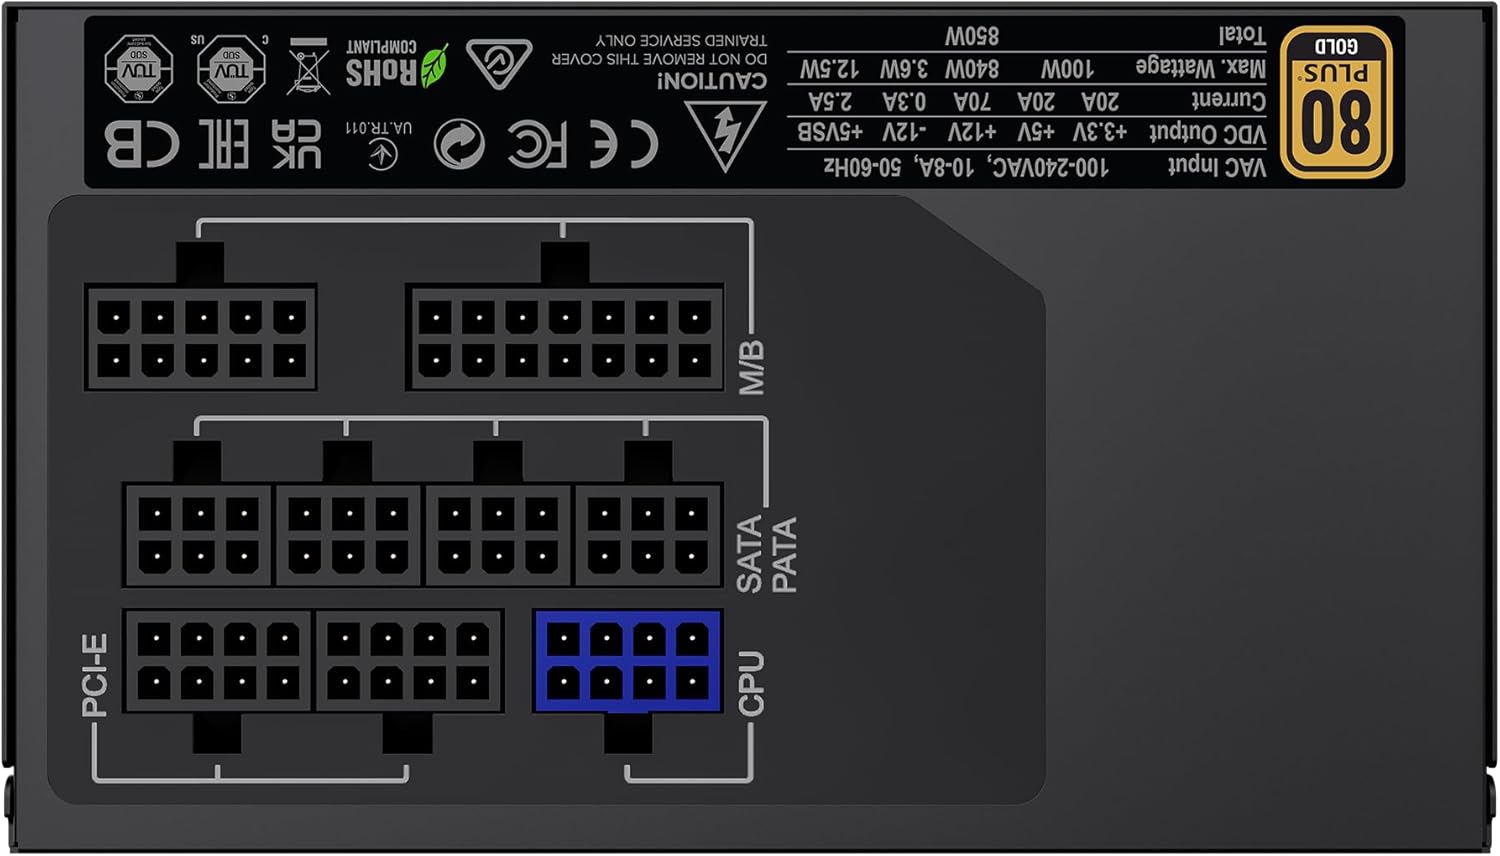
Bilde: Bak view of the GAMEMAX GX-850 showing the fully modular cable connection ports for PCI-e, M/B (Motherboard), SATA/PATA, and CPU cables.
- Motherboard (M/B): Koble den 24-pinners ATX-kabelen til hovedkortet.
- CPU: Connect the 8-pin (or 4+4-pin) CPU power cable to the CPU power connector on your motherboard.
- Graphics Cards (PCI-e): Connect the 6+2-pin PCIe power cables to your graphics card(s). Use separate cables for each connector if your GPU requires multiple.
- Storage Devices (SATA): Connect SATA power cables to your SSDs, HDDs, and optical drives.
- Peripherals (PATA/Molex): Connect peripheral power cables to any other devices requiring them (e.g., fan controllers, older drives).
- Kabeladministrasjon: Før kablene pent for å forbedre luftstrømmen og estetikken.
- Lukk dekselet og koble til vekselstrøm: Close your computer case. Connect the AC power cord to the power supply and then to a grounded wall outlet.
5. Bruksanvisning
After successful installation, follow these steps to operate your system.
- Strømbryteren: Ensure the power switch on the back of the power supply is in the 'ON' (I) position.
- System Power On: Press the power button on your computer case to turn on the system.
- Systemavstengning: To turn off your system, use the operating system's shutdown procedure. For a hard shutdown, hold the case power button for several seconds. For complete power disconnection, switch the PSU's power switch to 'OFF' (O) and unplug the AC cord.
6. Vedlikehold
Regular maintenance helps ensure the longevity and optimal performance of your power supply.
- Støvrengjøring: Periodically clean the power supply's fan and ventilation grilles using compressed air to prevent dust buildup, which can impede cooling. Ensure the system is powered off and unplugged before cleaning.
- Kabelsjekk: Occasionally check all modular cable connections to ensure they are securely seated.
- Miljøforhold: Maintain a clean, dry, and well-ventilated environment for your computer.
7. Feilsøking
If you encounter issues with your power supply, refer to the following common troubleshooting steps:
- Ingen strøm:
- Ensure the AC power cord is securely plugged into both the wall outlet and the power supply.
- Check that the power switch on the back of the PSU is in the 'ON' (I) position.
- Verify that the 24-pin ATX and 8-pin CPU power cables are correctly and firmly connected to the motherboard.
- Test stikkontakten med en annen enhet for å bekrefte at den har strøm.
- Systemustabilitet/tilfeldige nedstengninger:
- Ensure all modular cables are fully seated at both the PSU and component ends.
- Check for proper ventilation and ensure the PSU fan is spinning. Overheating can cause shutdowns.
- If you have recently added new components, ensure your 850W power supply is sufficient for the total system wattage.
- Viften snurrer ikke:
- The GX-850 features a temperature-controlled fan. It may not spin at low loads or temperatures. This is normal operation.
- If the fan does not spin under load and the PSU feels hot, ensure there are no obstructions and consider contacting support.
If problems persist after performing these steps, contact GAMEMAX customer support or your retailer for further assistance.
8. Spesifikasjoner
Detailed technical specifications for the GAMEMAX GX-850 80 Plus Gold Power Supply:
| Trekk | Spesifikasjon |
|---|---|
| Modellnavn | GX-850 Modular |
| Merke | GAMEMAX |
| Utgang Wattage | 850 watt |
| Formfaktor | ATX |
| Effektivitetssertifisering | 80 pluss gull |
| Design av strømforsyning | Full modulær |
| Kjølemetode | Air (FDB Fan) |
| Antall vifter | 1 |
| Minimum Input Voltage | 115 volt |
| Maksimal inngang Voltage | 240 volt (AC) |
| Øvre temperaturvurdering | 105 Degrees Celsius (Capacitors) |
| Kompatible enheter | Stasjonær datamaskin |
| Koblingstyper | ATX, PCI-e, SATA |
9. Garanti og støtte
GAMEMAX products are manufactured to high-quality standards. For warranty information, please refer to the warranty card included with your product or visit the official GAMEMAX webGarantivilkårene kan variere avhengig av region og forhandler.
For technical support or further inquiries, please contact GAMEMAX customer service through their official webnettstedet eller kontaktinformasjonen du har fått fra forhandleren din.