Produkt overview
The Amoper 7-inch LCD Digital Microscope is a versatile and powerful tool designed for detailed observation and analysis. Featuring a large 7-inch 1080P HD LCD screen, it provides a clear and expansive view of magnified objects. With a continuous magnification range of 10X to 1200X, it allows for precise examination of various items, from intricate circuit boards to fine details on coins.
Equipped with 8 adjustable LED lights and 2 flexible gooseneck auxiliary lamps, this microscope ensures optimal illumination for any subject. It supports PC connectivity for a larger viewing experience and easy data sharing, compatible with Windows and Mac systems without requiring additional software. The built-in rechargeable lithium battery offers 4-5 hours of continuous operation, making it suitable for both stationary and portable use. Its robust metal stand and wired remote enhance stability and ease of control, making it an excellent choice for soldering, PCB repair, watch repair, textile inspection, educational purposes, and collecting hobbies.

Figure 1: Amoper 7-inch LCD Digital Microscope with its main components, including the LCD screen, lens, stand, and wired remote. A 16GB TF card is also shown, indicating its inclusion for storage.
Produktkomponenter og kontroller
Familiarize yourself with the various parts and controls of your Amoper Digital Microscope for optimal use.
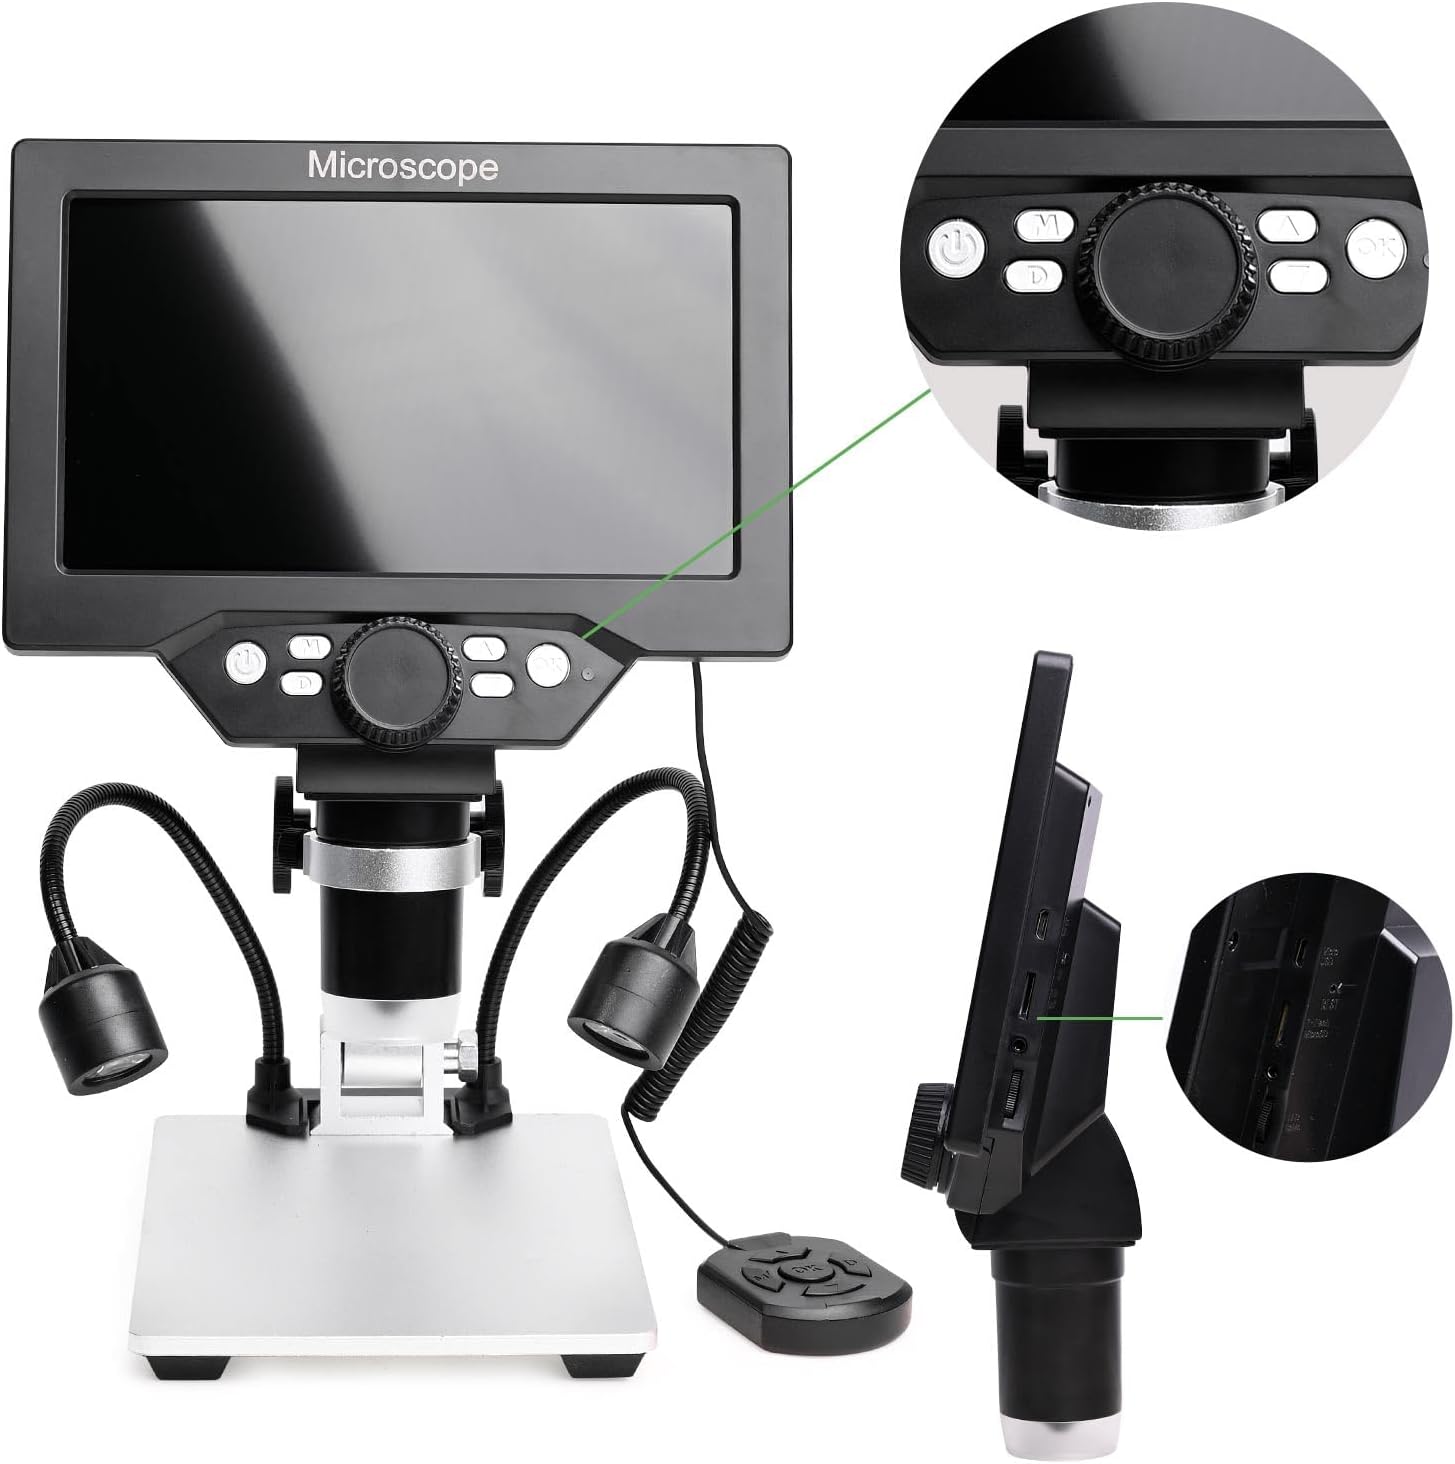
Figur 2: Detaljert view of the microscope's control panel and side ports. The control panel features buttons for system key programming, power on/off, video/camera/playback mode, zoom in/out, and a confirm/camera button. The side of the screen unit shows ports for USB, TF card, and power input.
- 7-tommers LCD-skjerm: High-definition display for real-time viewing.
- Mikroskoplinse: Captures magnified images of the subject.
- Justerbart stativ: Provides stability and allows for height adjustment of the microscope head.
- 8 innebygde LED-lys: Integrated around the lens for primary illumination.
- 2 Flexible Gooseneck Auxiliary Lamps: Provide additional, adjustable lighting from the sides.
- Kablet fjernkontroll: For convenient operation, including capturing images/videos.
- Kontrollpanelknapper: Located on the screen unit for power, mode selection, zoom, and capture.
- TF-kortspor: For inserting the included 16GB TF card to store images and videos.
- USB-port: For connecting to a PC and charging.
- Strøminngangsport: For tilkobling av strømadapter.

Figure 3: All components included in the package, showing the main microscope unit, metal stand, wired remote, and auxiliary lights.
Innledende oppsett
- Unpack and Verify Contents: Carefully remove all components from the packaging. Refer to Figure 3 to ensure all parts are present: the main microscope unit (with LCD screen and lens), the metal stand, two flexible auxiliary lamps, a wired remote control, and the 16GB TF card.
- Assemble the Microscope:
- Attach the main microscope unit to the vertical pole of the metal stand. Secure it firmly using the provided screws or locking mechanism.
- Connect the two flexible auxiliary lamps to their designated ports on the base or main unit, ensuring they are securely plugged in.
- Connect the wired remote control to its dedicated port on the main unit.
- Sett inn TF-kort: Locate the TF card slot on the side of the LCD screen unit. Gently insert the included 16GB TF card until it clicks into place. Ensure the card is inserted in the correct orientation. This card is essential for saving photos and videos.
- Lad opp batteriet: Before first use, fully charge the microscope's built-in lithium battery. Connect the microscope to a power source using the provided USB cable and adapter. The charging indicator will typically show the charging status and turn off or change color when fully charged. A full charge provides approximately 4-5 hours of continuous operation.
Bruksanvisning
Slå på/av
Press and hold the Power button (usually marked with a power symbol or 'ON/OFF') on the control panel of the LCD screen unit to turn the microscope on or off. The LCD screen will illuminate upon successful power-on.
Justering av forstørrelse
The microscope offers a continuous magnification range from 10X to 1200X. Adjust the magnification by rotating the focus wheel located on the main unit. For fine-tuning, use the 'PAGE UP ZOOM+' and 'PAGE DOWN ZOOM-' buttons on the control panel or remote to digitally zoom in or out on the displayed image.
Lyskontroll
The microscope features 8 built-in LED lights around the lens and 2 flexible gooseneck auxiliary lamps. You can adjust the brightness of these lights as needed to achieve optimal illumination for your subject. The auxiliary lamps can often be powered and controlled independently for precise lighting angles.
PC-tilkobling
Til view the microscope's output on a larger screen, connect it to a Windows or Mac computer via the USB cable. No additional software download is typically required. For Windows 10, simply run the default application "Windows Camera". For iMac/MacBook, use "Photo Booth". This allows for real-time observation, data sharing, and analysis on your computer.
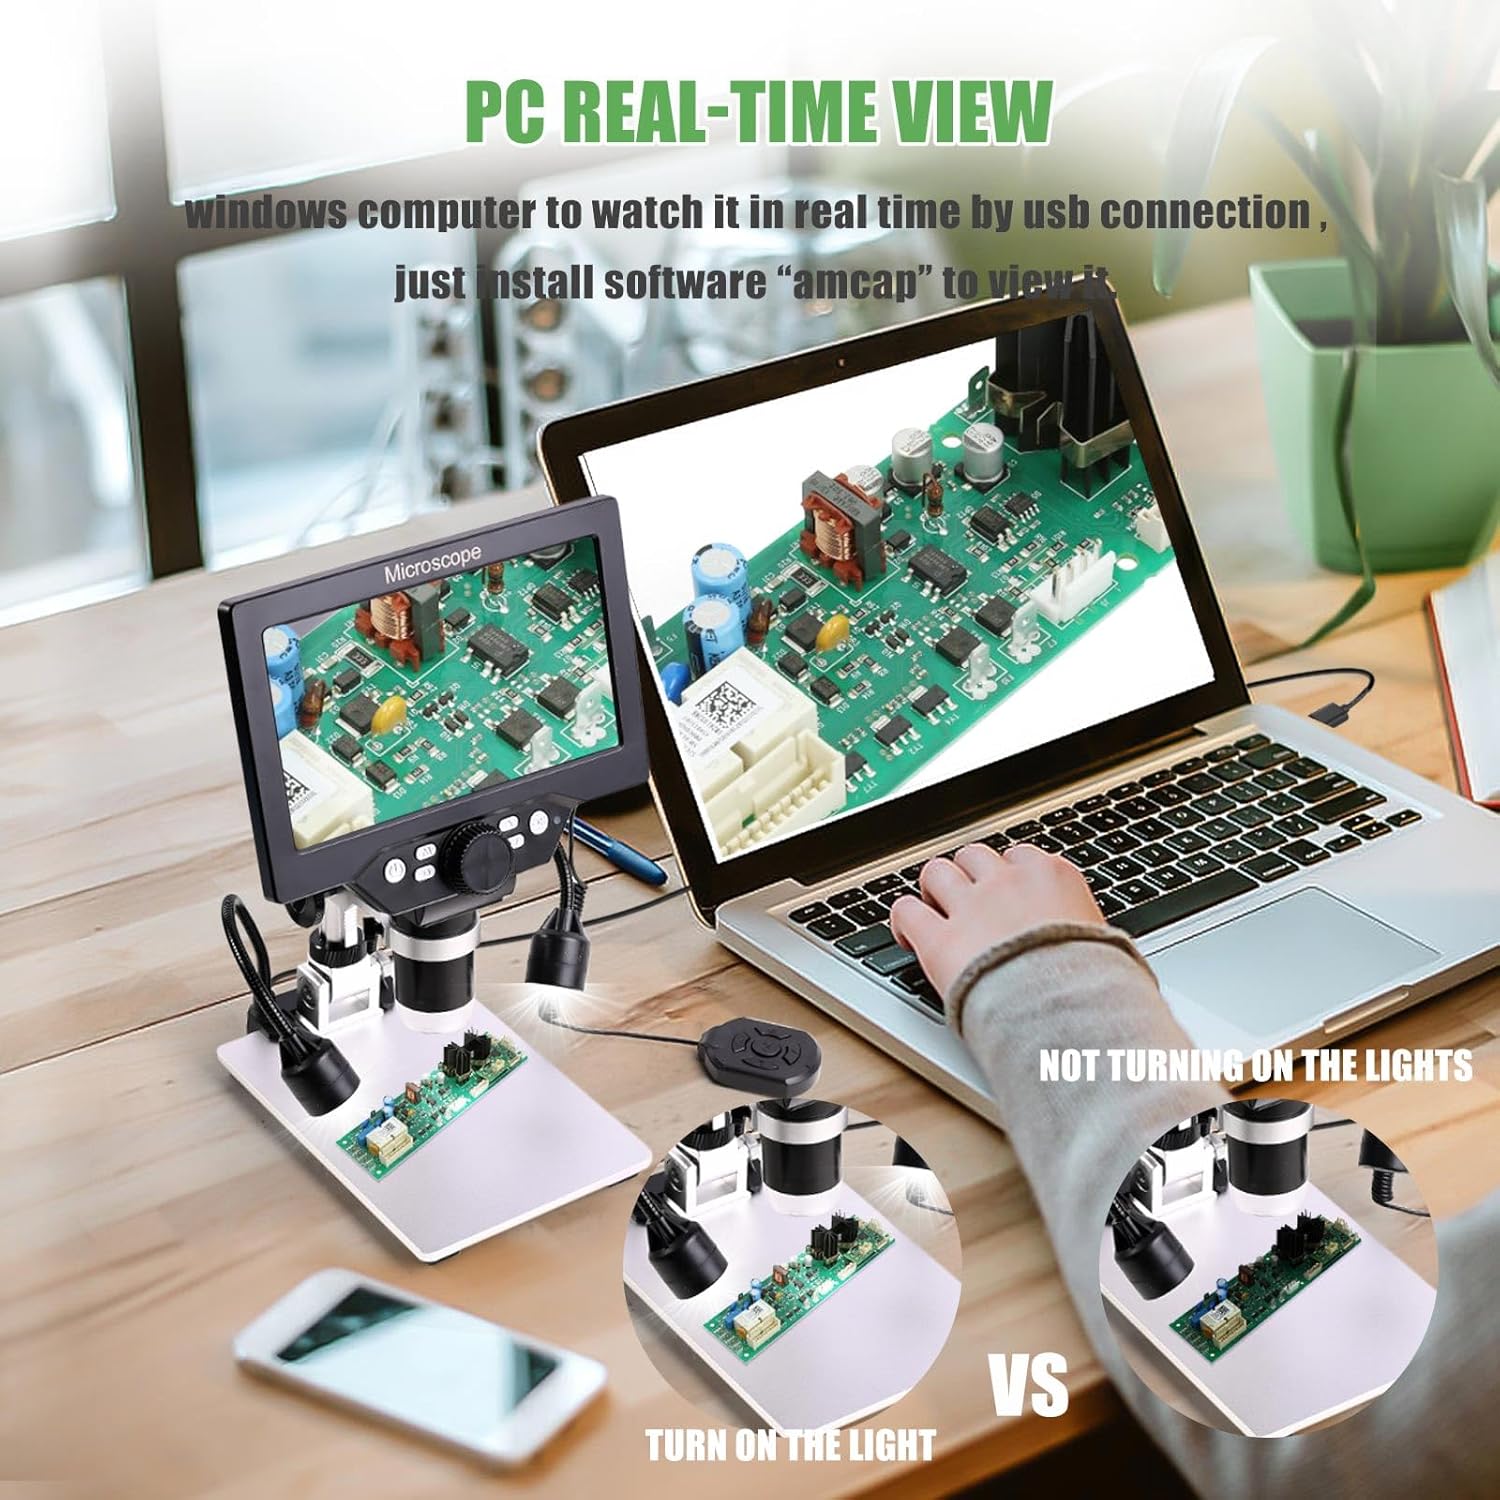
Figure 4: The digital microscope connected to a laptop, demonstrating the PC real-time viewing capability. The image highlights the difference in visibility with and without the auxiliary lights turned on.
Ta bilder og videoer
To capture still images or record videos, press the 'Confirm Key/Camera Button' on the control panel or the corresponding button on the wired remote. Ensure a TF card is inserted to save your captures. You can switch between photo and video modes using the 'Mode' button on the control panel.
Ergonomisk justering
The microscope is designed for better ergonomics, reducing eye and neck strain. The screen unit can be adjusted vertically along the stand to find a comfortable viewing height. This allows for prolonged use without discomfort.

Figure 5: Illustration of the microscope's vertical adjustment feature, allowing the screen to be moved up and down for improved ergonomic viewing and reduced strain.
Typiske applikasjoner
The Amoper 7-inch LCD Digital Microscope is suitable for a wide range of applications, including but not limited to:
- Circuit board inspection and repair (e.g., soldering).
- QC inspection in manufacturing.
- Watch and clock repair.
- Textile industrial inspection.
- Educational inspection and biological observation (not suitable for cellular level).
- Examination of coins, jewelry, and stamps for collectors.
- Use by medical professionals and scientific researchers for non-cellular observation.

Figure 6: The microscope in use for soldering and circuit board repair, highlighting its utility as a 'good helper for welding amplification board'.
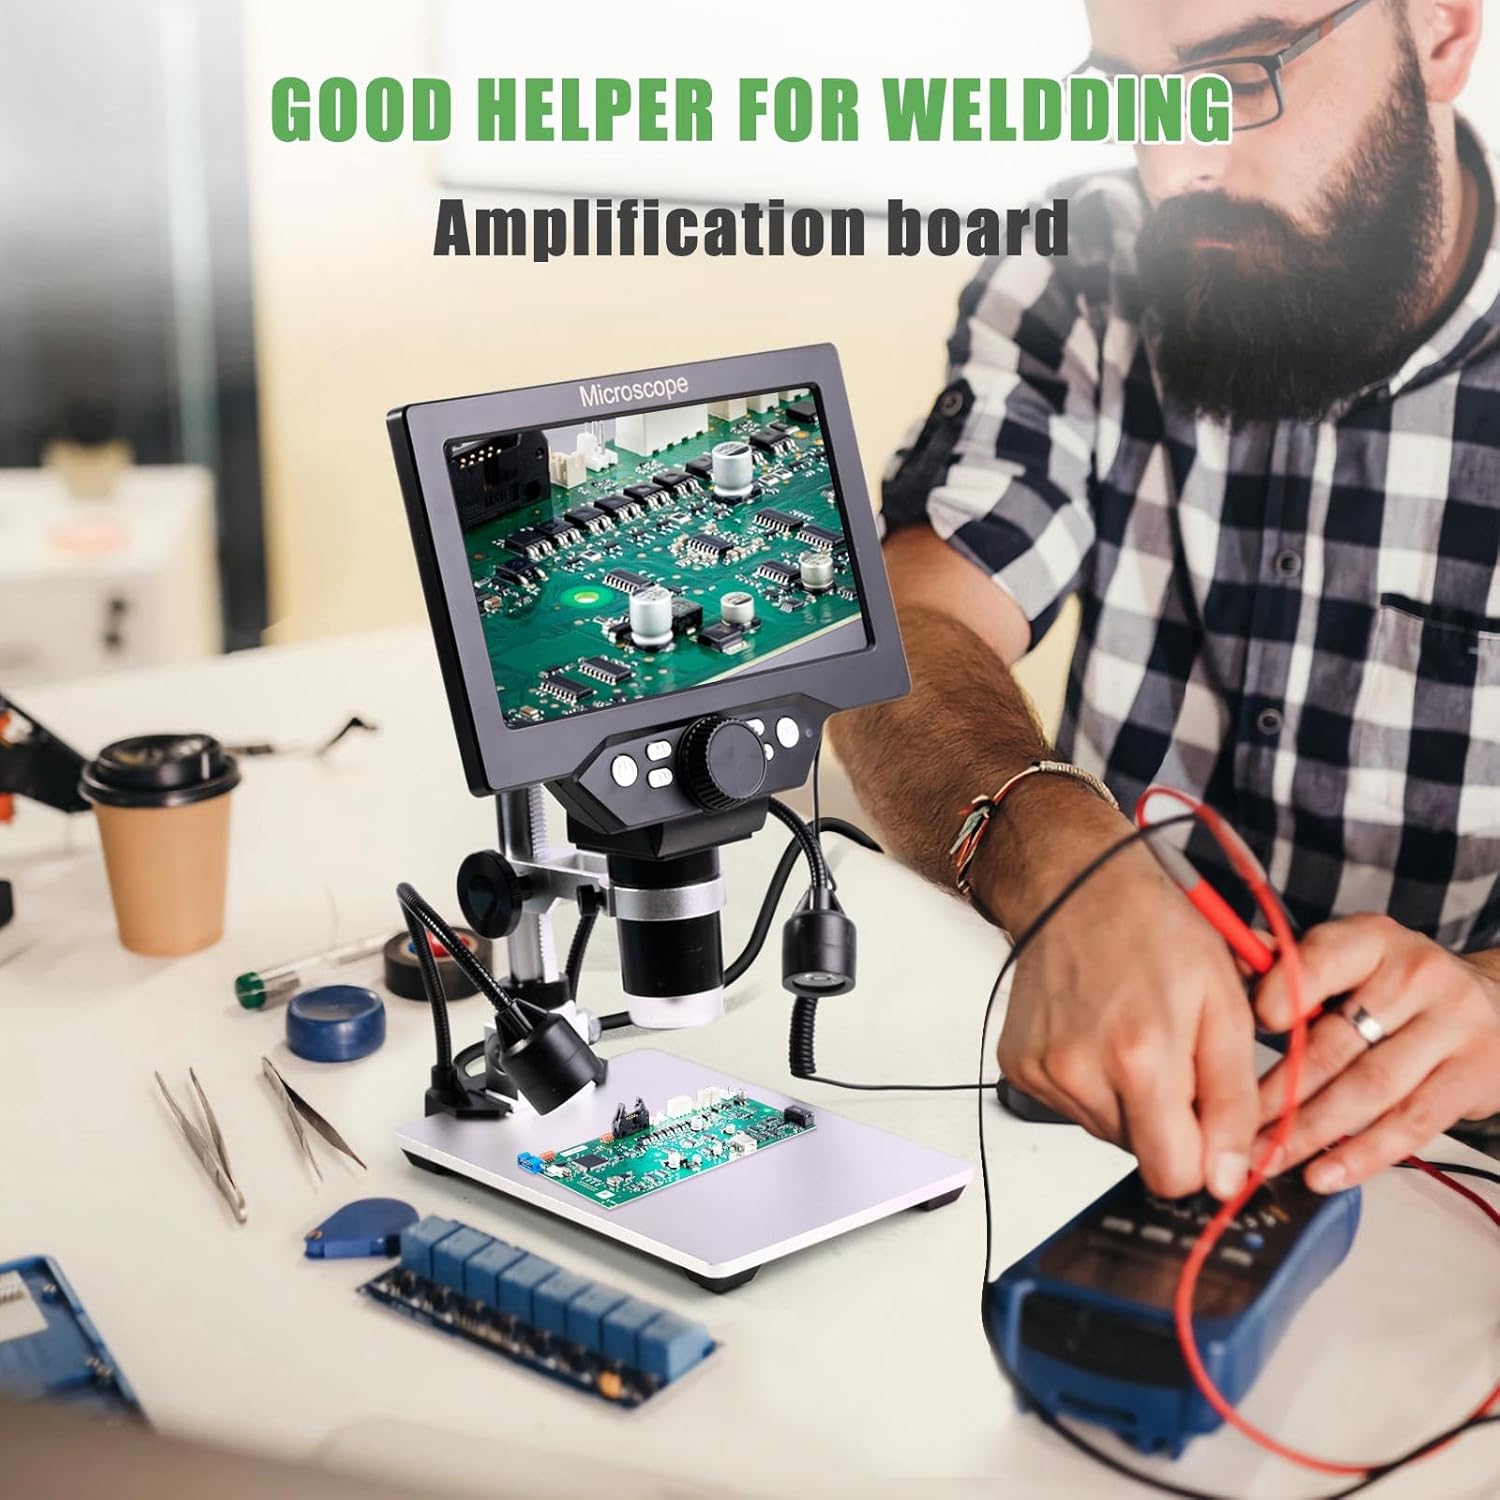
Figure 7: An elderly man using the microscope to inspect coins, demonstrating its benefit for coin collectors to view details from close-up to the entirety of the coin.
Stell og vedlikehold
- Rengjøring: Use a soft, dry cloth to clean the exterior of the microscope. For the lens and LCD screen, use a specialized lens cleaning cloth and solution to avoid scratches. Do not use abrasive cleaners or solvents.
- Lagring: When not in use, store the microscope in a clean, dry, and dust-free environment. Avoid extreme temperatures and direct sunlight.
- Batteripleie: For å forlenge batterilevetiden, unngå å utlade batteriet helt ofte. Lad mikroskopet regelmessig, selv om det ikke er i konstant bruk.
Feilsøkingsveiledning
This section addresses common issues you might encounter with your Amoper Digital Microscope.
| Problem | Mulig årsak | Løsning |
|---|---|---|
| Mikroskopet slår seg ikke på. | Battery is depleted; Power button not pressed correctly; Faulty power switch. | Charge the battery fully. Ensure the power button is pressed and held until the screen illuminates. If issues persist, contact customer support. |
| Image on screen is unclear or blurry. | Incorrect focus; Lens or subject dirty; Insufficient lighting. | Adjust the focus wheel. Clean the lens and subject. Adjust the brightness of the LED and auxiliary lights. Ensure proper working distance. |
| Cannot connect to PC or view sanntidsbilde. | Incorrect USB cable connection; PC software not running; Driver issues (rare). | Ensure the USB cable is securely connected to both the microscope and the PC. Open "Windows Camera" (Windows 10) or "Photo Booth" (Mac) on your computer. Try a different USB port or cable. |
| Kan ikke lagre bilder/videoer. | TF card not inserted; TF card full or corrupted; Incorrect mode. | Ensure the 16GB TF card is properly inserted. Check if the TF card has sufficient free space. Format the TF card if necessary (this will erase all data). Ensure you are in photo or video capture mode. |
| Wired remote control is unresponsive. | Remote not properly connected; Damaged cable. | Ensure the remote's cable is securely plugged into the microscope unit. Inspect the cable for any visible damage. |
Tekniske spesifikasjoner
| Trekk | Spesifikasjon |
|---|---|
| Modellnummer | XW-MCSP32-Upgraded |
| Skjermstørrelse | 7 tommer |
| Skjermoppløsning | 1080P HD |
| Forstørrelsesområde | 10X-1200X (Continuous) |
| Belysning | 8 LED Lights + 2 Auxiliary Lamps |
| Lagring | 16 GB TF-kort (inkludert) |
| PC-tilkobling | USB (Windows Camera for Win10, Photo Booth for Mac) |
| Strømkilde | Batteridrevet (1 litiumionbatteri inkludert) |
| Batterilevetid | 4-5 hours (continuous operation) |
| Materiale | Metal (Stand) |
| Varevekt | 2.6 pund |
| Pakkedimensjoner | 9.4 x 7.8 x 3.3 tommer |
Garanti og kundestøtte
Amoper products are manufactured to high-quality standards. For any questions, technical assistance, or warranty inquiries regarding your Amoper 7-inch LCD Digital Microscope, please contact Amoper customer support through the retailer's platform or the official Amoper website. Please retain your proof of purchase for any warranty claims. The standard return policy for this product is typically 30 days from the date of purchase.