Introduksjon
This manual provides detailed instructions for the setup, operation, and maintenance of your ORIA Wooden Digital Alarm Clock. Please read this manual thoroughly before using the product to ensure proper function and longevity.

Image: The ORIA Wooden Digital Alarm Clock, showcasing its LED display and wooden finish.
Pakkeinnhold
Vennligst sjekk pakken for følgende varer:
- 1 x ORIA Wooden Digital Alarm Clock
- 1 x 1.5 m Type-C ladekabel
- 1 x brukerhåndbok
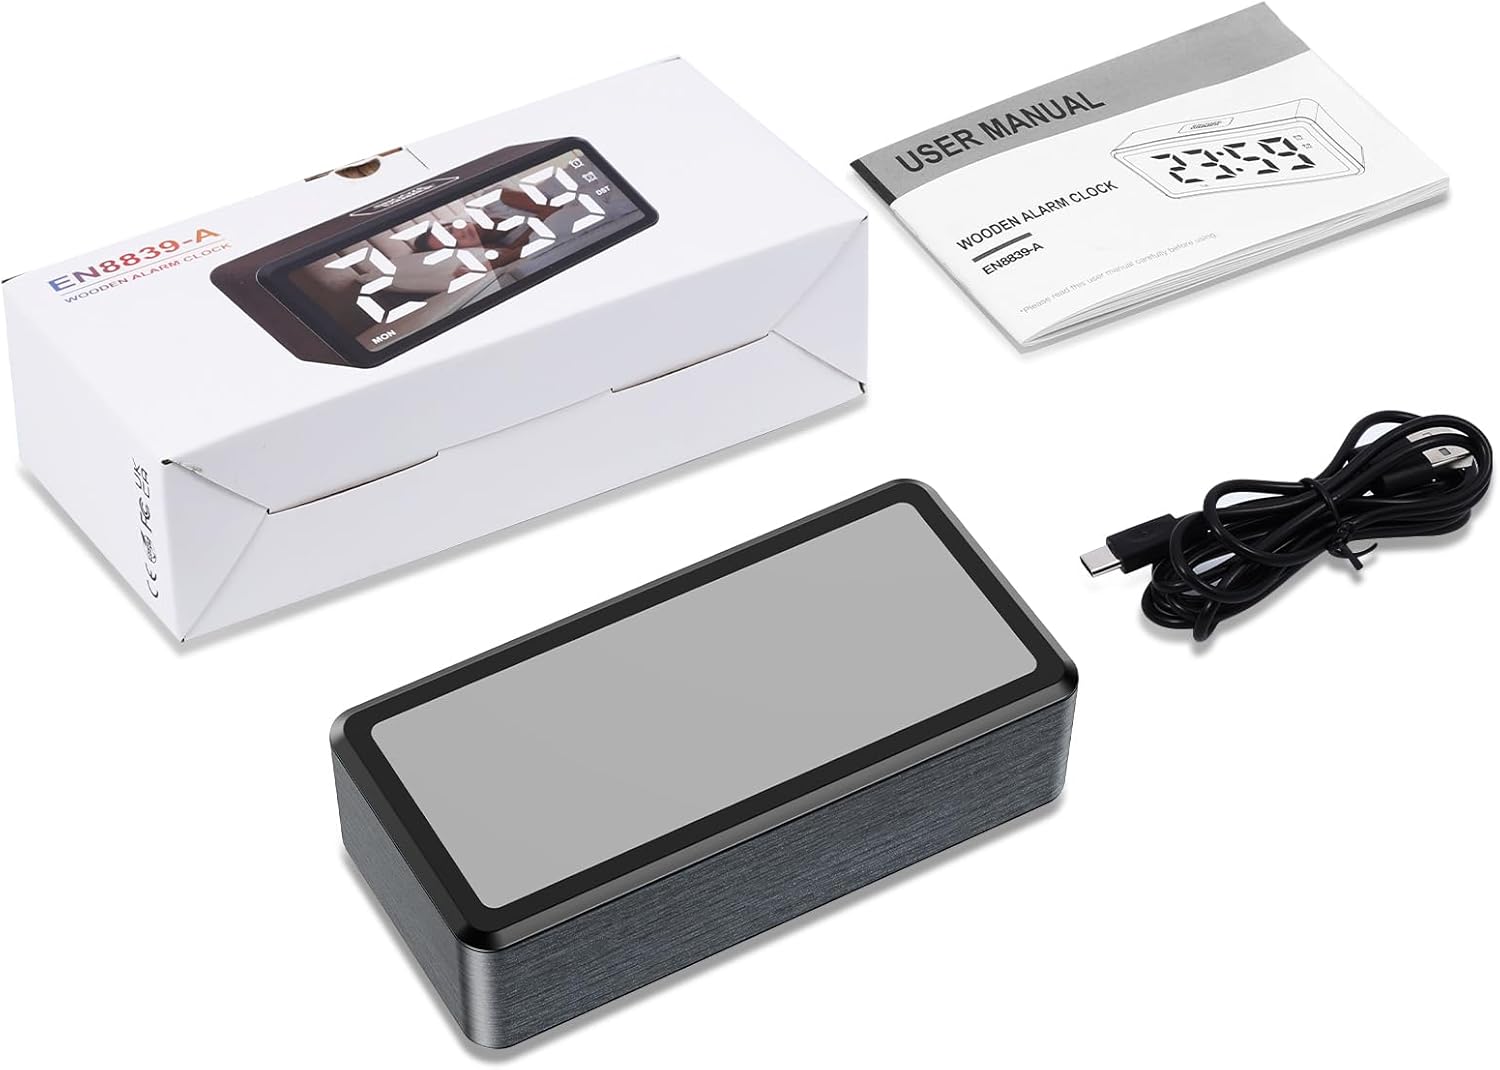
Image: Contents of the product package, including the alarm clock, Type-C cable, and user manual.
Produkt overview
The ORIA Wooden Digital Alarm Clock features a large LED mirror display and intuitive controls. Key features include dual alarms, adjustable brightness and volume, and Daylight Saving Time (DST) functionality.

Image: Visual representation of the clock highlighting features such as 12/24H display, DST, week display, snooze, dual alarm, adjustable volume, adjustable brightness, and USB output port.
Oppsett
Slår på
The alarm clock must be plugged in for operation. Connect the provided 1.5m Type-C cable to the clock and a suitable USB power adapter (not included). The LED display will light up once powered.
Batteribackup-funksjon
The clock requires 2 AAA batteries (not included) for its memory function. These batteries retain your time and alarm settings during a power outage but will not power the LED display. The display will remain off when operating solely on battery power.

Image: Illustration showing the Type-C power connection and the AAA battery compartment for memory backup.
Bruksanvisning
Tidsinnstilling
- I tidsvisningsmodus, trykk og hold inne SETT button for 2 seconds to enter time-setting mode. The HOUR digits will flash.
- Trykk på + or - buttons to adjust the hour. Hold the button to advance rapidly.
- Trykk kort på SETT button to confirm the hour and move to minute setting. The MINUTE digits will flash.
- Trykk på + or - knapper for å justere minuttet.
- Trykk kort på SETT button to confirm the minute and move to week setting. The WEEK digits will flash.
- Trykk på + or - buttons to adjust the day of the week.
- Trykk på SETT button again to save all settings and exit time-setting mode.
12/24-timers format
I tidsvisningsmodus, trykk kort på SETT button to toggle between 12-hour and 24-hour time formats. The AM/PM indicator will light up or turn off accordingly in 12-hour mode.

Image: Comparison of the clock display in 12-hour format (with AM/PM indicator) and 24-hour format.
Alarm og slumreinnstilling
The clock features two independent alarms (AL1 and AL2).
- To Activate/Deactivate Alarm: I tidsvisningsmodus, trykk kort på AL1 button to switch Alarm 1 ON/OFF. The corresponding alarm icon will light up or turn off. Repeat for AL2 button for Alarm 2.
- For å stille inn alarm: Trykk og hold inne AL1 button for 2 seconds to enter Alarm 1 setting mode. The HOUR digits will flash.
- Bruk + or - to adjust the hour, then short press AL1 for å bekrefte og gå til minuttinnstilling.
- Bruk + or - to adjust the minute, then short press AL1 to confirm and move to alarm mode setting.
- Alarmmoduser: Bruk + or - to select an alarm mode:
- 1-7: Alarm sounds Monday to Sunday (Default for ALARM 1).
- 1-5: Alarm sounds Monday to Friday (Default for ALARM 2).
- 6-7: Alarmen går lørdag og søndag.
- Kort trykk AL1 to confirm the alarm mode and move to snooze time setting.
- Slumretid: The default snooze time is 5 minutes. Use + or - to set the snooze duration from 5 to 60 minutes.
- Pressen AL1 again to save all settings and exit alarm setting mode.
- Repeat the process for Alarm 2 using the AL2 knapp.

Image: Display showing the two independent alarms and the three selectable alarm modes (Monday-Friday, Monday-Sunday, Saturday-Sunday).
Justering av lysstyrke
The LED screen brightness can be adjusted to 5 levels: 100%, 80%, 50%, 20%, and 5%. To adjust, press the SNOOZE/DIMMER button repeatedly in time display mode to cycle through the brightness levels.

Image: Visual representation of the clock display at different brightness levels, from 100% to 5%.
Volumjustering
The alarm volume can be adjusted to 5 levels: 95 dB, 85 dB, 75 dB (default), 65 dB, and 55 dB. To adjust, press the VOL button repeatedly to cycle through the volume levels.
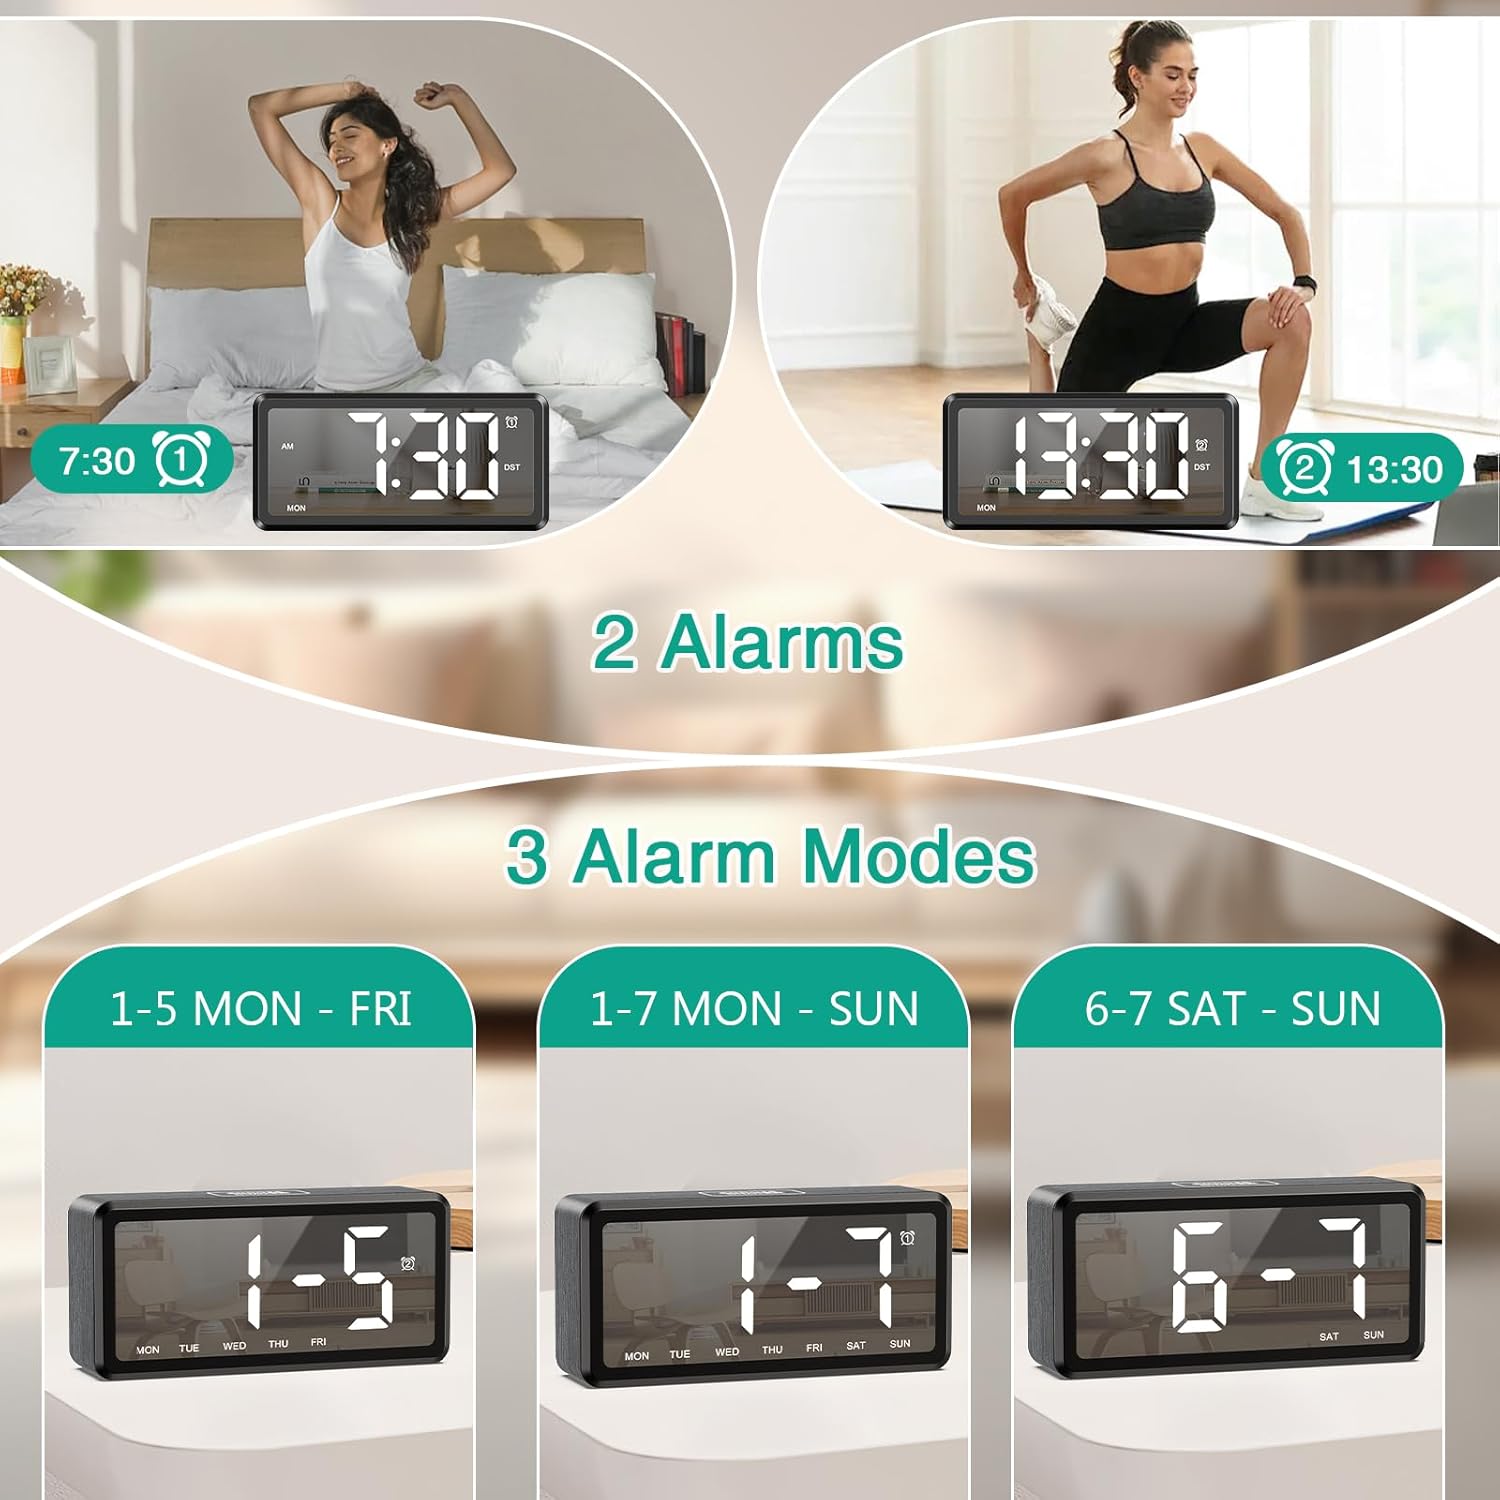
Image: Graphic illustrating the five adjustable alarm volume levels from 55dB to 95dB, along with snooze duration.
Sommertid (DST)
To activate or deactivate Daylight Saving Time, short press the DST button. The DST indicator will light up or turn off, and the time will adjust by one hour accordingly.
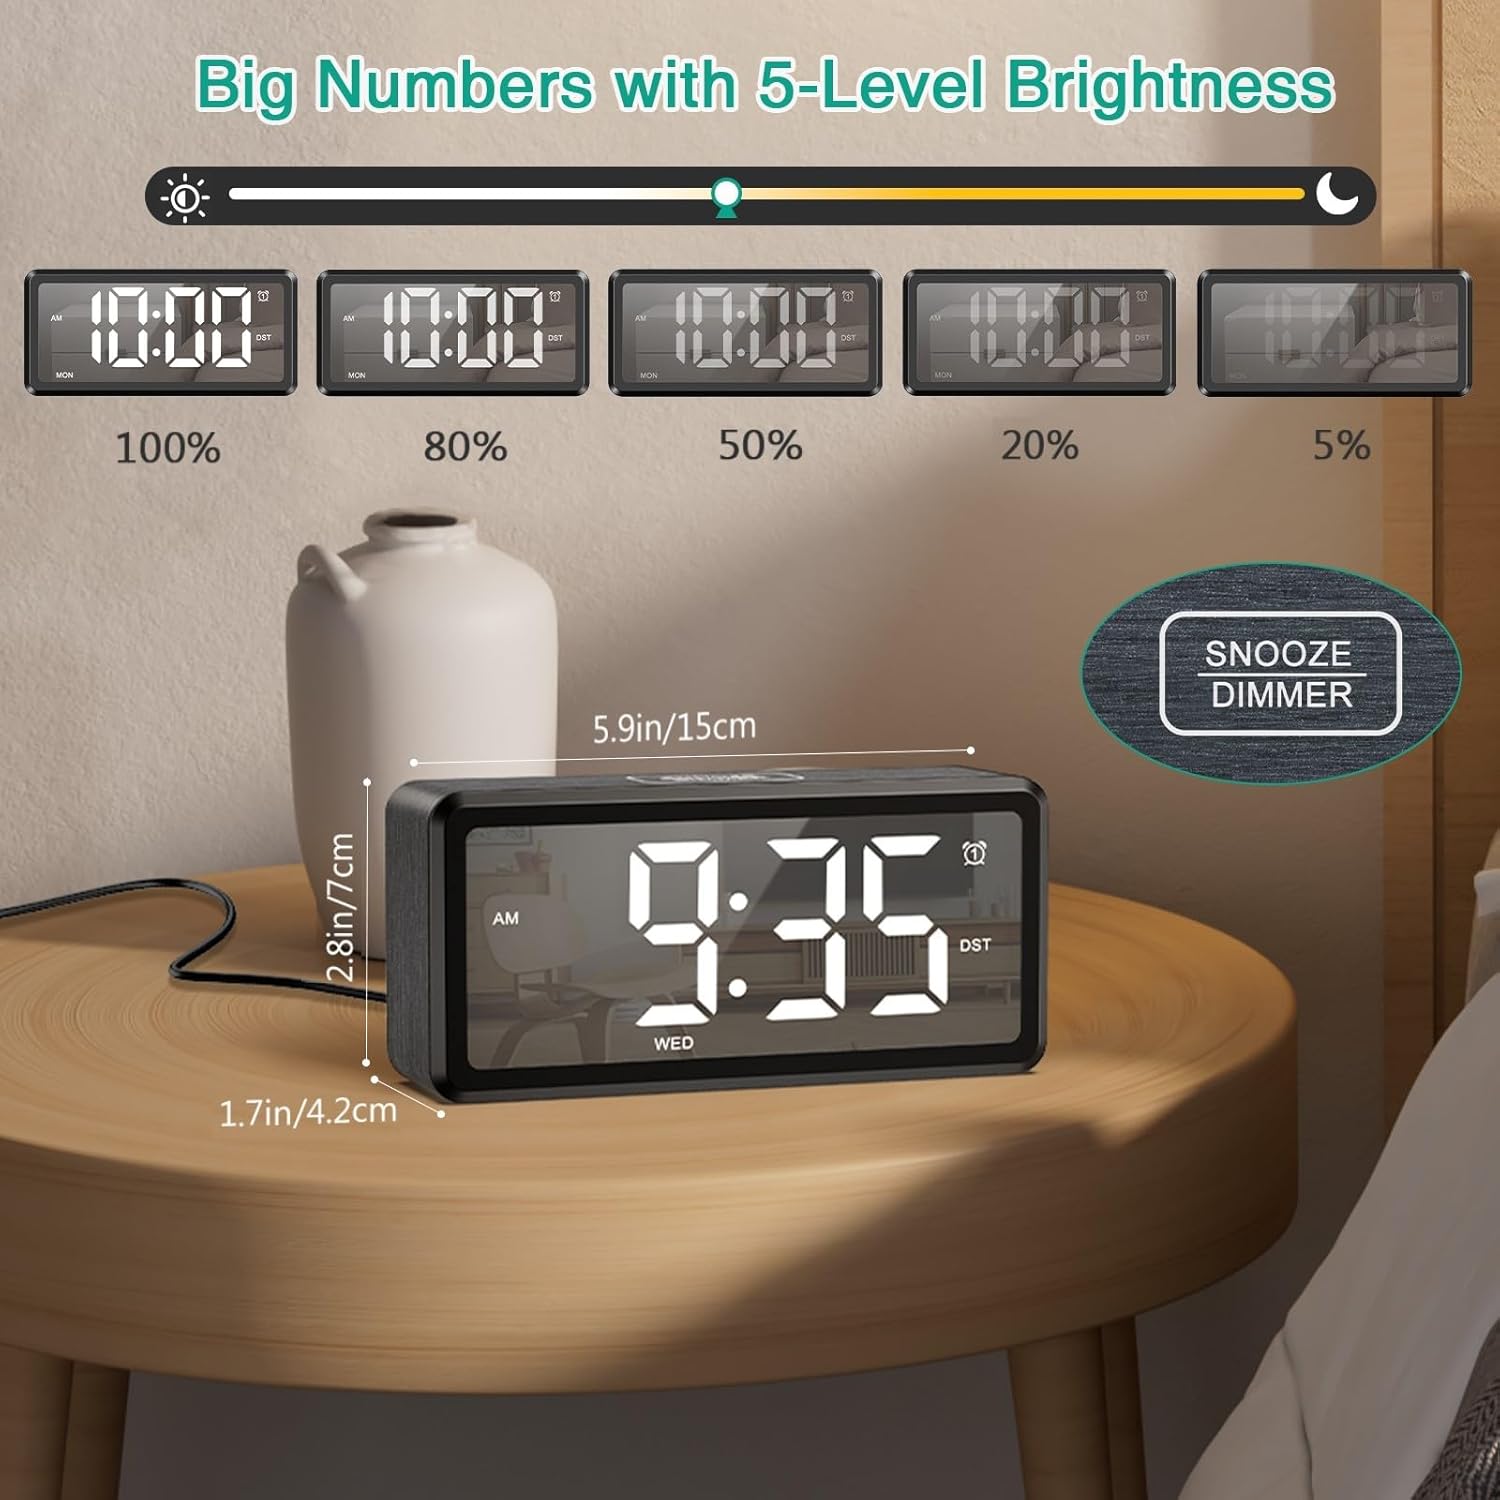
Image: The clock display showing time before and after activating DST with a single button press.
Vedlikehold
To ensure the longevity and optimal performance of your ORIA Wooden Digital Alarm Clock, follow these simple maintenance guidelines:
- Rengjøring: Wipe the clock's surface with a soft, dry cloth. Avoid using abrasive cleaners, solvents, or chemical sprays, as these can damage the finish and display.
- Plassering: Place the clock on a stable, flat surface away from direct sunlight, excessive heat, moisture, and strong magnetic fields.
- Makt: Always use the provided Type-C cable and a compatible USB power adapter. Disconnect power during electrical storms or when not in use for extended periods.
- Batterier: If using AAA batteries for backup, replace them annually or when the memory function appears unreliable. Ensure correct polarity when inserting batteries.
Feilsøking
| Problem | Mulig årsak | Løsning |
|---|---|---|
| Displayet er tomt. | Ikke koblet til; slå av strømmentage; batteries only. | Ensure the Type-C cable is securely connected to a power source. If using only AAA batteries, the display will not light up; they are for memory backup only. |
| Alarmen lyder ikke. | Alarm is deactivated; volume is too low; incorrect alarm time/mode. | Check if the alarm icon (AL1/AL2) is lit. Adjust the volume level. Verify the alarm time and selected alarm mode (1-7, 1-5, or 6-7). |
| Klokken er feil etter at strømmen er slått avtage. | No AAA batteries installed; dead AAA batteries. | Install 2 new AAA batteries for memory backup. If batteries are installed, replace them. |
| Knappene reagerer ikke. | Midlertidig programvarefeil. | Unplug the clock from power, remove any backup batteries, wait 30 seconds, then reconnect power and batteries. |
Spesifikasjoner
| Trekk | Detalj |
|---|---|
| Merke | ORIA |
| Modellnummer | OUS-HY-WA173 |
| Visningstype | LED |
| Strømkilde | Kablet elektrisk (USB type-C) |
| Batterisikkerhetskopiering | 2 x AAA batteries (for memory only, not included) |
| Produktdimensjoner | 2.73 cm B x 5.85 cm H |
| Rammemateriale | Tre |
| Spesielle funksjoner | Dual Alarms, Snooze, Adjustable Brightness (5 levels), Adjustable Volume (5 levels), DST, 12/24H Format |
| Innendørs/utendørs bruk | Innendørs |
Garanti og støtte
ORIA is committed to providing high-quality products and customer satisfaction. Your ORIA Wooden Digital Alarm Clock comes with the following:
- 1 års garanti: Dekker produksjonsfeil og funksjonsfeil ved normal bruk.
- 90-Day Free Replacements: For any issues within the first 90 days of purchase.
- 30-dagers gratis retur: Problemfri retur innen 30 dager etter kjøp.
- 24/7 kundestøtte: Assistance available around the clock for any queries or issues.
- Livstids teknisk støtte: Løpende teknisk assistanse gjennom hele produktets levetid.
For support, please visit the official ORIA website or contact our customer service team using the contact information provided on your purchase receipt or the ORIA brand store on Amazon.

Image: Graphic summarizing ORIA's customer support offerings, including warranty, replacements, returns, and technical support.