1. Introduksjon
Takk for kjøpetasing the Urageuxy Wireless Indoor/Outdoor Thermometer with 3 Sensors. This device provides accurate, real-time temperature and humidity readings for up to four locations simultaneously (one indoor, three outdoor/remote). It features a clear LCD display with backlight, comfort indicators, and records of daily maximum and minimum values. This manual will guide you through the setup, operation, and maintenance of your new thermometer.
2. Sikkerhetsinformasjon
- Do not expose the main unit or sensors to extreme force, shock, dust, temperature, or humidity.
- Do not immerse the main unit in water. The remote sensors are splash-proof but should not be submerged.
- Do not attempt to open the main unit or sensors. This will void the warranty.
- Use only fresh batteries of the specified type. Do not mix old and new batteries.
- Kast brukte batterier på en ansvarlig måte, i henhold til lokale forskrifter.
- Oppbevares utilgjengelig for barn.
3. Pakkens innhold
Vennligst sjekk innholdet i pakken for å sikre at alle varene er til stede:
- 1 x Main Display Unit (Indoor Console)
- 3 x trådløse fjernsensorer
- 1 x bruksanvisning
4. Produktet er overview
Hoveddisplayenhet
The main display unit shows indoor temperature and humidity, along with readings from up to three remote sensors. It features a large LCD screen with a backlight for easy viewing.


Wireless Remote Sensors
Each remote sensor measures temperature and humidity and transmits data wirelessly to the main unit. They are designed for outdoor use but should be placed in a sheltered location to avoid direct rain or prolonged sun exposure.
5. Oppsett
5.1 Installasjon av batteri
For the Main Display Unit:
- Åpne batteridekselet på baksiden av hovedenheten.
- Insert 3 AAA batteries (not included) according to the polarity markings (+ and -).
- Lukk batteridekselet.
For the Wireless Remote Sensors:
- Open the battery compartment cover on the back of each sensor.
- Insert 2 AAA batteries (not included) according to the polarity markings (+ and -).
- Lukk batteridekselet.

5.2 Sensorparing
The main unit will automatically search for and connect to the remote sensors once batteries are installed. Ensure both the main unit and sensors are within range during initial setup.
- Place the main unit and sensors close to each other during the initial pairing process.
- The main unit will display readings for each connected sensor (CH1, CH2, CH3).
- If a sensor does not connect, press the 'CHANNEL' button on the main unit to cycle through channels or press the 'RESET' button on the sensor to re-initiate pairing.
5.3 Sensor Placement Guidelines
For optimal performance and accurate readings, consider the following:
- Overføringsområde: The wireless sensors have a transmission range of up to 328 feet (100 meters) in open areas. Walls, metal structures, and other electronic devices can reduce this range.
- Utendørs plassering: While splash-proof, place outdoor sensors under a roof or in a sheltered area to protect them from direct rain and prolonged direct sunlight.
- Unngå varmekilder: Do not place sensors near heat sources (e.g., vents, appliances) or in direct sunlight, as this can lead to inaccurate temperature readings.
- Flere steder: Utilize the three sensors to monitor different areas such as a greenhouse, baby room, wine cellar, kitchen, or garage.


6. Bruksanvisning
6.1 Visningsavlesninger
LCD-skjermen viser følgende informasjon:
- Innendørs temperatur og fuktighet: Shown at the top of the display.
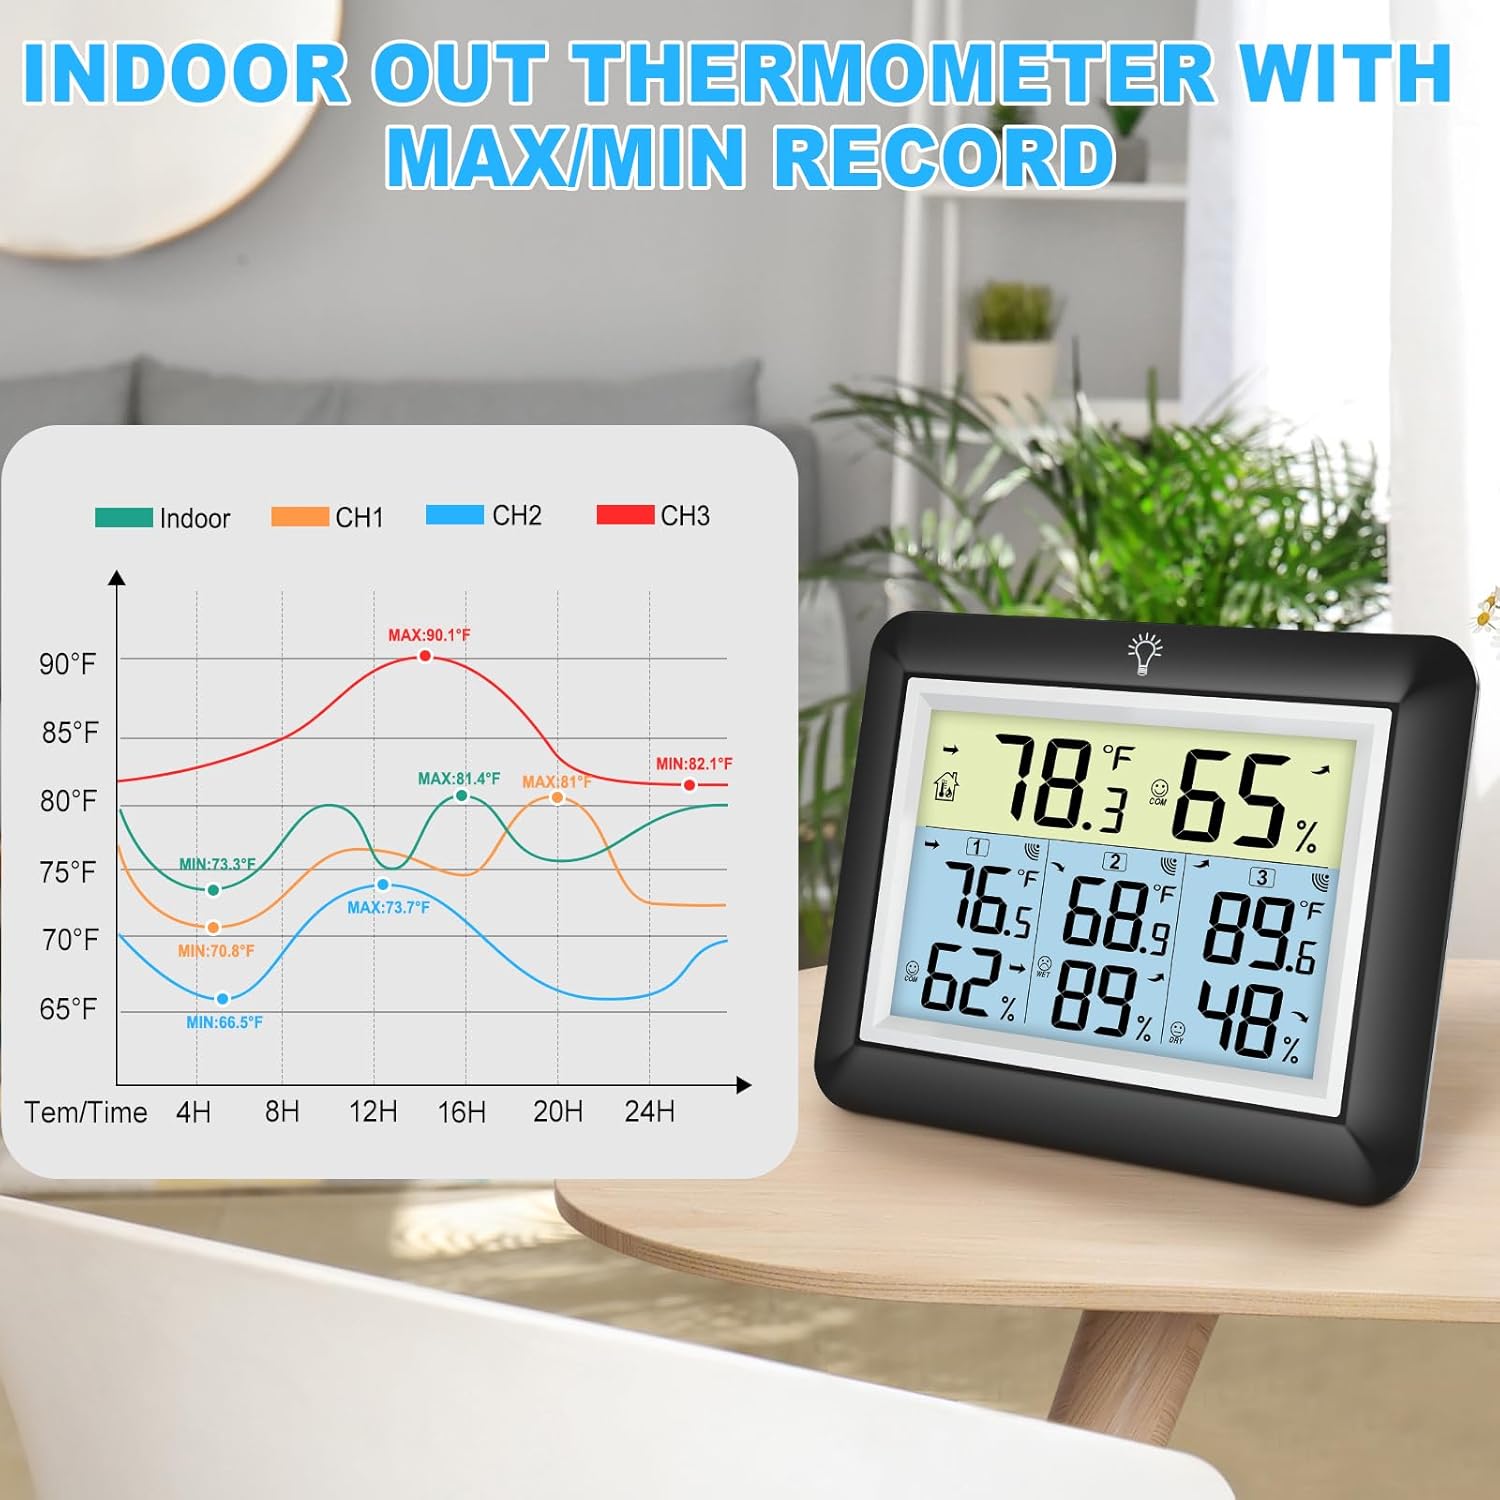
- Remote Sensor Readings: Temperature and humidity for each connected sensor (CH1, CH2, CH3) are displayed below the indoor readings.
- Comfort Icons: Indicates the current humidity level (DRY, COMFORT, WET).
- Trendindikatorer: Arrows next to temperature and humidity values show if they are rising, falling, or stable.
6.2 °C/°F Switcher
To switch between Celsius (°C) and Fahrenheit (°F), press the '°C/°F' button located on the back of the main unit.
6.3 MAX/MIN Records
The device automatically records the daily maximum and minimum temperature and humidity values for both indoor and all remote sensors. These records reset every 24 hours.
- Press the 'MIN/MAX' button on the back of the main unit to view de maksimale registrerte verdiene.
- Press the 'MIN/MAX' button again to view de minste registrerte verdiene.
- Trykk en tredje gang for å gå tilbake til gjeldende avlesninger.

6.4 Bakgrunnsbelysning
The main unit features an adjustable backlight for improved visibility in low-light conditions.
- Touch the light bulb icon on the top of the main unit to activate the backlight for 5 seconds.
- Press and hold the light bulb icon for more than 5 seconds to keep the backlight on for 30 minutes.


6.5 Komfortindikator
The comfort indicator provides a quick visual reference for the current humidity level, helping you maintain an ideal environment.
- TØRKE: Fuktighet < 45 %
- KOMFORT: 45 % ≤ Fuktighet ≤ 65 %
- VÅT: Fuktighet > 65 %


7. Vedlikehold
7.1 Rengjøring
Tørk av hovedenheten og sensorene med en myk klutamp cloth. Do not use abrasive cleaners or solvents, as they may damage the plastic components and electronic circuits.
7.2 Batteribytte
Replace batteries when the low battery indicator appears on the display. Always replace all batteries in a unit at the same time with new ones of the same type.
7.3 Oppbevaring
If the device will not be used for an extended period, remove the batteries from both the main unit and sensors to prevent leakage and damage.
8. Feilsøking
| Problem | Mulig årsak | Løsning |
|---|---|---|
| Ingen skjerm på hovedenheten. | Batteriene er tomme eller feil installert. | Bytt ut batteriene med nye, og sørg for riktig polaritet. |
| Remote sensor not displaying readings or showing '---'. | 1. Sensor out of range. 2. Batteries are dead. 3. Interferens. 4. Sensor not paired. | 1. Flytt sensoren nærmere hovedenheten. 2. Skift sensorbatterier. 3. Move away from other electronic devices. 4. Press the 'RESET' button on the sensor and then cycle channels on the main unit. |
| Unøyaktige avlesninger. | 1. Sensor exposed to direct sunlight or heat source. 2. Poor ventilation around sensor. | 1. Relocate sensor to a shaded, well-ventilated area. 2. Ensure proper airflow around the sensor. |
| Baklyset fungerer ikke. | Lavt batteri eller feil. | Replace main unit batteries. If issue persists, contact support. |
9. Spesifikasjoner
- Merke: Urageuxy
- Modell: WS0170BKY
- Innendørs temperaturområde: 32 °F til 140 °F (0 °C til 60 °C)
- Utetemperaturområde: -40 °F til 140 °F (-40 °C til 60 °C)
- Temperaturnøyaktighet: ± 2 ° F / ± 1 ° C
- Fuktighetsområde: 10 % til 99 % RF
- Fuktighetsnøyaktighet: ±5 % RF
- Trådløs overføringsrekkevidde: Opptil 100 meter i åpne områder
- Strømkilde (hovedenhet): 3 x AAA-batterier (ikke inkludert)
- Power Source (Remote Sensor): 2 x AAA-batterier (ikke inkludert)
- Spesielle funksjoner: Backlit LCD, Comfort Indicator, Min/Max Record, Fast Refresh
- Materiale: Akrylnitrilbutadienstyren (ABS)
- Produktmål (hovedenhet): 0.78 cm D x 4.33 cm B x 0.78 cm H (ca.)
- Varevekt: 9.9 unser (0.28 kilo)
10. Garanti og støtte
10.1 Garantiinformasjon
Urageuxy products are manufactured to high-quality standards. This product is covered by a limited warranty against defects in materials and workmanship for a period of one year from the original purchase date. This warranty does not cover damage caused by misuse, accident, unauthorized modification, or improper installation.
10.2 Kundestøtte
If you encounter any issues or have questions regarding your Urageuxy Wireless Indoor/Outdoor Thermometer, please contact our customer support team. For the quickest assistance, please refer to the contact information provided on the product packaging or the official Urageuxy webnettstedet.
Online støtte: Besøk Urageuxy Store on Amazon for vanlige spørsmål og produktinformasjon.
Denne videoen gir et visuelt overblikkview of the Urageuxy Indoor Outdoor Thermometer with 3 Remote Sensors, demonstrating its features and functionality.