1. Introduksjon
Thank you for choosing the RAINPOINT 3 Zone Water Timer. This device is designed to automate your garden and lawn watering, providing precise control and water-saving features. With its durable construction and user-friendly interface, you can manage up to three independent watering zones efficiently. Please read this manual thoroughly before installation and operation to ensure proper use and longevity of your water timer.
2. Sikkerhetsinformasjon
- Do not immerse the timer in water. The device is IP65 waterproof, meaning it is protected against water jets, but not submersion.
- Use only alkaline batteries (2 x AA, not included). Do not mix old and new batteries or different types of batteries.
- Remove batteries if the timer will not be used for an extended period.
- Protect the timer from freezing temperatures. Disconnect and store indoors during winter months to prevent damage.
- Ensure all connections are tight to prevent leaks. Use plumber's tape if necessary.
- Oppbevares utilgjengelig for barn.
3. Produktfunksjoner
- Durable & Reliable Performance: Features an upgraded metal inlet and coil valve for stable water flow and reduced leakage. Reinforced connectors and a metal head enhance overall durability.
- Precision Control for Diverse Needs: Three independent zones allow for customized scheduling, with durations from 1 minute to 8 hours and frequencies from every 1 hour up to every 7 days.
- Water-Saving & Weather-Resistant: Includes a rain delay function (24h/48h/72h) and boasts an IP65 waterproof rating with a UV-resistant ABS shell for outdoor resilience.
- Easy Installation & Flexible Operation: Installs easily on standard 3/4" faucets without tools. Offers both manual operation (1 minute to 8 hours) and automatic scheduling.
- User-Friendly & Clear Display: Ergonomic design with a large, sunlight-readable LCD screen and a low battery indicator for straightforward programming and operation.
4. Oppsett
4.1. Installasjon av batteri
The water timer requires 2 AA alkaline batteries (not included). To install:
- Finn batterirommet på baksiden av timeren.
- Skyv batteridekselet av.
- Sett inn to nye AA alkaliske batterier, og sørg for at polariteten (+/-) er riktig.
- Replace the battery cover securely. The LCD screen will activate.

Image: A person's hands installing batteries into the back of the water timer.
4.2. Connecting the Timer to the Faucet
Connect the timer to a standard 3/4-inch outdoor faucet.
- Sørg for at kranen er ren og fri for rusk.
- Screw the timer's brass inlet connector onto the faucet by hand until it is snug. Do not overtighten.
- If leakage occurs, unscrew, apply plumber's tape to the faucet threads, and re-tighten.

Bilde: En detaljert view highlighting the reinforced brass inlet and outlet connections of the water timer, emphasizing durability.
4.3. Connecting Hoses to Outlets
Connect your garden hoses to the three independent outlets at the bottom of the timer.
- Screw each hose onto its respective outlet (Zone 1, Zone 2, Zone 3) by hand.
- Ensure connections are secure to prevent leaks.

Image: The RAINPOINT 3 Zone Water Timer installed on an outdoor faucet, with three hoses extending to water different garden beds.
5. Bruksanvisning
5.1. Stille inn gjeldende tid
After battery installation, the LCD will display the default time. Set the current time:
- Turn the dial to the 'SET CLOCK' position.
- Use the '+' and '-' buttons to adjust the hour, then press 'OK' to confirm.
- Gjenta i minutter.
- Press 'OK' to save and move to the next setting, or turn the dial to 'ON' to exit.
5.2. Programmering av automatiske vanningsplaner
The timer allows for independent programming of up to three zones.

Image: The water timer's LCD screen displaying options for setting clock, start time, watering duration, and frequency.
- Velg sone: Press the 'ZONE' button to cycle through Zone 1, Zone 2, or Zone 3.
- Angi starttid: Turn the dial to 'START TIME'. Use '+' and '-' to set the desired start time for the selected zone, then press 'OK'.
- Set How Long (Duration): Turn the dial to 'HOW LONG'. Use '+' and '-' to set the watering duration (1 minute to 8 hours), then press 'OK'.
- Set How Often (Frequency): Turn the dial to 'HOW OFTEN'. Use '+' and '-' to set the watering frequency (e.g., every 1 hour, every 12 hours, every 1 day, every 7 days), then press 'OK'.
- Repeat steps for each zone you wish to program.
- Turn the dial to 'ON' to activate the programmed schedules.
5.3. Manuell vanning
For å vanne umiddelbart uten å påvirke den programmerte timeplanen:
- Ensure the dial is in the 'ON' position.
- Press the 'MANUAL' button.
- Use '+' and '-' to set the desired manual watering duration (1 minute to 8 hours).
- Press 'OK' to start manual watering. The selected zone(s) will water for the set duration.
- To stop manual watering, press 'MANUAL' again or turn the dial to 'OFF' and then back to 'ON'.

Image: A man manually watering plants with a hose connected to the RAINPOINT water timer, illustrating the manual watering feature.
5.4. Regnforsinkelsesfunksjon
To pause your watering schedule due to rain or wet conditions:
- Ensure the dial is in the 'ON' position.
- Press the 'DELAY' button.
- Use '+' and '-' to select a delay period (24, 48, or 72 hours).
- Press 'OK' to activate the rain delay. The timer will pause for the selected duration and resume its schedule automatically afterward.
- To cancel rain delay, press 'DELAY' again.
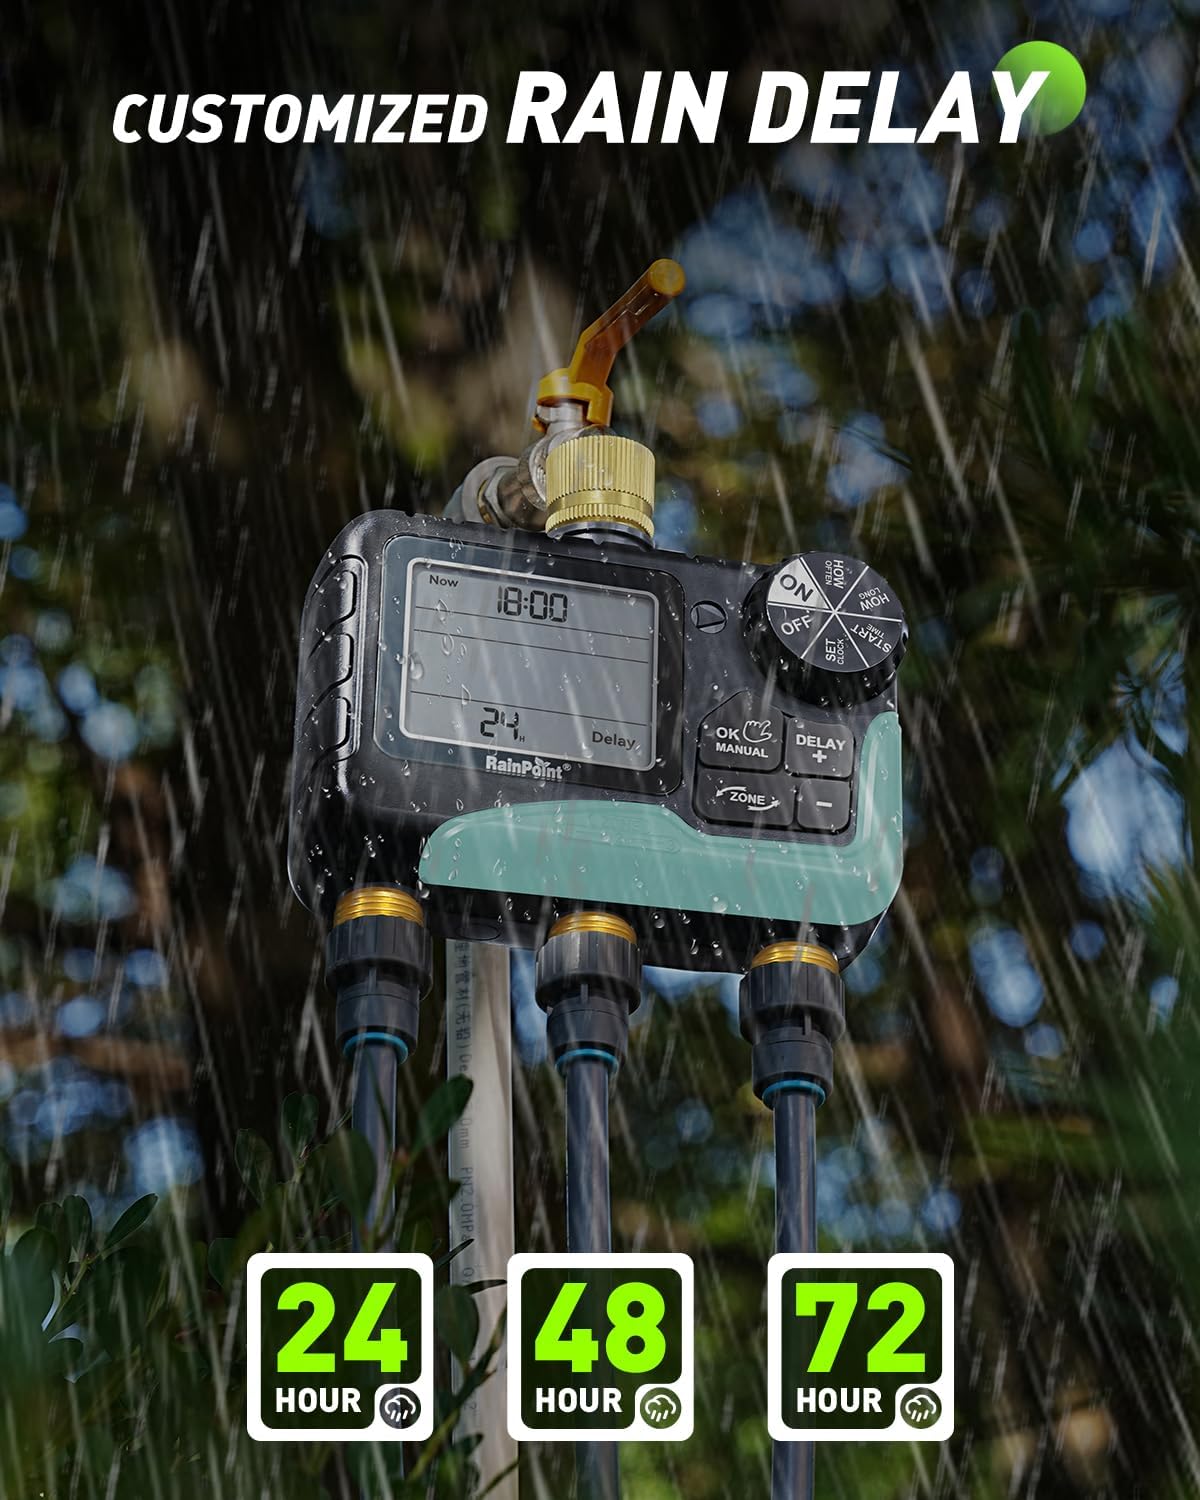
Image: The water timer's display showing the rain delay function activated for 24 hours, with raindrops falling in the background.
6. Vedlikehold
6.1. Batteribytte
When the low battery indicator appears on the LCD, replace the batteries promptly to avoid interruption of watering schedules. The timer features a low battery auto shut-off valve to prevent continuous watering if batteries die during operation.

Image: The water timer's display indicating a low battery reminder and explaining the auto shut-off valve feature.
6.2. Rengjøring
Periodically check the inlet filter for debris and clean it to ensure proper water flow. Use a soft brush and water to clean the exterior of the timer.
6.3. Vinterklargjøring
Before the first frost, disconnect the timer from the faucet and hoses. Remove the batteries. Store the timer indoors in a dry, protected area to prevent freezing and potential damage to internal components.
7. Feilsøking
| Problem | Mulig årsak | Løsning |
|---|---|---|
| Ingen vannføring | Faucet off, low batteries, clogged filter, incorrect programming. | Ensure faucet is fully open. Replace batteries. Clean inlet filter. Check programmed start times and durations. |
| Vannlekkasje | Loose connections, damaged O-ring/washer, high water pressure. | Tighten all connections. Check and replace O-rings/washers if damaged. Use plumber's tape. Ensure water pressure is within acceptable limits. |
| Skjermen er tom eller uleselig | Dead batteries, moisture inside screen. | Replace batteries. If moisture is present, disconnect, remove batteries, and allow to dry in a warm, dry place. If issue persists, contact customer support. |
| Timer not watering at scheduled time | Incorrect clock setting, rain delay active, incorrect program. | Verify current time. Check if rain delay is active. Review and re-program watering schedules for each zone. |
8. Spesifikasjoner
- Modellnummer: IOB347
- Merke: REGNPUNKT
- Antall soner: 3
- Vanningsvarighet: 1 minutt til 8 timer
- Vanningsfrekvens: Every 1 hour to every 7 days
- Alternativer for regnforsinkelse: 24h, 48h, 72h
- Inlet/Outlet Material: Messing
- Vanntetthetsvurdering: IP65
- Strømkilde: 2 x AA alkaliske batterier (ikke inkludert)
- Varevekt: 0.85 kilo
9. Garantiinformasjon
RAINPOINT offers a 5-year warranty for this product, covering defects in materials and workmanship under normal use. This warranty does not cover damage caused by misuse, neglect, freezing, accident, or unauthorized modification. Please retain your proof of purchase for warranty claims.
10. Kundestøtte
For any questions, technical assistance, or warranty claims, please contact RAINPOINT customer support. We are committed to providing lifetime support for our products.
- Online støtte: Visit the official RAINPOINT webnettsted for vanlige spørsmål og støtteressurser.
- E-poststøtte: Available 24/7. Refer to your product packaging or the official webnettsted for kontaktinformasjon.
- Telefonstøtte: Call our customer service center during business hours.

Image: A customer support representative wearing a headset, working at a computer, symbolizing available assistance.