1. Introduksjon
The Audizio Desio is a versatile digital radio that combines classic aesthetics with modern audio technology. It features DAB, DAB+, and FM tuning for clear radio reception, along with Bluetooth 5.0 for wireless streaming, a USB port for media playback, and a 3.5mm AUX input for wired connections. The radio is equipped with a 2.4-inch color LCD display and integrated stereo speakers, making it suitable for various environments such as living rooms, kitchens, or bedrooms.
This manual provides detailed instructions for setting up, operating, and maintaining your Audizio Desio radio. Please read it thoroughly before use to ensure proper functionality and to maximize your listening experience.
2. Sikkerhetsinformasjon
- Sørg for at strømadapterens volumtage matches your local power supply before connecting.
- Ikke utsett enheten for regn, fuktighet eller ekstreme temperaturer.
- Unngå å plassere enheten i nærheten av varmekilder eller i direkte sollys.
- Ikke åpne c-enasing; overlat all service til kvalifisert personell.
- Hold enheten unna sterke magnetiske felt.
- Rengjør enheten kun med en myk, tørr klut.
3. Pakkens innhold
Vennligst sjekk at alle gjenstander er til stede ved utpakking:
- Audizio Desio DAB/DAB+/FM Radio
- Strømadapter (DC 5V)
- Fjernkontroll
- Brukerhåndbok
4. Kontroller og tilkoblinger
Kontroller på frontpanelet
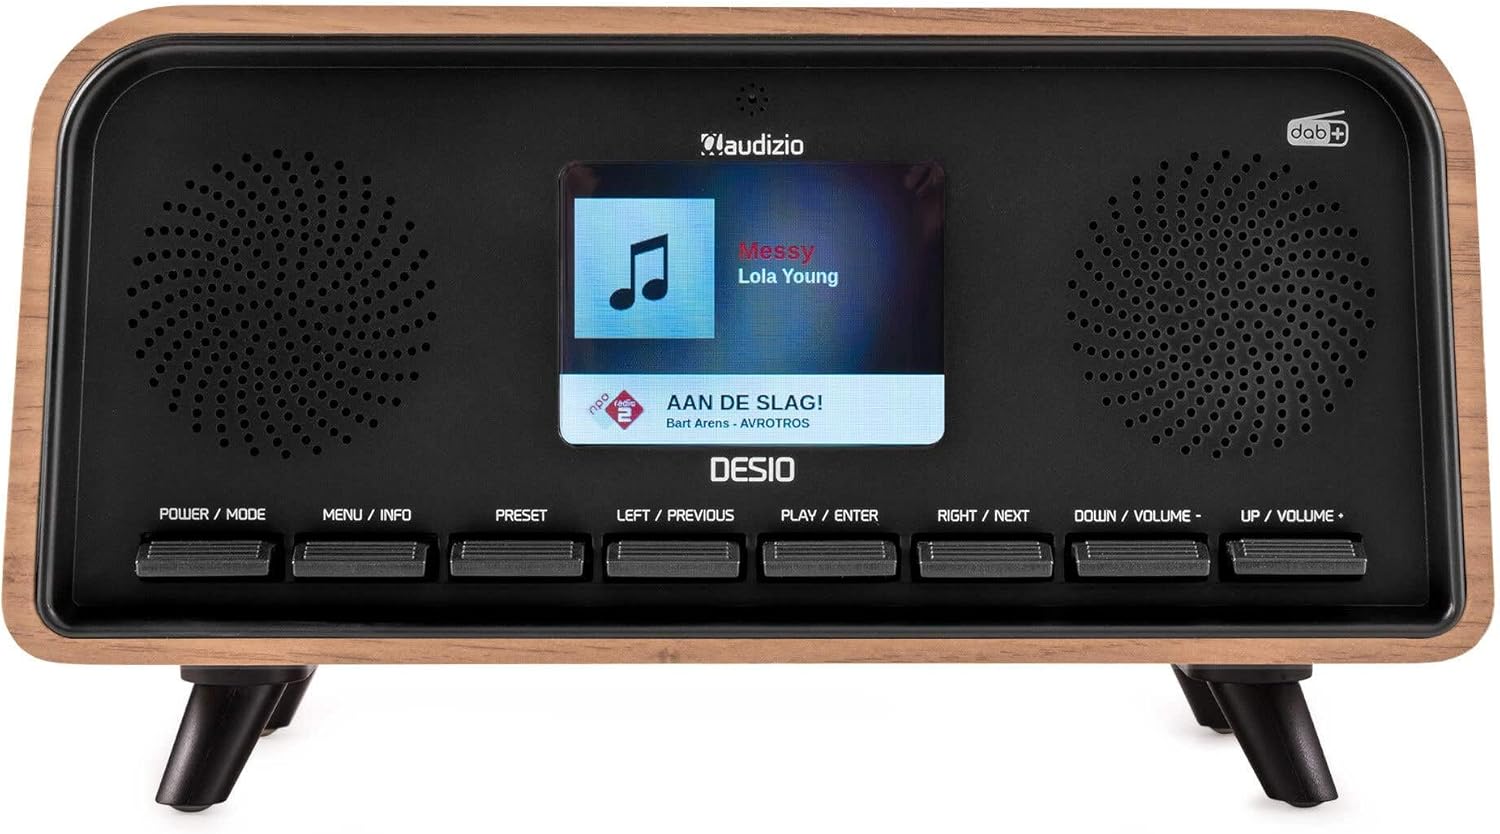
Front view of the Audizio Desio radio, showing the display playing music with artist and track information. The control buttons are visible below the screen.
- POWER / MODE: Press to turn on/off. Press and hold to switch between DAB, FM, Bluetooth, USB, and AUX modes.
- MENU / INFO: Press to access menu options. In playback mode, press to cycle through information display.
- Forhåndsinnstilt: Press to recall saved stations. Press and hold to save current station.
- LEFT / PREVIOUS: Navigate left in menus, or skip to previous track/station.
- PLAY / ENTER: Confirm selection in menus, or play/pause media.
- RIGHT / NEXT: Navigate right in menus, or skip to next track/station.
- DOWN / VOLUME -: Decrease volume, or navigate down in menus.
- UP / VOLUME +: Increase volume, or navigate up in menus.
Tilkoblinger på bakpanelet
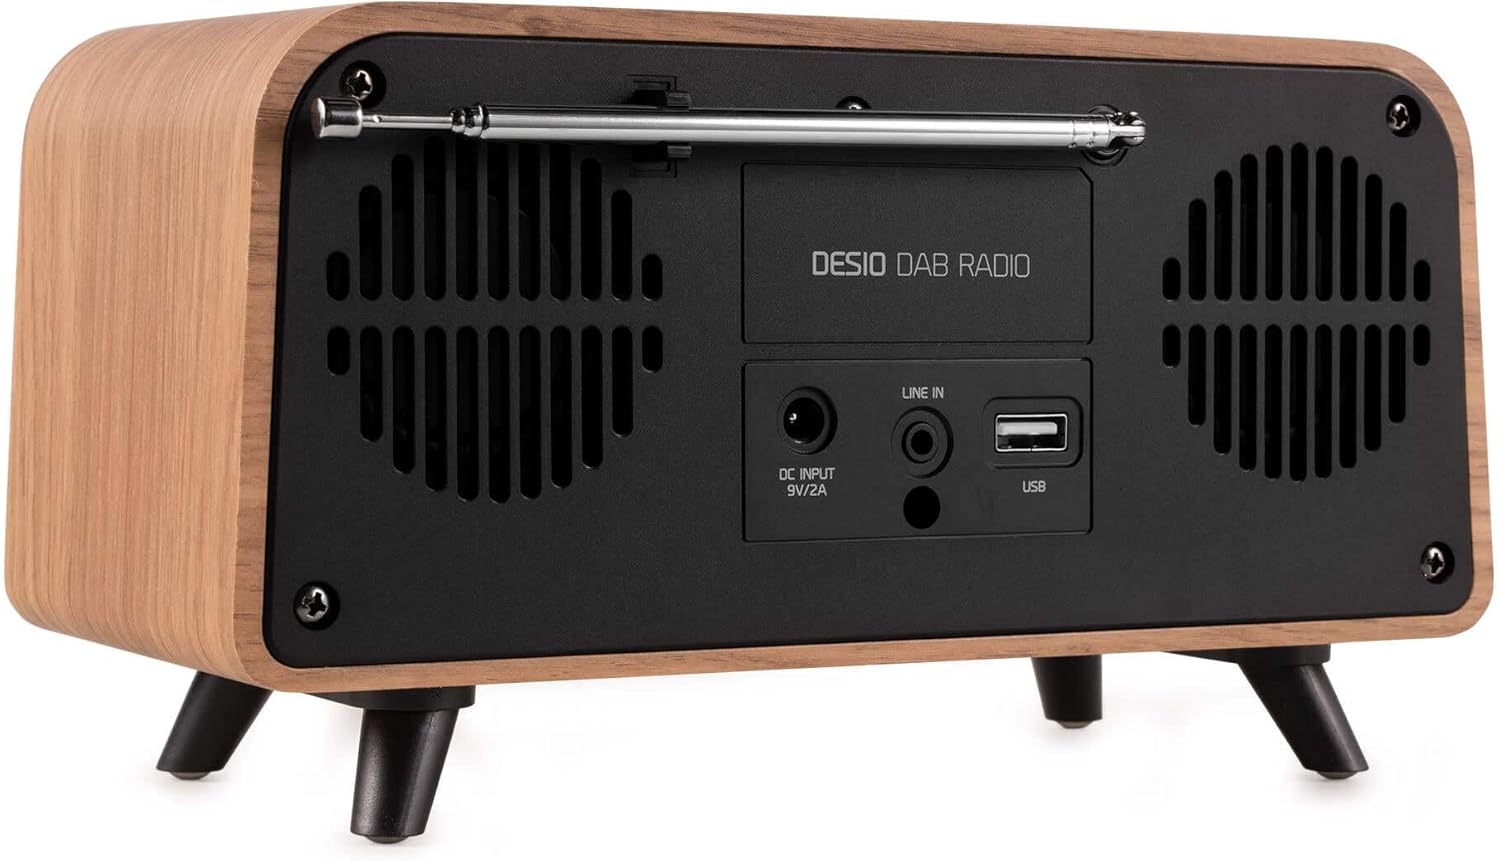
Bak view of the Audizio Desio radio, highlighting the DC INPUT 9V/2A, LINE IN (3.5mm AUX), and USB ports. The telescopic antenna is extended.
- DC INPUT 9V/2A: Koble til den medfølgende strømadapteren her.
- LINE IN (3.5mm AUX): Koble til eksterne lydenheter med en 3.5 mm lydkabel.
- USB: Insert a USB flash drive for MP3 playback.
- Teleskopantenne: Extend fully for optimal DAB/DAB+ and FM reception.
5. Første oppsett
- Koble til strøm: Plug the provided DC 5V power adapter into the DC INPUT port on the rear of the radio, then plug the adapter into a wall outlet.
- Forleng antennen: Fully extend the telescopic antenna located on the rear of the unit for best reception.
- Strøm på: Trykk på STRØM / MODUS knappen for å slå på radioen.
- First-time DAB Scan: Upon first power-on, the radio will automatically perform a full scan for DAB/DAB+ stations. This may take a few minutes. The display will show the scanning progress.
- Still inn tid/dato: The time and date will usually be set automatically via DAB signal. If not, you can manually set them via the menu.
6. Bruksanvisning
6.1 DAB/DAB+ radiodrift

Front view of the Audizio Desio radio, displaying a DAB radio station ('NPO Klassiek') and current time.
- Select DAB Mode: Trykk på STRØM / MODUS button repeatedly until 'DAB' is displayed.
- Scan for Stations: If no stations are found or you wish to rescan, press MENY / INFO, bruk deretter LEFT / PREVIOUS or RETT VED SIDEN AV to select 'Full Scan' and press PLAY / ENTER.
- Velg stasjon: Bruk LEFT / PREVIOUS or RETT VED SIDEN AV knappene for å bla gjennom tilgjengelige stasjoner. Trykk PLAY / ENTER for å velge en stasjon.
- Lagre forhåndsinnstilling: For å lagre en stasjon, trykk og hold inne FORHÅNDSINNSTILLING knapp. Bruk LEFT / PREVIOUS or RETT VED SIDEN AV to choose a preset number (1-50), then press PLAY / ENTER for å bekrefte.
- Tilbakekall forhåndsinnstilling: For å hente frem en lagret stasjon, trykk på FORHÅNDSINNSTILLING button (do not hold). Use LEFT / PREVIOUS or RETT VED SIDEN AV for å velge ønsket forhåndsinnstilling, og trykk deretter på PLAY / ENTER.

Front view of the Audizio Desio radio, showing the 'Preset Recall' menu on the display, indicating empty preset slots.
6.2 FM-radiodrift
- Velg FM-modus: Trykk på STRØM / MODUS button repeatedly until 'FM' is displayed.
- Automatisk skanning: Trykk og hold PLAY / ENTER to automatically scan for and save available FM stations.
- Manuell innstilling: Bruk LEFT / PREVIOUS or RETT VED SIDEN AV for å finjustere frekvensen.
- Save/Recall Presets: Follow the same procedure as for DAB radio (Section 6.1).
6.3 Bluetooth (BT)-drift

Front view of the Audizio Desio radio, with the display showing 'BT' (Bluetooth) mode and 'Connected' status.
- Select BT Mode: Trykk på STRØM / MODUS button repeatedly until 'BT' is displayed. The radio will enter pairing mode, indicated by a flashing Bluetooth icon.
- Par enhet: On your smartphone, tablet, or laptop, enable Bluetooth and search for available devices. Select 'Audizio Desio' from the list.
- Koble til: Once paired, the display will show 'Connected'. You can now stream audio from your device to the radio.
- Avspillingskontroll: Bruk den tilkoblede enheten eller radioens PLAY / ENTER, LEFT / PREVIOUS, og RETT VED SIDEN AV knapper for å kontrollere avspilling.
6.4 USB-avspilling

Front view of the Audizio Desio radio, with the display showing 'USB' mode, current time, and details of an MP3 file blir spilt.
- Sett inn USB-stasjon: Insert a USB flash drive (formatted to FAT32) containing MP3 fileinn i USB-porten på baksiden av radioen.
- Velg USB-modus: Trykk på STRØM / MODUS button repeatedly until 'USB' is displayed. The radio will automatically start playing the first compatible audio file.
- Navigere Files: Bruk LEFT / PREVIOUS or RETT VED SIDEN AV to skip tracks. Press PLAY / ENTER for å pause/gjenoppta avspilling.
6.5 AUX-inngang
- Koble til enhet: Connect an external audio device (e.g., MP3 player, smartphone) to the 'LINE IN' (3.5mm AUX) port on the rear of the radio using a 3.5mm audio cable (not included).
- Velg AUX-modus: Trykk på STRØM / MODUS button repeatedly until 'AUX' is displayed.
- Kontroller avspilling: Playback is controlled directly from your connected external device. Adjust volume using the radio's volume controls.
6.6 Alarm- og timerfunksjoner
- Stille inn alarmer: Få tilgang til alarminnstillingene via MENY / INFO button. You can set multiple alarms with customizable sources (DAB, FM, Buzzer), volume, and recurrence (daily, weekdays, weekends).
- Sleep Timer: The sleep timer allows the radio to turn off automatically after a set period. Access this function via the MENY / INFO button and select the desired duration.
- Snooze-funksjon: When an alarm sounds, press any button (except Power) to activate the snooze function for a short period.
7. Vedlikehold
- Rengjøring: Bruk en myk, tørr og lofri klut til å rengjøre radioens overflate. Ikke bruk slipende rengjøringsmidler, voks eller løsemidler.
- Antennepleie: Håndter teleskopantennen forsiktig for å unngå at den bøyer seg eller brekker.
- Lagring: Hvis radioen skal oppbevares over lengre tid, må du koble den fra strømforsyningen og oppbevare den på et kjølig og tørt sted.
8. Feilsøking
| Problem | Mulig årsak | Løsning |
|---|---|---|
| Ingen strøm | Strømadapteren er ikke tilkoblet, eller stikkontakten er defekt. | Sjekk strømadaptertilkoblingen og prøv en annen stikkontakt. |
| Dårlig DAB/FM-mottak | Antenna not fully extended or poor signal area. | Fully extend the antenna. Try repositioning the radio. Perform a full scan. |
| Bluetooth kobler ikke til | Radio not in BT mode, device not in pairing mode, or too far away. | Ensure radio is in BT mode. Put your device in pairing mode. Move device closer to the radio (within 10m). |
| USB-avspilling fungerer ikke | USB-stasjonen er ikke satt inn riktig, støttes ikke file format, or drive not FAT32. | Reinsert USB drive. Ensure files are MP3. Check USB drive format (FAT32). |
| No sound from AUX | Radio not in AUX mode, cable faulty, or external device volume low. | Select AUX mode. Check 3.5mm cable. Increase volume on both radio and external device. |
9. Tekniske spesifikasjoner
- Merke: Audizio
- Modell: Desio
- Tuner-teknologi: FM, DAB+
- Bluetooth: Version 5.0 (Range: 10m)
- Avspillingsalternativer: Bluetooth, USB, 3.5mm AUX input
- Forhåndsinnstilte stasjoner: 50
- Utstilling: 2.4 tommers fargeskjerm
- Funksjoner: Alarm, Sleep Timer, Snooze, Dimming, Week/Weekend Alarm
- Max Speaker Power: 30 watt
- Strømforsyning: DC 5V (Power Adapter)
- Produktdimensjoner (H x B x D): 32 x 16 x 18 cm
- Vekt: 1.66 kg
10. Garanti og støtte
This product comes with a standard manufacturer's warranty. For detailed warranty terms and conditions, please refer to the documentation provided at the time of purchase or contact your retailer.
For technical support, troubleshooting assistance, or service inquiries, please contact the Audizio customer support team or your local dealer. Please have your product model number (Desio) and purchase information ready when contacting support.